
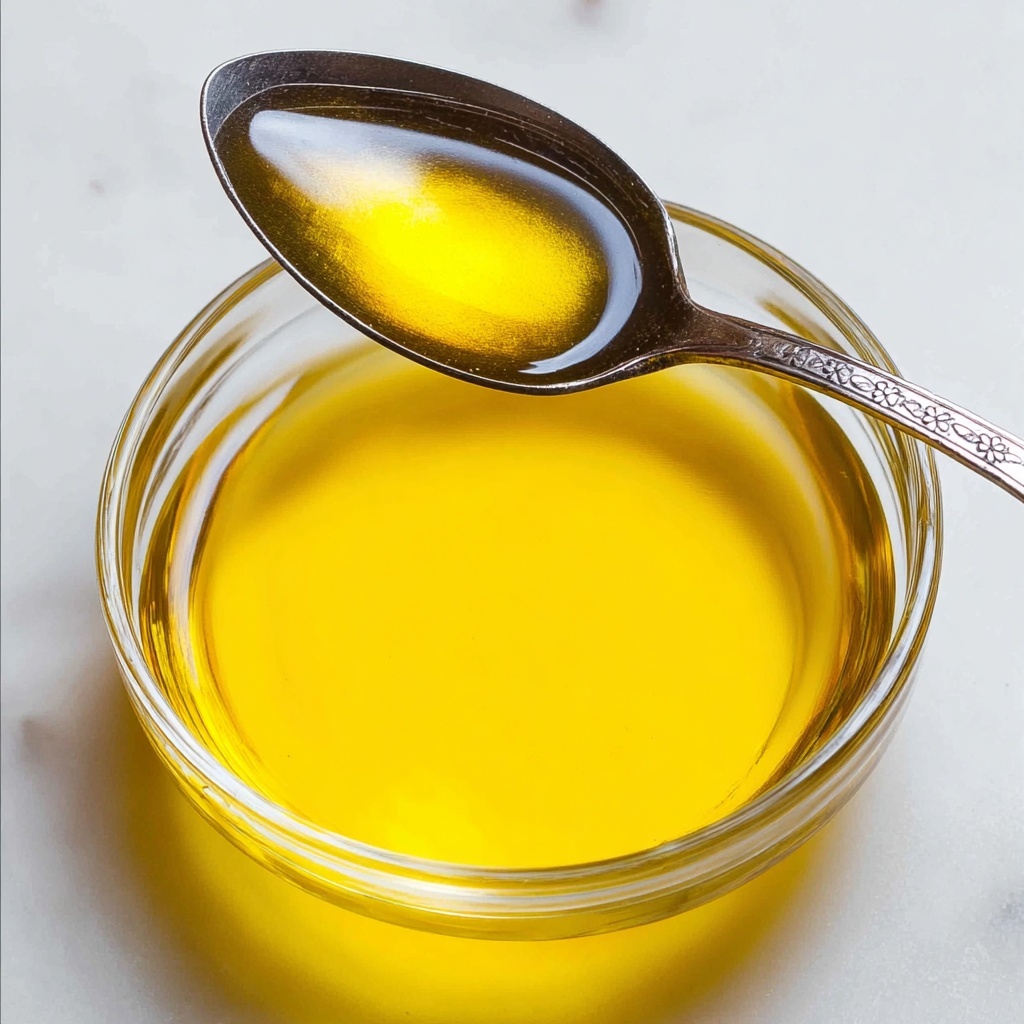
Discover the magic and simplicity of How to Make Ghee and Clarified Butter Recipe, a timeless kitchen staple that transforms ordinary butter into a golden, nutty treasure. Whether you’re a seasoned cook or just starting out, this delicious process preserves butter’s rich flavor while removing milk solids, leaving behind a versatile fat that elevates everything from sautéed veggies to fragrant curries. It’s a small cooking ritual with huge payoff, perfect for those who appreciate homemade goodness and long-lasting pantry essentials.

Ingredients You’ll Need
The beauty of this recipe is in its simplicity. With just one fundamental ingredient and a little patience, you’ll create a rich, buttery ghee. Each ingredient plays a crucial role in the flavor, clarity, and consistency of your final product.
- Unsalted Butter: Use 250g (about 2 sticks) cut into cubes; unsalted ensures you control the saltiness and taste perfectly.
How to Make How to Make Ghee and Clarified Butter Recipe
Step 1: Choose the Perfect Pan
Starting with the right equipment makes all the difference. Opt for a small or medium saucepan or skillet with a light-colored or silver base — this helps you clearly see the milk solids as they turn golden, a key indicator your ghee is ready.
Step 2: Melt the Butter Slowly
Place the cubed butter in your pan and melt it gently over medium-low heat. This slow melting maintains the buttery flavor and helps separate the milk solids without burning them.
Step 3: Let It Simmer and Foam
Allow the butter to simmer for about 10 minutes. Around 5 minutes in, you’ll notice a layer of foam forming on top — this is perfectly normal. By 7 minutes, most foam will disappear as the milk solids start to settle. Watching this transformation is part of the fun, signaling the gradual clarification happening underneath.
Step 4: Look for Golden Milk Solids
The moment your ghee is ready is when the milk solids have sunk to the bottom of the pan and turned a delightful golden brown. This imparts the rich, nutty aroma that makes ghee so irresistible.
Step 5: Strain for Purity
Using a mesh colander lined with a single paper towel, strain the liquid ghee carefully into a clean container. This step removes all remaining milk solids, leaving you with clear, smooth clarified butter.
Step 6: Store It Properly
Pour your freshly made ghee into a jar. Store it in your pantry for up to 3 months where it will firm to a peanut butter-like consistency, or refrigerate it for up to a year, where it will harden like butter but remain perfectly spreadable.
How to Serve How to Make Ghee and Clarified Butter Recipe
Garnishes
Ghee’s natural golden glow adds a beautiful sheen when drizzled over dishes. Enhance it by garnishing with toasted herbs like rosemary or dried chili flakes for an added burst of flavor and color.
Side Dishes
Serve ghee alongside roti, naan, or rice to add a silky richness that complements savory dishes beautifully. It also pairs wonderfully with roasted or steamed vegetables, infusing them with a nutty depth that’s hard to resist.
Creative Ways to Present
Try melting ghee over popcorn or drizzle it on grilled corn for an irresistible twist. Whip it with a pinch of turmeric or cinnamon for a spiced butter treat. You can even use it as a base for baking, replacing regular butter to bring out unique flavors.
Make Ahead and Storage
Storing Leftovers
Homemade ghee is very stable and keeps well without refrigeration. Store leftovers in an airtight jar at room temperature away from direct light. This allows you to enjoy your delicious creation whenever you want with minimal fuss.
Freezing
If you have a large batch, ghee freezes beautifully. Place it in freezer-safe containers or ice cube trays for convenient portions. When needed, just thaw at room temperature or gently warm up to use.
Reheating
Ghee melts quickly and can be reheated gently over low heat to return it to liquid form. Avoid overheating to preserve its golden color and nutty aroma for the best culinary results.
FAQs
What is the difference between ghee and clarified butter?
While often used interchangeably, ghee is clarified butter cooked a bit longer to brown the milk solids, which gives it a nuttier flavor and longer shelf life. Clarified butter is simply melted butter with milk solids removed but not browned.
Can I use salted butter for this recipe?
It’s best to use unsalted butter to control the salt content and ensure the pure buttery flavor shines through without added salt interfering with the cooking or storage.
How can I tell when the ghee is done?
Look for the milk solids settled and turning a golden brown on the bottom of the pan. The ghee will also become clear, and most of the foam on top disappears when it’s ready.
Why is my ghee cloudy?
Cloudiness often occurs if the ghee cools too quickly or if some milk solids remain. Straining through fine mesh or cheesecloth can help ensure clarity, and reheating slightly will clear it up again.
How long does homemade ghee last?
Stored properly in an airtight container, ghee can last up to 3 months in the pantry and up to a year when refrigerated — making it a wonderfully durable cooking fat to keep on hand.
Final Thoughts
I hope you feel inspired to try this cozy and satisfying How to Make Ghee and Clarified Butter Recipe in your own kitchen. It’s a fantastic way to add depth and richness to your meals, all while enjoying a hands-on cooking experience. Once you’ve mastered this simple recipe, you’ll wonder how you ever cooked without it!
Print
How to Make Ghee and Clarified Butter Recipe
- Prep Time: 3 minutes
- Cook Time: 10 minutes
- Total Time: 13 minutes
- Yield: 220 ml / 7 oz
- Category: Condiment
- Method: Stovetop
- Cuisine: Indian
- Diet: Gluten Free
Description
This simple guide teaches you how to make homemade ghee, a form of clarified butter commonly used in Indian and Middle Eastern cuisines. By gently simmering unsalted butter, you separate the milk solids, resulting in a nutty, aromatic cooking fat that stores well at room temperature or in the fridge. Perfect for frying, roasting, or adding rich flavor to dishes.
Ingredients
Ingredients
- 250g / 2 sticks unsalted butter, cut into 2.5 cm (1 inch) cubes
Instructions
- Choose Your Pan: Select a small or medium saucepan or a small skillet with a silver base. The silver base helps you monitor the color of the milk solids to know when the ghee is perfectly done.
- Melt the Butter: Place the cubed butter into the pan and melt it over medium-low heat. Allow it to gently melt without burning.
- Simmer the Butter: Let the butter simmer for about 10 minutes. Around 5 minutes in, you will see the butter start to foam. By 7 minutes, most of the foam should dissipate, and by 10 minutes, the foam should be nearly gone.
- Watch for the Milk Solids: The ghee is ready when the milk solids that settle at the bottom of the pan turn a golden brown color, indicating a rich, nutty flavor.
- Strain the Ghee: Pour the liquid through a mesh colander lined with a single sheet of paper towel to remove the browned milk solids. This results in clear, golden ghee.
- Store the Ghee: Transfer the strained ghee into a clean jar. Store it in the pantry for up to 3 months, where it will firm to a peanut butter consistency, or refrigerate it for up to 1 year, where it will harden like butter.
- Use and Enjoy: Use your homemade ghee as a cooking fat for frying, roasting, or as a flavorful addition to your recipes.
Notes
- Using unsalted butter ensures the purest flavor without added salt.
- Keep heat medium-low to prevent burning the butter and to allow proper clarification.
- The golden color of milk solids is key to perfect ghee; do not wait until dark brown as this will taste burnt.
- Paper towel filters out milk solids effectively, but cheesecloth can also be used for a cleaner strain.
- Ghee is shelf-stable due to the removal of milk solids but refrigerating extends its storage life.
- You can reuse the leftover milk solids in cooking or baking for a nutty flavor.


