
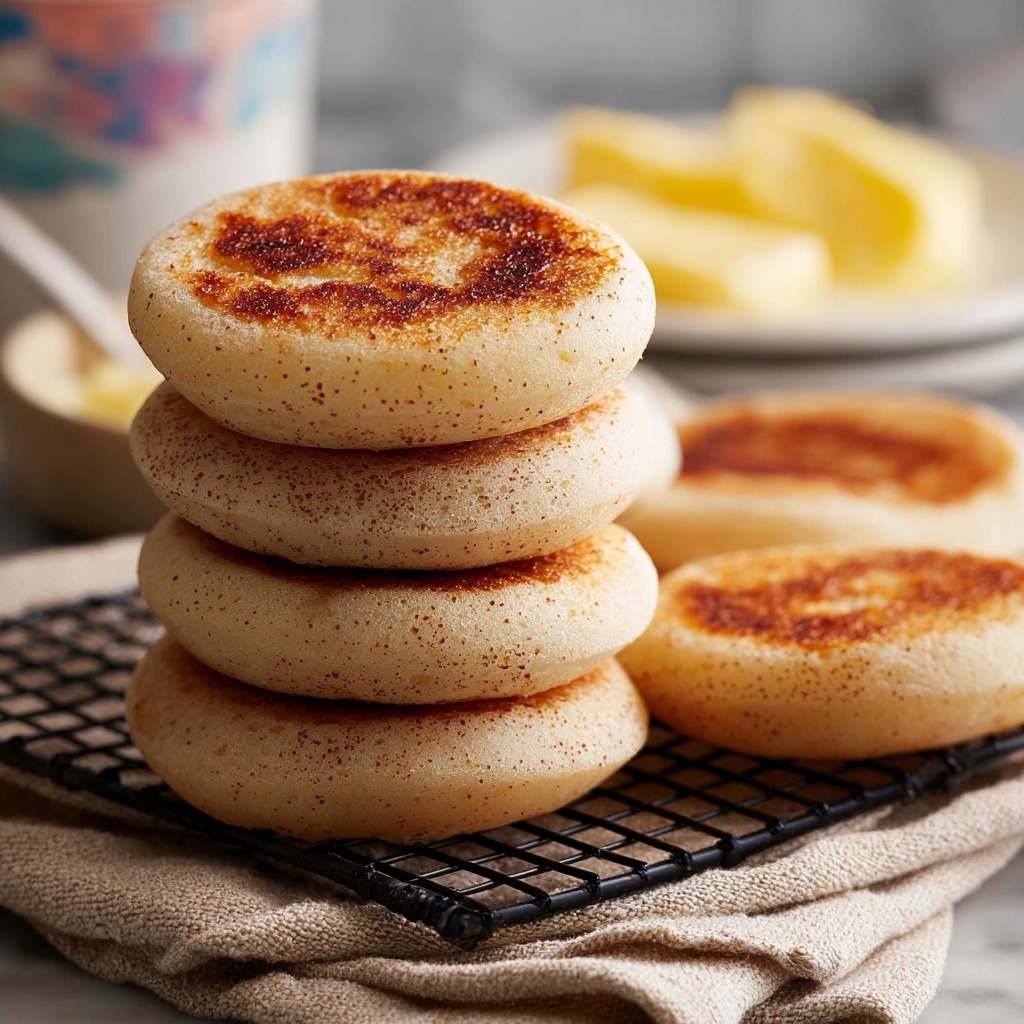
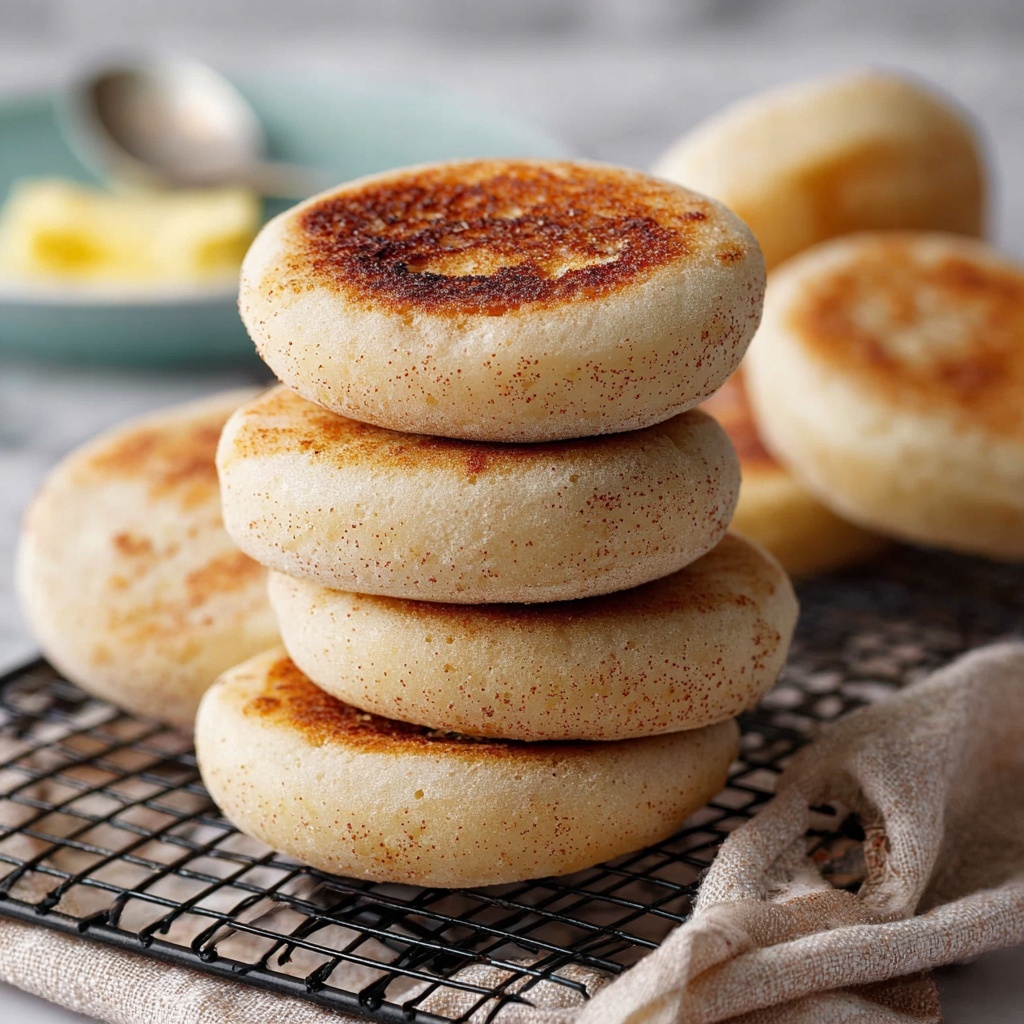
If you’ve ever dreamed of biting into the perfect, fluffy bread that’s crisp on the outside and delightfully chewy on the inside, then you’re going to adore this Homemade English Muffins from Scratch Recipe. There is something so wonderfully satisfying about making these classic breakfast treats yourself — it’s like filling your kitchen with the irresistible aroma of freshly baked comfort and tradition. Each muffin features that iconic nooks-and-crannies texture that soaks up butter and jam like a charm, making your mornings instantly better and your brunch table a little more special.
Ingredients You’ll Need
You don’t need a long list of fancy ingredients to make these homemade English muffins shine. The magic comes from simple, wholesome staples, each playing a crucial part in creating the perfect texture, flavor, and golden color you crave.
- All-purpose flour (2¼ cups, 270 grams): The backbone of the dough, providing structure and softness.
- Whole wheat flour (¾ cup, 85 grams): Adds subtle nuttiness and a heartier texture; you can swap for extra all-purpose flour if preferred.
- Instant yeast (1½ teaspoons, 4 grams): The leavening agent that makes these muffins rise beautifully and become airy.
- Granulated sugar (2 teaspoons, 8 grams): Just enough sweetness to feed the yeast and balance the flavors.
- Kosher salt (1¼ teaspoons, 4 grams): Enhances all the flavors and controls yeast activity for perfect rise.
- Warm milk (1 cup, 227 grams at about 110°F): Moistens the dough and creates tenderness with a hint of richness.
- Unsalted butter (2 tablespoons, 28 grams, melted): Adds richness and helps develop a golden crust.
- Cornmeal or semolina flour (for dusting): Keeps muffins from sticking and contributes to that characteristic crisp bottom.
How to Make Homemade English Muffins from Scratch Recipe
Step 1: Mix Dry Ingredients
Begin by combining the all-purpose flour, whole wheat flour, instant yeast, sugar, and kosher salt in the large mixing bowl of your stand mixer. This blends all your dry components evenly, setting a solid foundation for your dough.
Step 2: Add Wet Ingredients and Form Dough
Pour in the warm milk and melted butter to your dry mix. Stir gently with a spatula just until the ingredients come together into a rough dough—this is the moment the magic starts to take shape.
Step 3: Knead the Dough
Attach your dough hook and knead on medium speed for about 5 minutes. The dough will smooth out and become elastic, which is exactly what you want to build the structure of these tender muffins.
Step 4: First Proof
Place your dough into a greased bowl, covering it with a clean towel or plastic wrap. Set it somewhere warm and cozy so it can double in size. This usually takes 1 to 2 hours and is key for that soft crumb.
Step 5: Roll and Cut
After the dough has risen, gently punch it down to release the air. On a floured surface, roll it out to about ½ inch thickness. Use a round cutter to cut out your English muffins—aim for about 3 inches in diameter for perfect portion size.
Step 6: Prepare for Second Proof
Transfer the cut muffins onto a baking sheet dusted generously with cornmeal or semolina flour. Cover them with a cloth and allow another rise of 30 to 40 minutes so they get nicely puffy and light.
Step 7: Cook Your Muffins
Heat a skillet over low heat. Place your muffins in the pan, cover, and cook for approximately 5 minutes per side. You’ll know they’re ready when they turn golden brown with a hollow sound upon tapping the top.
Step 8: Cool and Serve
Move the muffins to a wire rack to cool. When they’re just warm, split them with a fork to reveal those iconic nooks and crannies—toast them lightly before slathering with your favorite butter or jam.
How to Serve Homemade English Muffins from Scratch Recipe
Garnishes
English muffins are a fabulous canvas for tasty toppings. Spread some creamy butter or tangy cream cheese, drizzle with honey, or add a spoonful of fruit preserves for a delightful morning treat. Don’t forget a sprinkle of cinnamon sugar if you want a sweet twist.
Side Dishes
Pair these muffins with sunny-side-up eggs, crispy bacon, or a fresh fruit salad to make a breakfast that feels like a little celebration. Their versatility makes them a perfect match for both savory and sweet accompaniments.
Creative Ways to Present
Try using these muffins as the base for mini breakfast sandwiches stacked with eggs, cheese, and avocado, or cut them smaller for bite-sized appetizers topped with smoked salmon and dill. They even make spectacular bases for homemade eggs Benedict.
Make Ahead and Storage
Storing Leftovers
If you’ve got extra muffins, keep them in an airtight container at room temperature for up to two days. The texture remains tender enough to enjoy fresh without any fuss.
Freezing
To save muffins for later, freeze them in a sealed bag or container. They’ll stay fresh for up to three months, and you can thaw individual muffins as needed without losing that homemade appeal.
Reheating
Reheat frozen or leftover muffins by toasting them directly from frozen or warming gently in a skillet. This revives their signature crispness and warmth, making every bite as delightful as just baked.
FAQs
Can I use all-purpose flour instead of whole wheat flour?
Absolutely! If you prefer a lighter texture, substitute the whole wheat flour with additional all-purpose flour. The muffins will still be delicious, though a bit less nutty in flavor.
Why do I need to split English muffins with a fork?
Splitting with a fork creates the classic nooks and crannies that hold butter and jam better than slicing. This ensures you get that authentic texture and taste unique to English muffins.
Can I make these muffins without a stand mixer?
Definitely. You can mix and knead the dough by hand—it will just take a little more elbow grease but produces the same wonderful results.
Is it necessary to cook the muffins on low heat covered?
Cooking on low heat with a cover helps the muffins cook evenly and develop a golden crust without burning, while keeping the inside soft and fluffy.
How long can I keep the dough in the fridge if I want to prep ahead?
You can refrigerate the dough for up to 24 hours after the first rise. Just bring it back to room temperature before rolling and cutting into muffins.
Final Thoughts
There is nothing quite like the joy of pulling warm English muffins fresh off the skillet, knowing you created them yourself with simple ingredients and a little patience. This Homemade English Muffins from Scratch Recipe is not just about food; it’s about making memories and treating yourself to something truly satisfying and wholesome. So go ahead—try it out, share it with loved ones, and savor every buttery bite!
Print
Homemade English Muffins from Scratch Recipe
- Prep Time: 2 hours 45 minutes
- Cook Time: 10 minutes
- Total Time: 2 hours 55 minutes
- Yield: 10 English muffins
- Category: Breakfast
- Method: Stovetop
- Cuisine: British
- Diet: Vegetarian
Description
This classic English Muffins recipe yields fluffy, lightly chewy muffins with a slightly crisp crust perfect for toasting. Made with a combination of all-purpose and whole wheat flours, the dough is gently kneaded and allowed to proof twice before cooking on a skillet to achieve the signature nooks and crannies. Ideal for breakfast or brunch, these homemade English muffins are easy to prepare and delightful when served with butter, jam, or your favorite toppings.
Ingredients
Dry Ingredients
- 2¼ cups all-purpose flour (270 grams, plus extra for dusting)
- ¾ cup whole wheat flour (85 grams; can substitute with more all-purpose flour if preferred)
- 1½ teaspoons instant yeast (4 grams)
- 2 teaspoons granulated sugar (8 grams)
- 1¼ teaspoons kosher salt (4 grams)
Wet Ingredients
- 1 cup warm milk (227 grams, about 110°F)
- 2 tablespoons unsalted butter (28 grams, melted, ¼ stick)
For Dusting
- Cornmeal or semolina flour (for dusting the baking sheet)
Instructions
- Combine Dry Ingredients: In a large mixing bowl of a stand mixer, whisk together all-purpose flour, whole wheat flour, instant yeast, sugar, and kosher salt until thoroughly mixed.
- Add Wet Ingredients: Pour the warm milk and melted unsalted butter into the dry ingredients. Stir gently until a rough dough forms.
- Knead the Dough: Attach the dough hook to your stand mixer and knead the dough for about 5 minutes, or until it becomes smooth and elastic.
- First Proof: Transfer the dough to a greased bowl, cover it with a clean towel or plastic wrap, and let it proof at room temperature in a warm spot until it doubles in size, about 1 to 2 hours.
- Shape the Muffins: Punch down the risen dough and roll it out on a floured surface to approximately ½ inch thickness. Using a round cutter, cut out muffins and place them onto a baking sheet generously dusted with cornmeal or semolina flour.
- Second Proof: Cover the cut muffins with a towel and let them rise for another 30 to 40 minutes until slightly puffed.
- Cook the Muffins: Preheat a skillet over low heat. Cook the muffins covered for about 5 minutes on one side, then flip and cook covered for another 5 minutes on the other side. They should be golden brown and sound hollow when tapped.
- Cool and Serve: Transfer the cooked muffins to a wire rack to cool. When ready to eat, split them open with a fork and toast to your liking before serving.
Notes
- Ensure the milk is warm (around 110°F) to activate the yeast without killing it.
- The cornmeal or semolina flour used for dusting helps prevent sticking and gives the muffins a slight texture on the bottom.
- Cooking on low heat is critical to cook the muffins through without burning the exterior.
- Splitting the muffins with a fork, rather than slicing, helps maintain their airy texture and characteristic nooks and crannies.
- These muffins can be stored in an airtight container for up to 3 days or frozen for longer storage.


