
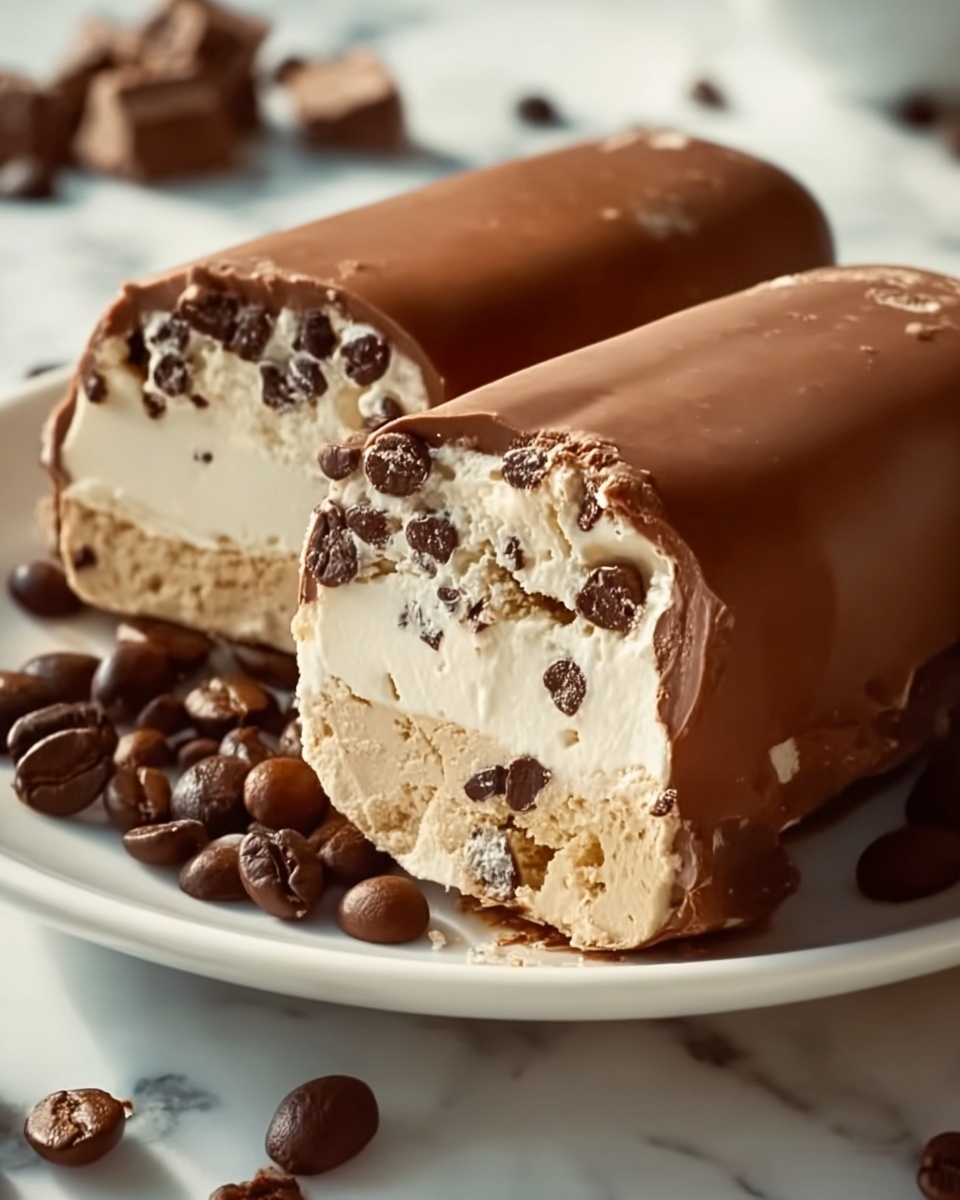
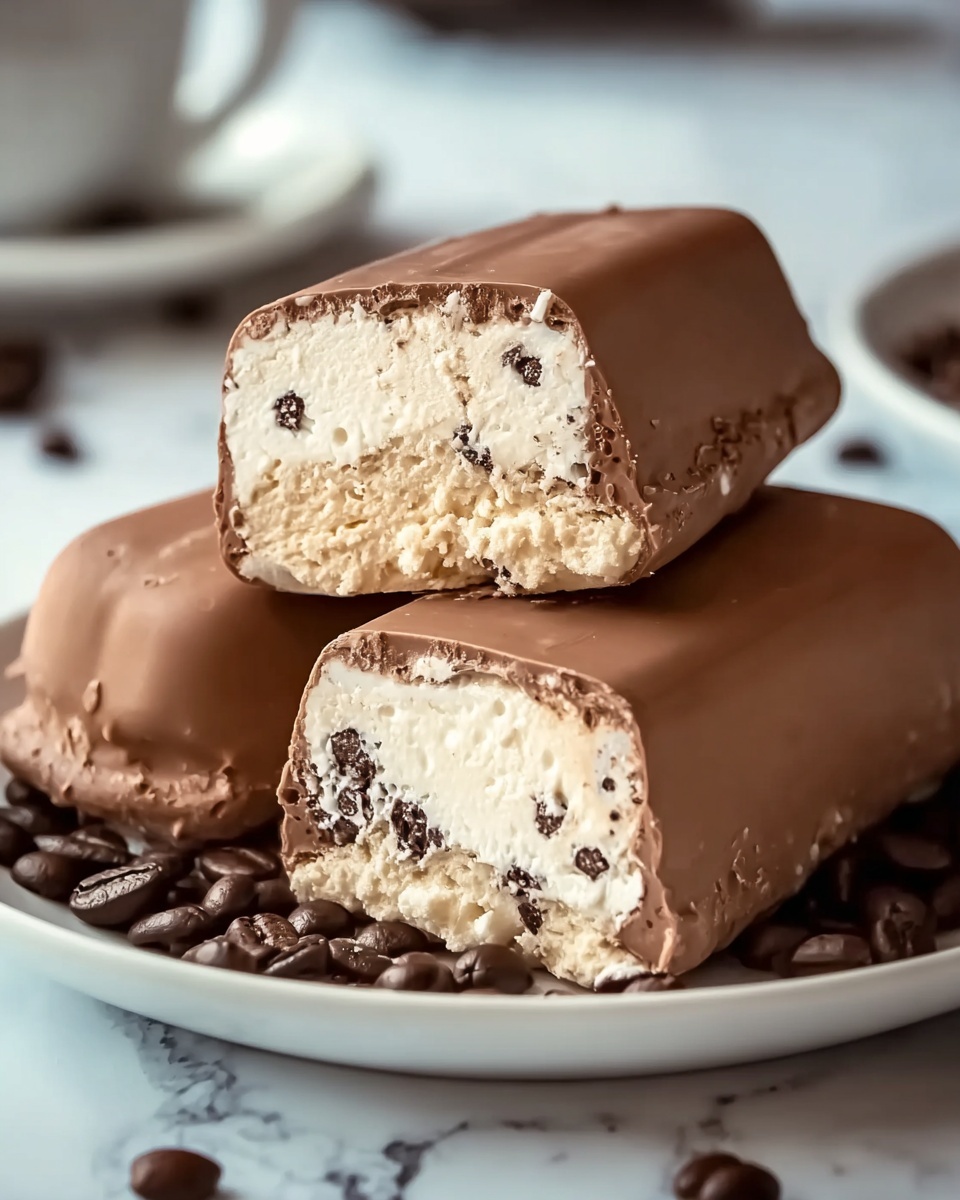
If you’re a coffee lover and a dessert enthusiast, this Homemade Coffee Ice Cream Recipe will quickly become one of your all-time favorites. Rich, creamy, and bursting with deep coffee flavor, this ice cream combines the smoothness of a classic custard with the invigorating aroma of freshly brewed coffee. Perfect for a summer treat or a cozy dessert any time of year, it’s surprisingly straightforward to make and promises a delightful experience with every spoonful.
Ingredients You’ll Need
Trust me, the magic of this recipe lies in its simplicity. Each ingredient plays a crucial role, from creating that luscious creamy texture to infusing the ice cream with robust coffee flavor and just the right sweetness.
- 2 cups heavy cream: Provides the rich, velvety base essential for creamy ice cream.
- 1 cup whole milk: Balances the creaminess and helps achieve the perfect texture.
- 1 cup brewed strong coffee (cooled): The star ingredient delivering bold coffee flavor without bitterness.
- 3/4 cup granulated sugar: Sweetens the custard and enhances the overall flavor.
- 4 large egg yolks: Create a silky custard base that thickens beautifully when cooked.
- 1 teaspoon vanilla extract: Adds warmth and depth to the flavor profile.
- Pinch of salt: Lifts the flavors and balances the sweetness.
How to Make Homemade Coffee Ice Cream Recipe
Step 1: Make the Custard Base
Begin by combining the heavy cream, whole milk, and brewed coffee in a saucepan. Heat this mixture gently over medium heat until it’s hot but not boiling. This warming step helps meld the rich dairy with the coffee so that those flavors marry perfectly throughout your ice cream.
Step 2: Whisk the Eggs
While your milk mixture warms up, whisk together the egg yolks and granulated sugar in a separate bowl. Whisk the duo until it turns pale and thickens slightly—this is crucial to ensure a smooth custard and prevent grainy texture later on.
Step 3: Temper the Eggs
Slowly add the hot milk mixture into the eggs bit by bit, whisking consistently. This step protects the eggs from cooking too quickly and scrambling. It’s a gentle way to bring the ingredients together while preserving that silky smooth texture we’re after.
Step 4: Cook the Custard
Pour the blended mixture back into the saucepan and cook over medium heat, stirring constantly. The custard will thicken and should coat the back of a spoon around 170°F to 175°F. This is the magic moment where everything comes together into a luxurious custard perfect for churning.
Step 5: Cool the Custard
Once thickened, take your custard off the heat and stir in vanilla extract and a pinch of salt. These finishing touches enhance the flavor beautifully. Let the custard cool to room temperature before refrigerating it for at least four hours or overnight to ensure it’s thoroughly chilled and ready for churning.
Step 6: Churn the Ice Cream
Pour the chilled custard into your ice cream maker and churn according to your machine’s instructions, typically around 20 to 25 minutes. The ice cream will transform into a creamy, soft-serve consistency infused with that rich coffee essence.
Step 7: Freeze
Transfer your churned ice cream into an airtight container and freeze for at least four hours, or until firm. This final freeze allows the flavors to intensify and the texture to firm up so you get perfect scoops every time.
Step 8: Serve and Enjoy
Now for the best part! Scoop out generous portions and savor your homemade coffee ice cream. Each bite offers a harmonious blend of creamy texture and bold coffee flavor that feels truly indulgent.
How to Serve Homemade Coffee Ice Cream Recipe
Garnishes
Adding simple garnishes can elevate this ice cream into a show-stopper. Consider sprinkling crushed dark chocolate, toasted almonds, or a dusting of instant espresso powder to complement the coffee notes. A drizzle of caramel sauce or a dollop of whipped cream is also heavenly for an indulgent touch.
Side Dishes
Serve this ice cream alongside warm chocolate brownies or a slice of coffee-flavored cake to create a divine dessert combo. It also pairs wonderfully with biscotti or shortbread cookies, offering a delightful contrast between crunchy and creamy textures.
Creative Ways to Present
For a fun twist, serve scoops of the ice cream inside coffee-rimmed chocolate cups or with an espresso shot poured over it for an affogato-style treat. You can even create a layered coffee ice cream parfait with chocolate mousse and whipped cream for an elegant presentation.
Make Ahead and Storage
Storing Leftovers
Your Homemade Coffee Ice Cream Recipe keeps best in an airtight container placed in the coldest part of the freezer. Proper sealing prevents ice crystals from forming and maintains the smooth, creamy texture you’ve worked so hard to create.
Freezing
When freezing homemade ice cream, allow it to firm up for at least four hours, but it can stay in the freezer for up to two weeks and still taste fresh. Avoid frequent temperature changes to prevent ice crystallization and preserve that luscious consistency.
Reheating
Unlike some dishes, ice cream isn’t meant to be reheated. If it becomes too hard after freezing, simply let it sit at room temperature for 5 to 10 minutes before scooping to regain its perfect scoopable consistency.
FAQs
Can I use instant coffee instead of brewed coffee?
Yes, you can substitute brewed coffee with strong instant coffee dissolved in hot water. However, brewed coffee tends to offer a fresher and more nuanced flavor that really shines in this recipe.
What if I don’t have an ice cream maker?
You can still make this recipe by placing the custard in a shallow container and freezing it. Stir vigorously every 30 minutes during the freezing process to break up ice crystals. It won’t be as creamy but will still taste delicious.
Can I use non-dairy milk to make this recipe?
This recipe relies on dairy for its creamy texture and richness. While you can try using full-fat coconut milk or almond milk, the texture and flavor will differ, and achieving the same custard consistency is challenging.
How long does homemade coffee ice cream last?
When properly stored in an airtight container, it’s best enjoyed within two weeks for optimal flavor and texture. Beyond that, the ice cream may develop ice crystals and lose its creamy smoothness.
Can I adjust the coffee intensity?
Absolutely! Feel free to tweak the strength of your brewed coffee depending on your preference. Using more coffee or espresso will give a bolder taste, while less will produce a milder, creamier flavor.
Final Thoughts
I can’t recommend this Homemade Coffee Ice Cream Recipe enough if you’re craving something special that’s both comforting and invigorating. It’s a simple yet satisfying way to elevate your dessert game, impress any coffee lover, and enjoy the deep, smooth flavors of homemade ice cream that’s truly one of a kind. Give it a try—you’ll wonder how you ever lived without it!
Print
Homemade Coffee Ice Cream Recipe
- Prep Time: 10 minutes
- Cook Time: 15 minutes
- Total Time: 5 hours 25 minutes
- Yield: 1 quart (approximately 4 servings)
- Category: Dessert
- Method: Stovetop
- Cuisine: American
Description
Indulge in the rich, creamy flavors of homemade coffee ice cream with this simple, classic recipe. Combining strong brewed coffee with a luscious custard base made from heavy cream, milk, and egg yolks, this ice cream offers a perfect balance of robust coffee taste and velvety texture. Easy to make with an ice cream maker, it’s a delightful treat for coffee lovers and dessert enthusiasts alike.
Ingredients
Ice Cream Base
- 2 cups heavy cream
- 1 cup whole milk
- 1 cup brewed strong coffee (cooled)
Custard
- 3/4 cup granulated sugar
- 4 large egg yolks
- 1 teaspoon vanilla extract
- Pinch of salt
Instructions
- Make the custard base: In a medium saucepan, combine the heavy cream, whole milk, and brewed coffee. Heat the mixture over medium heat until it’s hot but not boiling, stirring occasionally to combine the flavors evenly.
- Whisk the eggs: In a separate bowl, whisk together the egg yolks and sugar until the mixture is pale and slightly thickened, which ensures a smooth, creamy texture for the ice cream.
- Temper the eggs: Slowly pour the hot milk mixture into the egg yolk mixture in small increments while constantly whisking to prevent the eggs from curdling or scrambling.
- Cook the custard: Pour the combined mixture back into the saucepan. Cook it over medium heat, stirring constantly with a wooden spoon or spatula, until it thickens enough to coat the back of the spoon, reaching about 170°F-175°F (77°C-80°C). Avoid boiling to keep the custard smooth.
- Cool the custard: Remove from heat and stir in the vanilla extract and a pinch of salt. Let the custard cool to room temperature, then refrigerate it for at least 4 hours or overnight until completely chilled for optimum texture.
- Churn the ice cream: Pour the chilled custard into an ice cream maker and churn following your manufacturer’s instructions until it achieves a soft-serve consistency, typically 20-25 minutes.
- Freeze: Transfer the churned ice cream to an airtight container and freeze for at least 4 hours or until it firms up to your desired scoopable consistency.
- Serve: Scoop the homemade coffee ice cream into bowls or cones and enjoy a delicious, refreshing treat that highlights rich coffee flavor and creamy texture.
Notes
- Ensure the coffee is completely cooled before adding it to the cream and milk to prevent curdling during heating.
- Use a candy or instant-read thermometer to monitor the temperature when cooking the custard for perfect results.
- If you don’t have an ice cream maker, you can pour the custard into a shallow container and freeze it, stirring every 30 minutes until firm, though the texture will be less smooth.
- For a stronger coffee flavor, you can increase the brewed coffee amount or use espresso instead of regular coffee.
- This recipe can be made ahead of time and stored in the freezer for up to 2 weeks.


