“`html
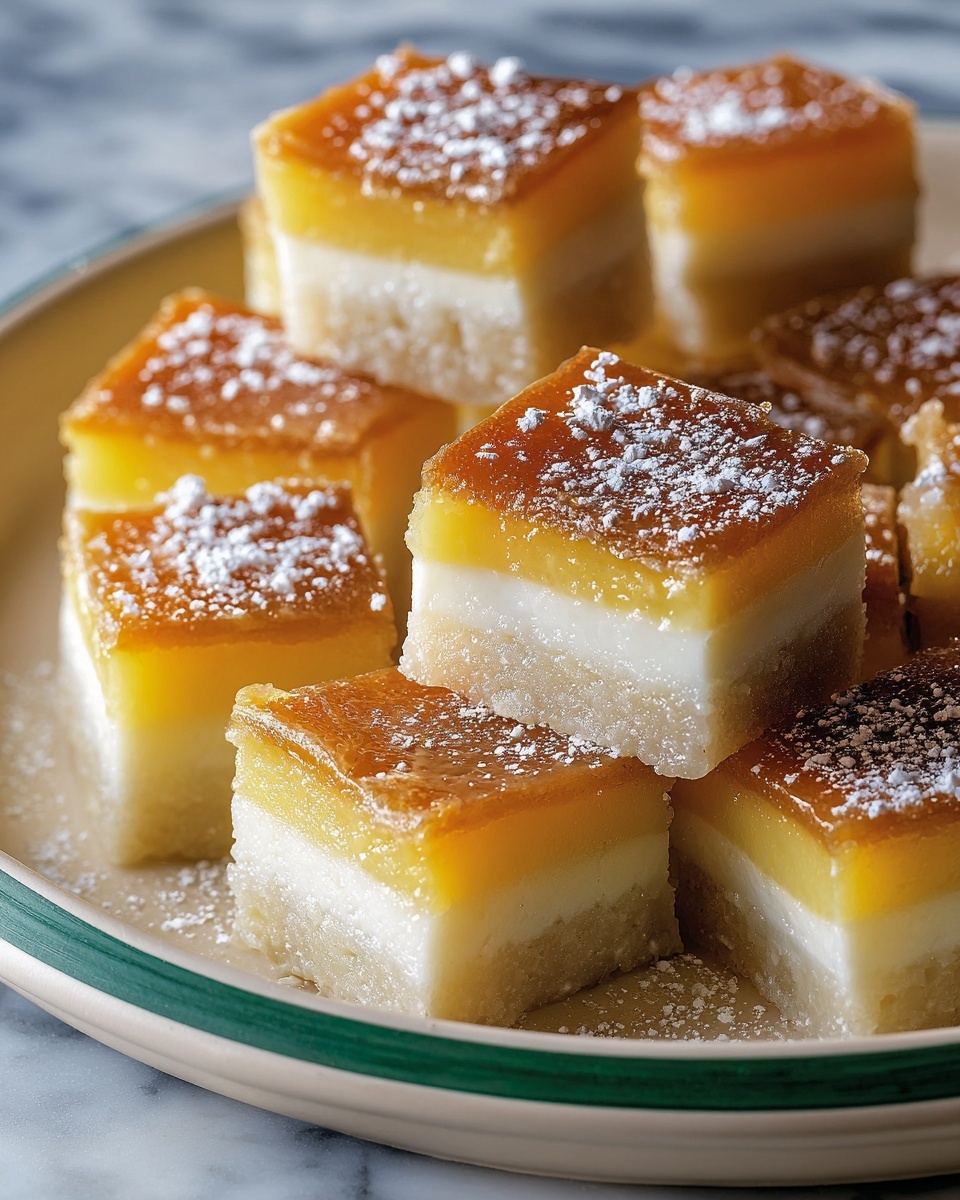
If you’re craving something uniquely delightful and utterly comforting, the Hawaiian Butter Mochi Recipe is your sweet escape to tropical indulgence. This luscious dessert combines the dreamy chewiness of sweet rice flour with the buttery richness and creamy coconut milk, resulting in a treat that’s both familiar and exotic. Whether you’re serving it at a family gathering or enjoying a quiet moment alone, this recipe promises a slice of paradise in every bite.
Ingredients You’ll Need
The magic of this Hawaiian Butter Mochi Recipe comes from its simple yet essential ingredients. Each component plays a crucial role, from the chewy texture brought by sweet rice flour to the creamy sweetness of coconut milk, and the rich buttery notes that bind it all beautifully.
- 1 cup sweet rice flour (mochiko): This gives the mochi its signature chewy and soft texture that makes it so addictive.
- 1 cup sugar: Sweetens the mochi perfectly without overpowering the other subtle flavors.
- 1 1/2 teaspoons baking powder: Adds a light rise to create a tender yet chewy crumb.
- 1/4 teaspoon salt: Enhances all the sweet and buttery flavors.
- 1/2 cup unsalted butter, melted: Provides rich, creamy depth and moistness to the batter.
- 1 cup coconut milk: Contributes a tropical creaminess and subtle sweetness unique to this dessert.
- 2 large eggs: Bind everything together and add a rich texture.
- 1 teaspoon vanilla extract: Brings a warm, fragrant note that complements the coconut and butter.
- 1/2 cup whole milk: Lightens the batter and adds moisture for the perfect consistency.
How to Make Hawaiian Butter Mochi Recipe
Step 1: Get the Oven Ready
Start by preheating your oven to 350°F (175°C). Prepare a 9×9-inch baking pan by greasing it or lining it with parchment paper to ensure easy removal after baking. This step sets the stage for your mochi to bake evenly and develop that gorgeous golden crust.
Step 2: Mix the Dry Ingredients
In a medium bowl, whisk together the sweet rice flour, sugar, baking powder, and salt. This ensures your mochi will have a perfect texture and balanced sweetness. Taking the time to mix these thoroughly helps the rising agent, baking powder, distribute evenly for a consistent bake.
Step 3: Combine the Wet Ingredients
In a separate bowl, beat the eggs until smooth. Then add the melted butter, coconut milk, vanilla extract, and whole milk. Stir gently to combine all these luscious liquids into a creamy, fragrant mixture. The richness of butter and coconut milk will make every bite melt in your mouth.
Step 4: Bring It All Together
Slowly pour the wet ingredients into the dry mixture, stirring until you achieve a smooth, glossy batter. It’s important not to overmix, just enough to combine everything well. This step is where the magic happens as the batter transforms into that famous mochi texture — chewy, tender, and irresistible.
Step 5: Bake to Perfection
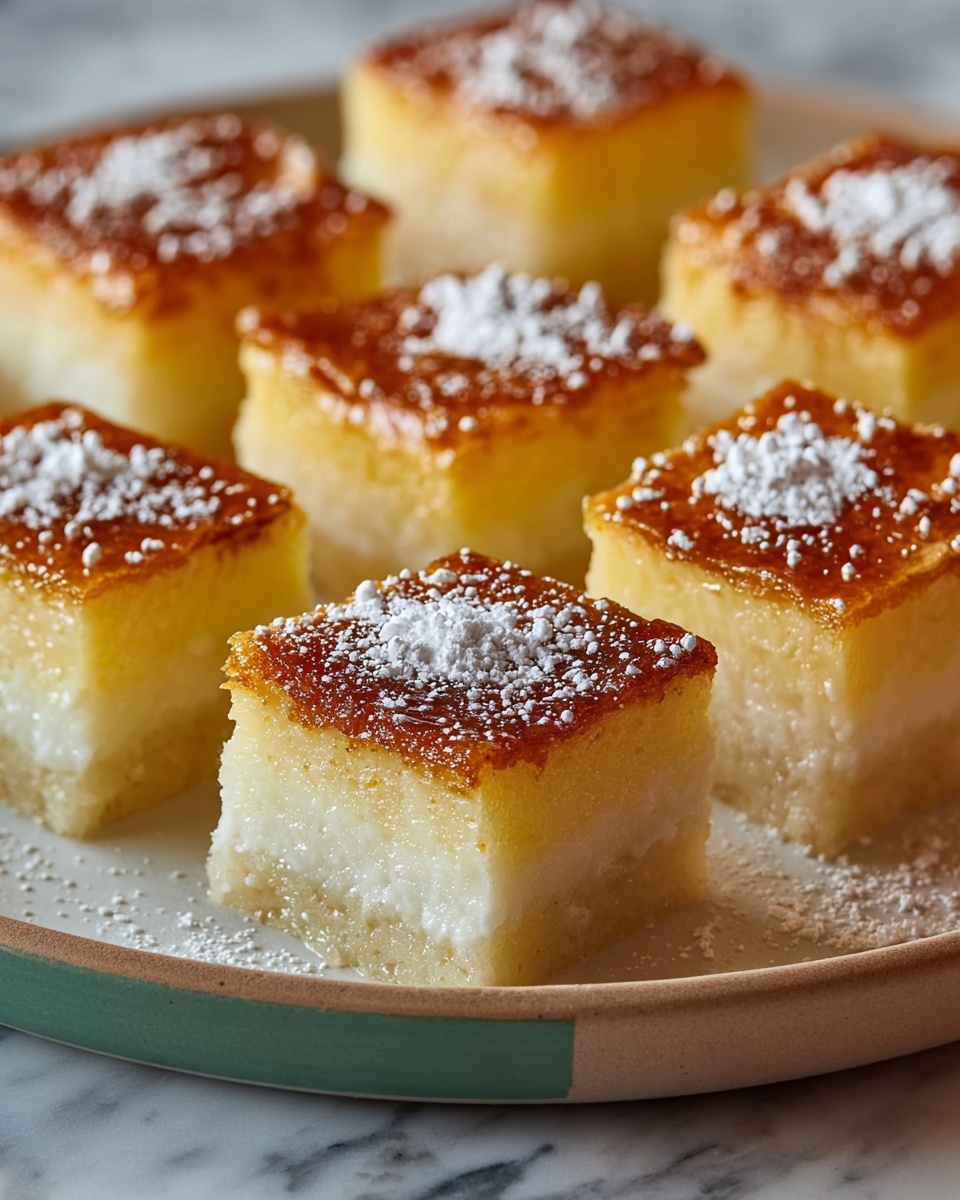
Pour your mochi batter into the prepared baking pan, smoothing the surface with a spatula for an even bake and a lovely presentation. Pop it into the oven and let it bake for 50 to 55 minutes. You’ll know it’s done when the top turns a beautiful golden brown and a toothpick inserted into the center comes out clean.
Step 6: Cool and Slice
After baking, it’s crucial to let the mochi cool completely in the pan before slicing. This helps it set and maintain its delightful chewy texture. Once cooled, cut into squares, serve, and prepare for all the compliments you’re about to receive!
How to Serve Hawaiian Butter Mochi Recipe
Garnishes
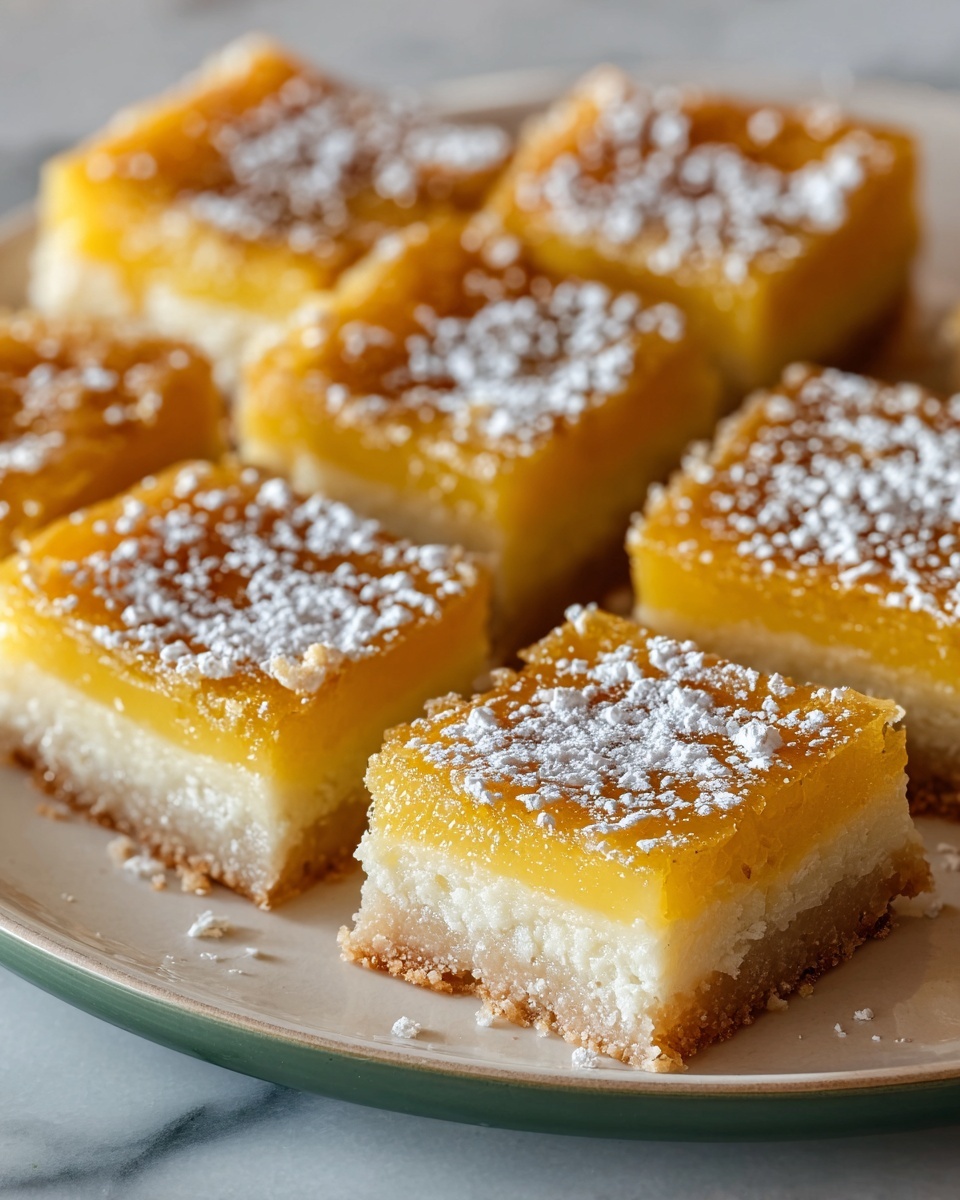
While the mochi is delicious on its own, adding a sprinkle of toasted coconut flakes on top or a dusting of powdered sugar can elevate the presentation and add an extra layer of texture. Fresh mango slices or a drizzle of condensed milk create even more tropical vibes that will leave everyone asking for seconds.
Side Dishes
Because Hawaiian Butter Mochi Recipe is rich and sweet, it pairs wonderfully with light and refreshing sides like fresh fruit salad or a chilled cup of green tea. For an indulgent twist, serve alongside vanilla ice cream or a scoop of coconut sorbet — the warm-and-cold combo is unbeatable!
Creative Ways to Present
For a fun party idea, try serving the mochi squares on a decorative platter garnished with edible flowers or pineapple leaves. You can also cut the mochi into bite-sized cubes and serve with toothpicks for an easy finger-food dessert option. If feeling adventurous, drizzle melted dark chocolate or caramel sauce over the squares for a decadent finish.
Make Ahead and Storage
Storing Leftovers
Leftover mochi keeps best in an airtight container at room temperature for up to 3 days, maintaining its soft, chewy texture. If your kitchen is warm, storing it in the refrigerator can extend freshness to about a week, though it may firm up slightly.
Freezing
You can freeze the mochi after slicing it into squares. Wrap each piece tightly in plastic wrap and place them in a freezer-safe bag or container. Frozen, the mochi can last for up to 2 months. When you’re ready to enjoy it, simply thaw at room temperature or warm gently.
Reheating
To bring back that fresh-baked softness, pop mochi squares in the microwave for 10 to 15 seconds or warm them in a low oven wrapped in foil. This quick reheat will revive the buttery, chewy goodness you fell in love with.
FAQs
Can I use regular rice flour instead of sweet rice flour?
For the unique chewy texture that defines Hawaiian Butter Mochi Recipe, sweet rice flour (mochiko) is essential. Regular rice flour will result in a much drier and crumbly dessert, so it’s best to stick with mochiko for authenticity and texture.
Is there a dairy-free version of this Hawaiian Butter Mochi Recipe?
Absolutely! To make a dairy-free version, swap unsalted butter with a plant-based alternative and substitute whole milk with extra coconut milk or almond milk. The coconut milk already adds tropical flavor, so this swap keeps the moistness and richness intact.
How can I make the mochi sweeter?
If you prefer your mochi sweeter, you can increase the sugar by about 1/4 cup. Keep in mind the current balance of sweetness complements the coconut and butter beautifully, so adjusting sugar is a personal choice to suit your taste.
Can I freeze leftover mochi?
Yes! Freezing leftover slices is a great way to keep them fresh longer. Just wrap each piece tightly and store in a freezer-safe container. When ready to eat, thaw and warm slightly to restore that soft, chewy texture.
Can I double the recipe for a larger batch?
Definitely! Doubling the ingredients works well for larger gatherings. Use a larger baking dish and watch the baking time closely, as it may take a bit longer for the mochi to bake through when made in larger quantities.
Final Thoughts
I can’t recommend the Hawaiian Butter Mochi Recipe enough to anyone looking for a comforting, chewy dessert that transports you to the islands with every bite. It’s straightforward to make, wonderfully versatile, and always a crowd-pleaser. So gather your ingredients, preheat the oven, and get ready to enjoy a truly special treat that feels like a warm hug from Hawaii.
“`
Print
Hawaiian Butter Mochi Recipe
- Prep Time: 10 minutes
- Cook Time: 55 minutes
- Total Time: 1 hour 5 minutes
- Yield: 16 servings
- Category: Dessert
- Method: Baking
- Cuisine: Hawaiian
- Diet: Vegetarian
Description
Hawaiian Butter Mochi is a soft, chewy, and indulgent dessert that beautifully combines the tropical flavors of coconut milk and vanilla with the rich buttery taste of mochi made from sweet rice flour. This traditional Hawaiian treat has a unique pudding-like texture and is perfect for gatherings or a delightful sweet snack. Easy to prepare and customizable, it’s a crowd-pleasing dessert that brings a comforting and irresistible flavor to any occasion.
Ingredients
Dry Ingredients
- 1 cup sweet rice flour (mochiko)
- 1 cup sugar
- 1 1/2 teaspoons baking powder
- 1/4 teaspoon salt
Wet Ingredients
- 1/2 cup unsalted butter, melted
- 1 cup coconut milk
- 2 large eggs
- 1 teaspoon vanilla extract
- 1/2 cup whole milk
Instructions
- Preheat Oven: Preheat your oven to 350°F (175°C). Prepare a 9×9-inch baking pan by greasing it or lining it with parchment paper to prevent sticking.
- Mix Dry Ingredients: In a medium-sized bowl, whisk together the sweet rice flour, sugar, baking powder, and salt until well combined to ensure an even distribution of leavening and seasoning.
- Mix Wet Ingredients: In a separate bowl, beat the eggs thoroughly, then stir in the melted butter, coconut milk, vanilla extract, and whole milk to combine all wet ingredients smoothly.
- Combine Batter: Gradually pour the wet ingredient mixture into the dry ingredients while mixing continuously until the batter is smooth and lump-free.
- Prepare for Baking: Transfer the batter to the prepared baking pan, spreading it evenly and smoothing the surface with a spatula for uniform baking.
- Bake: Bake in the preheated oven for 50-55 minutes. The mochi is done when the top is golden brown and a toothpick inserted in the center comes out clean.
- Cool and Serve: Allow the mochi to cool completely in the pan before cutting into 16 squares. Serve and enjoy this chewy, flavorful treat.
Notes
- Experiment with tropical twists by adding shredded pineapple or coconut flakes to the batter or on top before baking for extra texture and flavor.
- For a chocolate variation, fold in chocolate chips into the batter or drizzle melted chocolate on top after baking.
- To make this recipe vegan, substitute the unsalted butter with plant-based butter and use coconut milk in place of whole milk.
- Store leftovers in an airtight container at room temperature for 2-3 days or refrigerate for up to a week. Reheat in the microwave for 10-15 seconds before serving.
- This mochi can also be frozen for up to 2 months; wrap pieces individually and thaw before reheating.


