
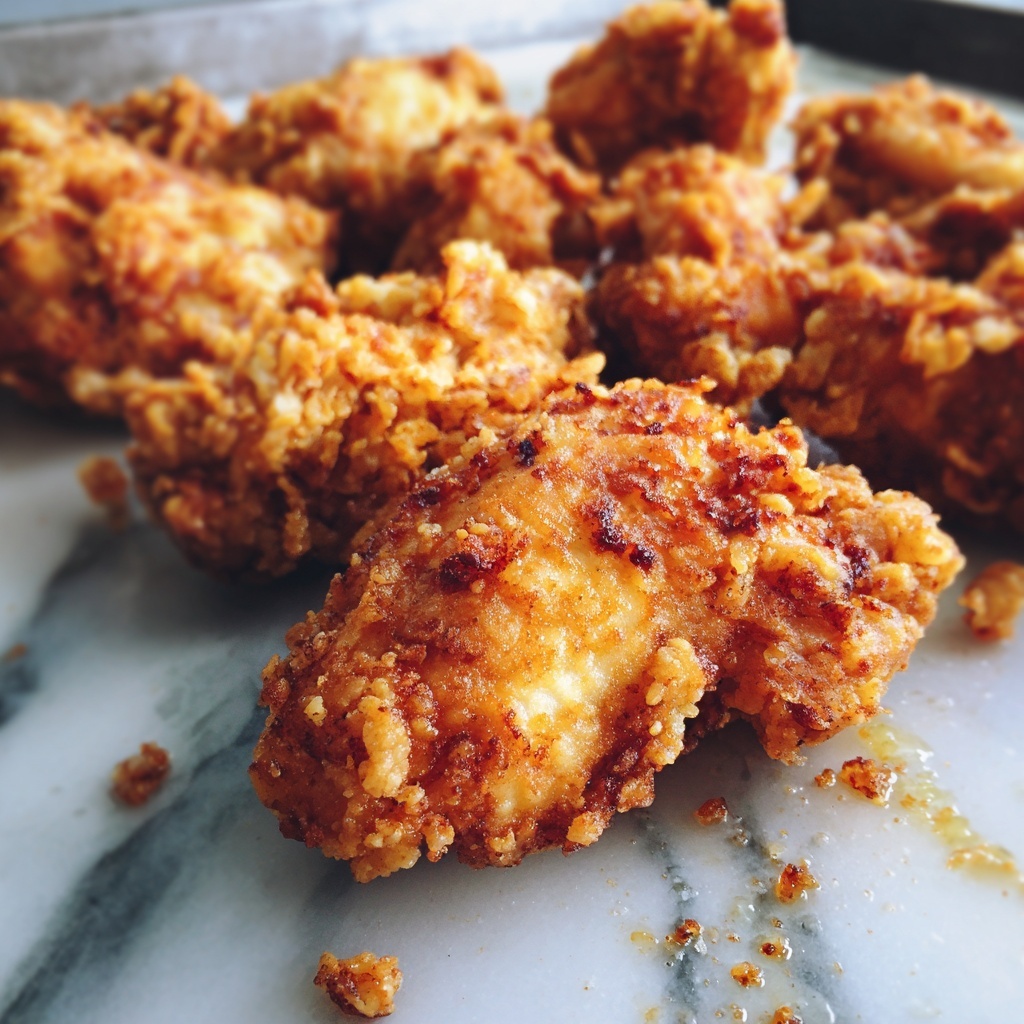
If you’re looking for a dish that delivers that perfect harmony of crunch, savory richness, and a touch of indulgence, you’ve just found your new favorite: the Garlic Parmesan Crispy Oven Fried Chicken Recipe. This recipe transforms simple chicken tenders into a masterpiece of golden, crispy coating infused with the bold flavors of garlic and nutty Parmesan cheese, baked to crispy perfection in your oven. It’s the ultimate crowd-pleaser that feels like a guilty pleasure without the guilt, combining convenience with flavor that will have you coming back for seconds every time.
Ingredients You’ll Need
These ingredients are straightforward yet essential, each playing a vital role in building the dish’s outstanding flavor and crispy texture. From the tangy buttermilk that tenderizes the chicken to the Parmesan that adds an irresistible depth, every component is thoughtfully chosen.
- 2 large eggs: Bind the coating ingredients, helping the breading stick perfectly to the chicken.
- 2/3 cup buttermilk: Thick and tangy, it tenderizes the chicken and adds a subtle tang.
- 1 cup white flour: Serves as the base for the crispy coating, giving texture and structure.
- ⅔ cup grated Parmesan cheese: Infuses a rich, nutty flavor that melts into the breading.
- 4 tablespoons bread crumbs: Adds extra crunch and body to the crust.
- 1 teaspoon baking powder: Helps lighten and crisp up the coating.
- 2 teaspoons salt: Enhances all the flavors; adjust according to taste.
- 2-3 teaspoons garlic powder: Delivers that bold garlic punch throughout the breading.
- 1 teaspoon ground paprika: Adds subtle smokiness and beautiful color.
- 1 teaspoon onion powder: Rounds out the seasoning with a savory depth.
- ½ teaspoon ground black pepper: Lends just the right amount of heat and complexity.
- 2 pounds chicken tenders: The perfect cut for quick, even cooking and maximum crispiness.
- 1/3 cup butter: Used for basting, it guarantees a golden, flavorful crust.
How to Make Garlic Parmesan Crispy Oven Fried Chicken Recipe
Step 1: Preheat and Prepare Your Pan
Start by preheating your oven to a sizzling 410°F (210°C). Place a dark-colored roasting pan or a rimmed baking sheet inside — this preheats the pan so that when the chicken hits the surface, it starts crisping immediately, giving you that coveted crunchy bottom crust.
Step 2: Whisk Together the Egg and Buttermilk Mixture
In a medium bowl, whisk your eggs and thick buttermilk together until smooth. This mixture acts as a sticky, flavorful glue that helps the coating adhere better to every tender piece of chicken.
Step 3: Combine the Dry Ingredients
Mix together the flour, grated Parmesan, bread crumbs, baking powder, and all your carefully measured seasonings in a large bowl. This aromatic blend will coat your chicken beautifully, packing in flavor and crunch with every bite.
Step 4: Double-Coat Your Chicken
First, toss the chicken tenders in the dry mixture for a light initial coat. Then, dunk them into the egg and buttermilk wash for generous coverage. Finally, individually coat each piece thickly with the dry mixture again, pressing the coating firmly so it sticks well. This triple-layered method ensures a crunchy, flavorful crust that clings perfectly and bakes up wonderfully crisp.
Step 5: Bake to Crispy Perfection
Carefully remove your hot pan from the oven and melt two-thirds of the butter on it. Place your breaded chicken tenders on the pan and dot the tops with the remaining butter. Bake the chicken for 10 to 15 minutes until the bottoms turn a glorious golden brown. Gently flip each piece (using an offset spatula helps keep the crust intact), then bake for another 5 to 10 minutes. Finish with a quick 2-3 minute broil to lock in that crunch and color. That buttery goodness sizzling and browning is exactly what makes this Garlic Parmesan Crispy Oven Fried Chicken Recipe so addictive.
Step 6: Rest and Serve
Carefully transfer your hot chicken to a cooling rack and let rest for 5 minutes. This short pause lets the juices redistribute and the breading settle for the ultimate crispy bite. Then, serve immediately and prepare to hear all the compliments pouring in!
How to Serve Garlic Parmesan Crispy Oven Fried Chicken Recipe
Garnishes
A sprinkle of freshly chopped parsley or a light dusting of extra Parmesan makes the dish pop visually and flavor-wise. For a hint of freshness, a wedge of lemon on the side brightens every bite, balancing the richness beautifully.
Side Dishes
This crispy chicken pairs wonderfully with a creamy coleslaw, roasted vegetables, or even a crisp garden salad. For something heartier, mashed potatoes or buttery corn on the cob echo the comforting vibe of this dish while keeping the meal balanced and satisfying.
Creative Ways to Present
Try serving your Garlic Parmesan Crispy Oven Fried Chicken on a bed of garlic parmesan pasta for a feast that doubles down on flavor. Or stack several pieces in a toasted bun with lettuce and aioli for an upscale chicken sandwich that’s sure to impress. Presentation is your playground here, so have fun showing off that golden crispiness!
Make Ahead and Storage
Storing Leftovers
Store leftover chicken in an airtight container in the refrigerator for up to 3 days. It keeps its flavor well, though the crust might soften slightly. For best texture, reheat using an oven or toaster oven to bring back that crisp.
Freezing
If you want to save this treat for later, freeze the chicken pieces in a single layer on a baking sheet until solid, then transfer to a freezer-safe bag or container. Frozen breaded chicken will keep for up to 2 months, ready for a quick oven refresh anytime.
Reheating
To reheat while preserving crispness, place the chicken on a wire rack set over a baking sheet in a preheated 350°F oven. Heat for 10 to 15 minutes or until warmed through and crunchy again. Avoid microwaves if you crave that satisfying crunch.
FAQs
Can I use chicken breasts instead of tenders?
Absolutely! Just slice the chicken breasts into strips of similar size to tenders, ensuring they cook evenly. Keep an eye on cooking time as slightly thicker pieces might need a few minutes longer in the oven.
What can I substitute for buttermilk?
If you don’t have buttermilk on hand, stir 2/3 cup of milk with 1 tablespoon of white vinegar or lemon juice, then let it sit for 5 minutes. This mixture mimics the tanginess and thickness that tenderize the chicken beautifully.
Why is the baking powder included in the coating?
Baking powder helps create a lighter, crispier crust by promoting tiny bubbles and a raised texture in the breading. It’s a small addition that makes a big difference in crunch factor.
How can I make this recipe gluten-free?
Swap the all-purpose flour and breadcrumbs for gluten-free alternatives like rice flour and gluten-free panko. Just ensure your seasonings are gluten-free as well, and you’re good to go without sacrificing flavor or crunch.
Is it possible to make this recipe without butter?
You can substitute the butter with olive oil or a high-quality vegetable oil for basting and baking. Butter adds richness and helps with browning, but oil can still produce a crispy crust with a slightly different flavor profile.
Final Thoughts
This Garlic Parmesan Crispy Oven Fried Chicken Recipe is truly a game-changer for anyone who loves that delicious crunch without the hassle of frying in oil. It’s simple, packed with flavor, and perfect for sharing with friends and family. Give it a try and watch it become your new go-to comfort food that never disappoints!
Print
Garlic Parmesan Crispy Oven Fried Chicken Recipe
- Prep Time: 20 minutes
- Cook Time: 20 minutes
- Total Time: 40 minutes
- Yield: 6 servings
- Category: Chicken
- Method: Baking
- Cuisine: American
Description
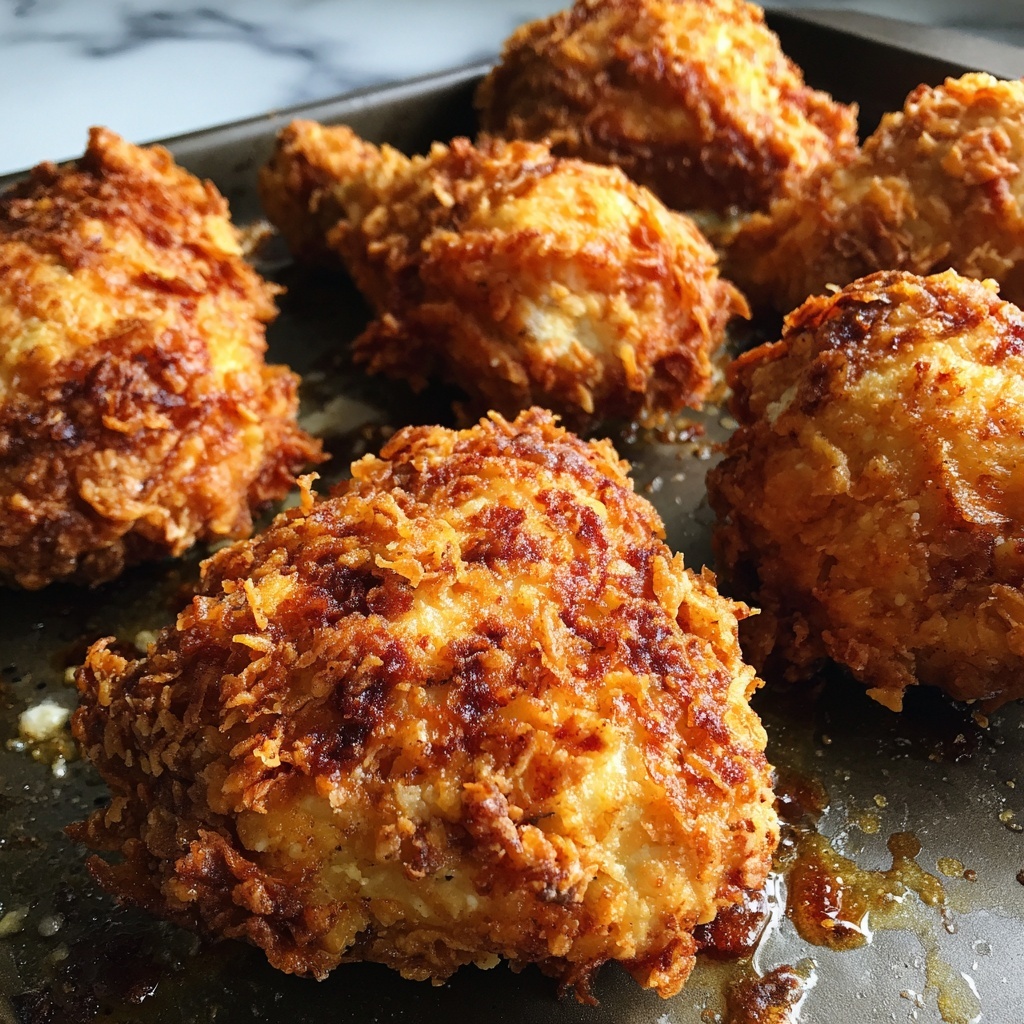
This Garlic Parmesan Crispy Oven Fried Chicken recipe delivers a perfect blend of crispy, golden-brown breading infused with savory garlic and Parmesan flavors. Using an oven-baking method with a unique breading technique, the chicken tenders come out irresistibly crunchy on the outside and tender on the inside, all without deep frying. A deliciously rich and satisfying meal perfect for family dinners or casual gatherings.
Ingredients
Wet Ingredients
- 2 large eggs
- 2/3 cup buttermilk (thick; see notes for substitutes)
- 1/3 cup butter
Dry Breading Mix
- 1 cup white flour
- 2/3 cup grated Parmesan cheese
- 4 tablespoons bread crumbs
- 1 teaspoon baking powder
- 2 teaspoons salt (or less to taste)
- 2–3 teaspoons garlic powder
- 1 teaspoon ground paprika
- 1 teaspoon onion powder
- 1/2 teaspoon ground black pepper
Protein
- 2 pounds chicken tenders
Instructions
- Prep: Preheat the oven to 410°F (210°C). Place a dark-colored roasting pan without non-stick coating or a rimmed baking sheet inside the oven to heat up thoroughly, ensuring it will create the perfect crisp base for baking the chicken.
- Prepare Egg Mixture: In a medium mixing bowl, whisk together the eggs and thick buttermilk until fully combined and smooth to create the wet coating for the chicken.
- Prepare Dry Flour Mix: In a separate bowl, combine the white flour, grated Parmesan cheese, bread crumbs, baking powder, salt, garlic powder, ground paprika, onion powder, and ground black pepper. Mix well to ensure all seasonings are evenly distributed.
- Bread Chicken: Lightly toss all the chicken tenders in the dry flour mix to coat them evenly. Then, dip and toss the coated chicken pieces into the egg and buttermilk mixture to generously coat. Finally, individually coat each piece again with the dry flour mixture, applying a thick, even layer. Spoon additional flour mixture onto the chicken to build a substantial breading layer. Use the back of a tablespoon to gently press and flatten the breaded chicken pieces, creating a uniform thickness and ensuring the coating adheres well.
- Bake: Remove the hot baking pan from the oven carefully and melt two-thirds of the butter on it. Arrange the breaded chicken tenders on the pan, then dot the remaining butter over the chicken pieces. Bake for 10 to 15 minutes until the bottom side becomes golden and crisp. Using an offset spatula, carefully flip the chicken pieces to avoid disturbing the breading, and bake an additional 5 to 10 minutes depending on thickness. Complete the cooking by broiling the chicken for 2 to 3 minutes until the surface is golden brown and crispy.
- Rest: Carefully transfer the cooked chicken to a cooling rack and let it rest for 5 minutes before serving to allow juices to redistribute and maintain crunch.
Notes
- For the buttermilk substitute, mix 2/3 cup milk with 1 tablespoon lemon juice or white vinegar and let it sit for 5 minutes.
- Using a dark roasting pan or baking sheet helps develop better crust and browning.
- Pressing the breading firmly onto the chicken ensures a thick, crispy coating that stays intact while baking and flipping.
- Use an offset spatula to flip the chicken gently to prevent breading from falling off.
- Resting chicken after baking helps maintain juiciness and a crispy texture.


