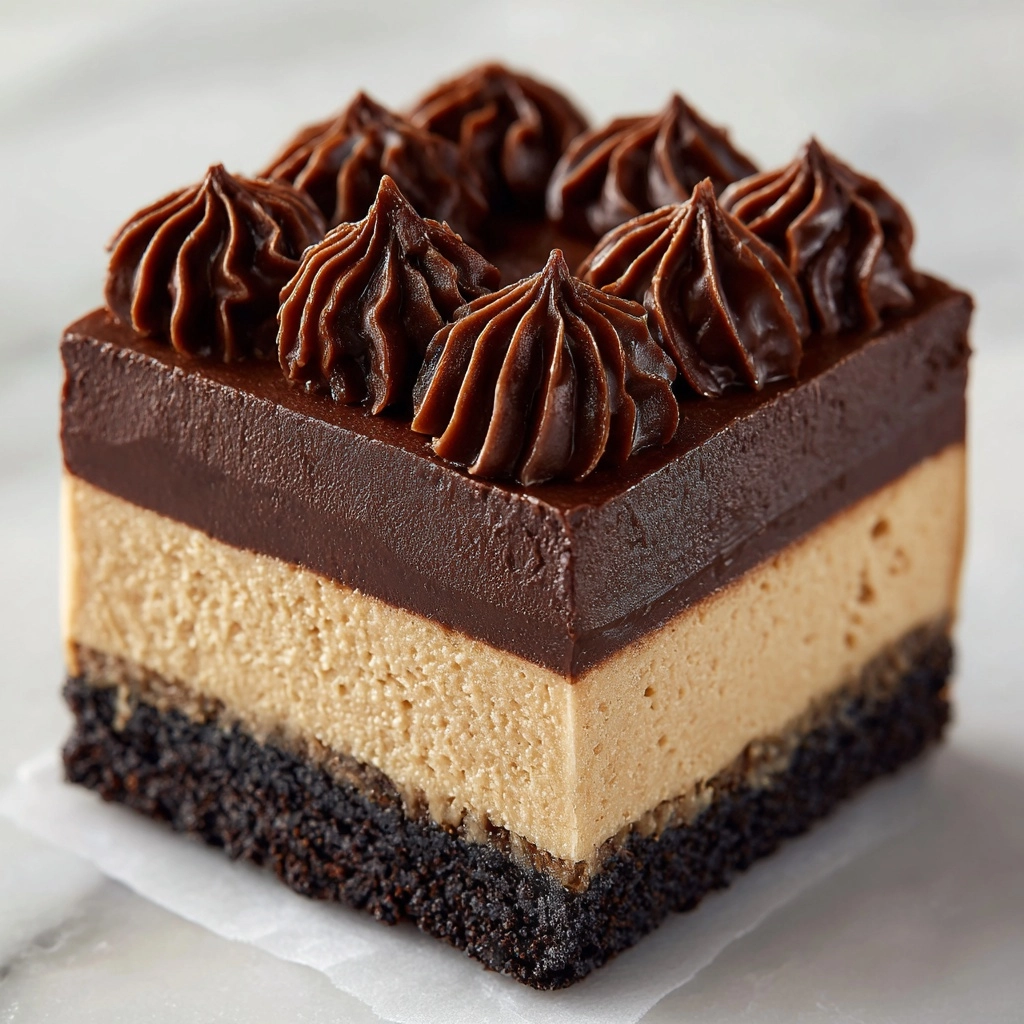
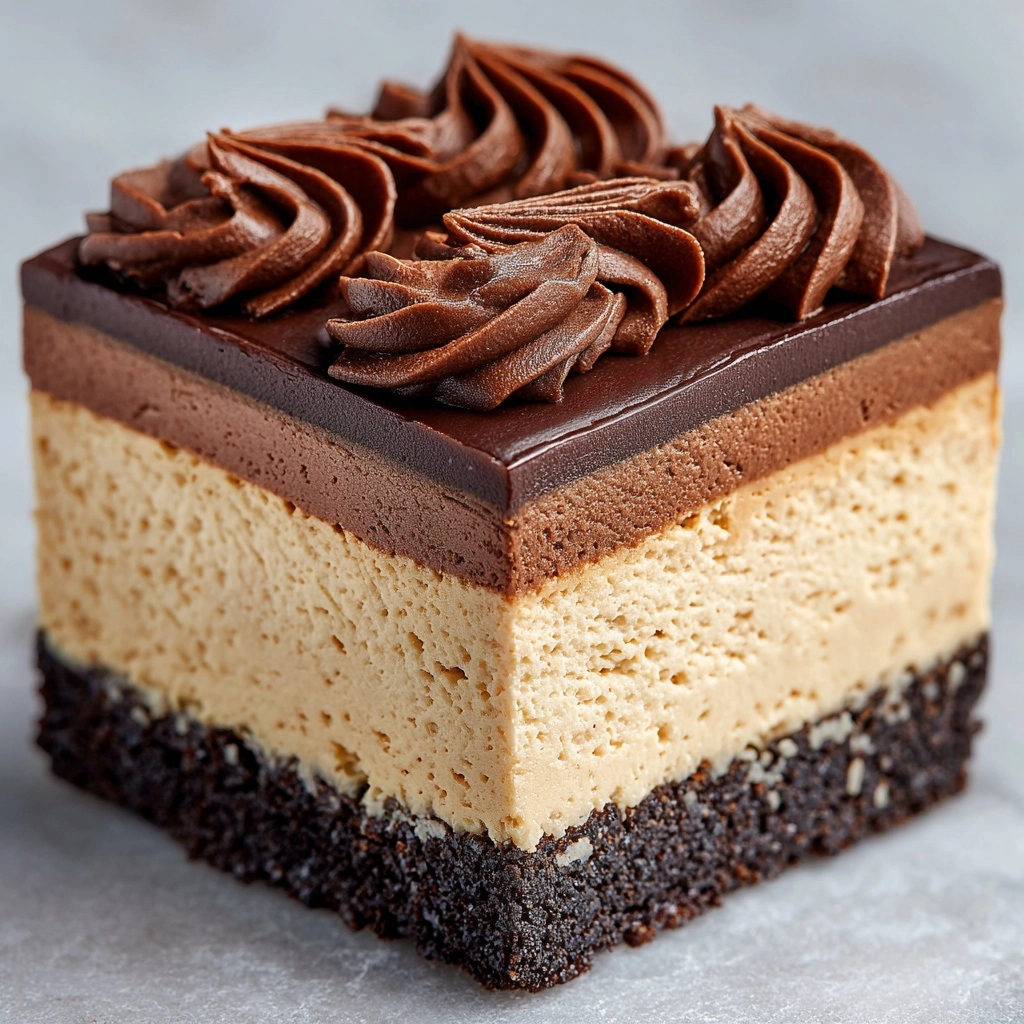
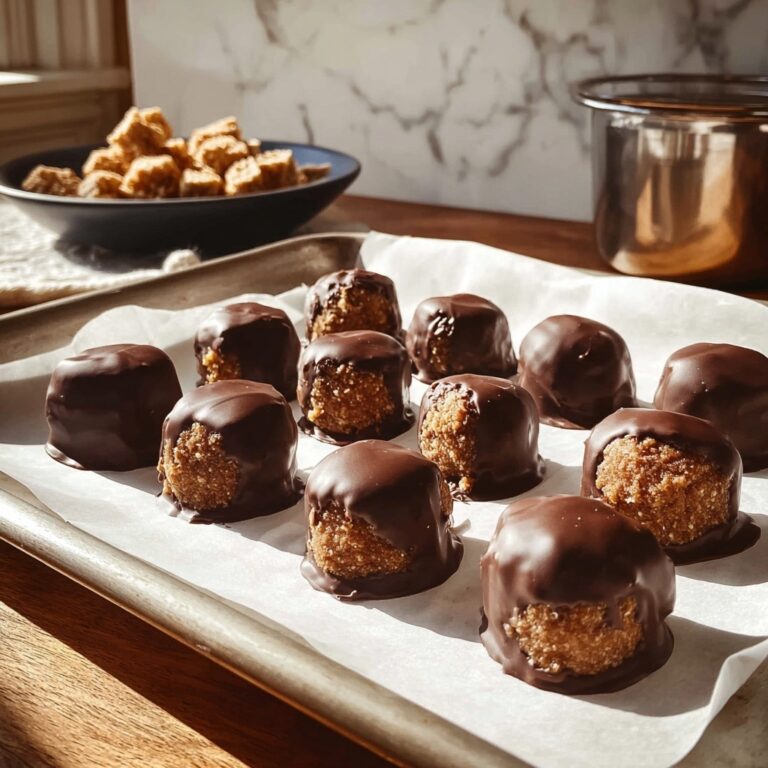
Meet your new favorite no-bake treat: Chocolate Peanut Butter Dream Bars. We’re talking three luscious layers — buttery graham cracker crust, creamy peanut butter filling, and a glossy chocolate ganache — coming together for the ultimate dessert bar. Whether you’re baking for a party, satisfying a late-night craving, or treating your family just because, these dreamy bars strike the perfect balance between sweet, salty, soft, and just the right touch of crunch.
Ingredients You’ll Need
What makes these bars so irresistible is the simple lineup of pantry staples, each pulling its weight for maximum flavor and texture. From the classic allure of graham crackers to a generous helping of creamy peanut butter, every ingredient plays a starring role in creating Chocolate Peanut Butter Dream Bars that taste like pure indulgence.
- Graham cracker crumbs: These create a buttery, slightly crunchy base that holds everything together and adds a touch of nostalgic flavor.
- Granulated sugar: Just enough to sweeten the crust without overpowering the peanut butter richness.
- Unsalted butter (melted): Binds the crumbs and adds a luscious flavor — make sure it’s fully melted for a cohesive base.
- Creamy peanut butter: The heart of the bars, lending creaminess and that signature salty-sweet love.
- Powdered sugar: Gives the peanut butter layer its classic, fudge-like texture.
- Vanilla extract: A small touch that brings out the flavors in both the peanut butter and chocolate.
- Salt: Don’t skip it! A pinch enhances both the sweetness and the peanut butter’s depth.
- Semi-sweet chocolate chips: Melts into a shiny, smooth top layer that satisfies every chocoholic’s craving.
- Heavy cream: The secret to glossy, luxurious ganache that slices beautifully and melts in your mouth.
How to Make Chocolate Peanut Butter Dream Bars
Step 1: Prepare the Graham Cracker Crust
Start by preheating your oven to 350°F (175°C). In a medium bowl, combine the graham cracker crumbs, granulated sugar, and melted butter. Mix until the crumbs are evenly moistened and resemble wet sand — you’ll want every crumb coated in buttery goodness! Press the mixture firmly into the bottom of a greased 8×8-inch baking dish, making sure to spread it evenly into every corner. Bake for 8 to 10 minutes, then set aside to cool while you prepare the next layer.
Step 2: Make the Peanut Butter Layer
While the crust is cooling, it’s time for that creamy peanut butter magic. In a separate bowl, stir together the creamy peanut butter, powdered sugar, vanilla extract, and salt. Stir until silky-smooth and thick — it should hold together and spread easily but not be too stiff. Using an offset spatula or the back of a spoon, gently spread this mixture over your cooled crust, making sure it’s nice and even.
Step 3: Prepare the Chocolate Ganache
Now for the crowning glory: chocolate ganache. Place your semi-sweet chocolate chips and heavy cream in a microwave-safe bowl. Heat in 30-second bursts, stirring well after each time, until completely melted and glossy. The cream ensures the chocolate stays silky, sliceable, and not too hard when chilled. Pour the ganache over the peanut butter layer, tilting the pan or smoothing gently with a spatula to cover every inch.
Step 4: Chill and Set
Transfer the entire pan to your refrigerator and chill for at least 2 hours. This step is essential: it allows the layers to set completely so you’ll get those perfect, tidy slices. If you’re in a hurry, pop them into the freezer to speed things up — just keep an eye out so they don’t freeze solid!
Step 5: Slice and Serve
Once fully set, run a sharp knife under warm water and wipe dry, then slice the bars into squares for clean, fuss-free servings. Each cut should reveal beautiful layers of Chocolate Peanut Butter Dream Bars, ready to dazzle at your table (or straight from the pan, if you can’t resist).
How to Serve Chocolate Peanut Butter Dream Bars

Garnishes
Amp up the wow factor by topping each bar with a scatter of chopped roasted peanuts, a pinch of flaky sea salt, or a drizzle of extra melted chocolate. These simple garnishes provide a delightful contrast in texture and flavor, turning classic Chocolate Peanut Butter Dream Bars into something that looks as beautiful as it tastes.
Side Dishes
While these bars totally stand on their own, you can serve them alongside a scoop of vanilla ice cream, a fresh berry compote, or even a frosty glass of milk. The rich chocolate and peanut butter flavors play so well with cold, creamy, or even tart side dishes, balancing indulgence with a hint of freshness.
Creative Ways to Present
If you’re feeling fancy, stack the bars Jenga-style on a cake stand, tuck each into a mini cupcake liner for parties, or wrap individual pieces in parchment and tie with twine for a sweet homemade gift. The clean layers of Chocolate Peanut Butter Dream Bars make for impressive, mouthwatering presentations every single time.
Make Ahead and Storage
Storing Leftovers
Keep your Chocolate Peanut Butter Dream Bars fresh by storing them in an airtight container in the refrigerator. They’ll stay delicious and perfectly textured for up to a week. Layering parchment or wax paper between bars prevents the ganache from sticking and keeps each piece picture-perfect.
Freezing
Need to plan ahead? These bars freeze beautifully! Once set and sliced, arrange them in a single layer (or separated by parchment) in a freezer-safe container. They’ll keep for up to two months. To serve, thaw in the refrigerator overnight, and you’re ready to indulge whenever the craving strikes.
Reheating
No need to reheat these treats — they’re meant to be enjoyed chilled or at room temperature. If the bars are too firm from the fridge or freezer, just let them sit at room temp for 10–15 minutes to soften ever so slightly before serving.
FAQs
Can I use crunchy peanut butter instead of creamy?
Absolutely! Crunchy peanut butter brings irresistible texture to the peanut butter layer, and you’ll get little bursts of peanut crunch in every bite of your Chocolate Peanut Butter Dream Bars. Just follow the same measurements.
Can I make this recipe dairy-free?
You sure can. Use your favorite plant-based butter alternative and swap the heavy cream for canned coconut cream. Pair with vegan chocolate chips, and you have a dairy-free version of this classic treat!
Is there a gluten-free option for the crust?
Definitely. Substitute regular graham cracker crumbs with gluten-free graham-style crackers or your favorite gluten-free cookie crumbs — it works seamlessly, and you won’t miss a thing in your Chocolate Peanut Butter Dream Bars.
Why does my chocolate layer crack when slicing?
The key to a smooth cut is waiting until the bars are fully set and using a sharp knife dipped in warm water. The added cream in the ganache should keep it soft enough, but if your kitchen is very cold, let the bars rest at room temp for a bit before slicing.
Can I double the recipe for a crowd?
Yes! Just double all the ingredients and use a 9×13-inch baking dish. The bars will set just as beautifully — perfect for parties, potlucks, or anytime you need a larger batch of Chocolate Peanut Butter Dream Bars.
Final Thoughts
There’s just something special about a homemade treat that combines all the best flavors into one delicious bite, and these Chocolate Peanut Butter Dream Bars do exactly that. Whether you’re sharing with friends or savoring every square yourself, this recipe is always a hit. Give it a try and let your kitchen fill with chocolate-peanut buttery joy!
Print
Chocolate Peanut Butter Dream Bars Recipe
- Prep Time: 15 minutes
- Cook Time: 10 minutes
- Total Time: 2 hours 25 minutes
- Yield: 16 bars
- Category: Dessert
- Method: No-Bake, Baking
- Cuisine: American
- Diet: Non-Vegetarian
Description
Indulge in the decadent layers of these Chocolate Peanut Butter Dream Bars. A crunchy graham cracker crust supports a creamy peanut butter filling, all topped with a rich chocolate layer. These no-bake bars are a dreamy dessert for any occasion.
Ingredients
Graham Cracker Crust:
- 1 cup graham cracker crumbs
- 1/4 cup granulated sugar
- 1/2 cup unsalted butter, melted
Peanut Butter Layer:
- 1 cup creamy peanut butter
- 1/2 cup powdered sugar
- 1/2 teaspoon vanilla extract
- 1/4 teaspoon salt
Chocolate Layer:
- 1 1/2 cups semi-sweet chocolate chips
- 1/2 cup heavy cream
Instructions
- Preheat the oven: Preheat the oven to 350°F (175°C).
- Prepare the crust: Mix graham cracker crumbs, sugar, and melted butter. Press mixture into a greased 8×8-inch dish and bake.
- Make the peanut butter layer: Combine peanut butter, powdered sugar, vanilla, and salt. Spread over the cooled crust.
- Prepare the chocolate layer: Melt chocolate chips and cream together, then pour over the peanut butter layer.
- Chill: Refrigerate for at least 2 hours until set. Cut into bars and serve.
Notes
- For added crunch, top with chopped peanuts before chilling.
- Try using crunchy peanut butter for a different texture.
Nutrition
- Serving Size: 1 bar
- Calories: 280
- Sugar: 20g
- Sodium: 105mg
- Fat: 18g
- Saturated Fat: 8g
- Unsaturated Fat: 8g
- Trans Fat: 0g
- Carbohydrates: 26g
- Fiber: 2g
- Protein: 5g
- Cholesterol: 15mg


