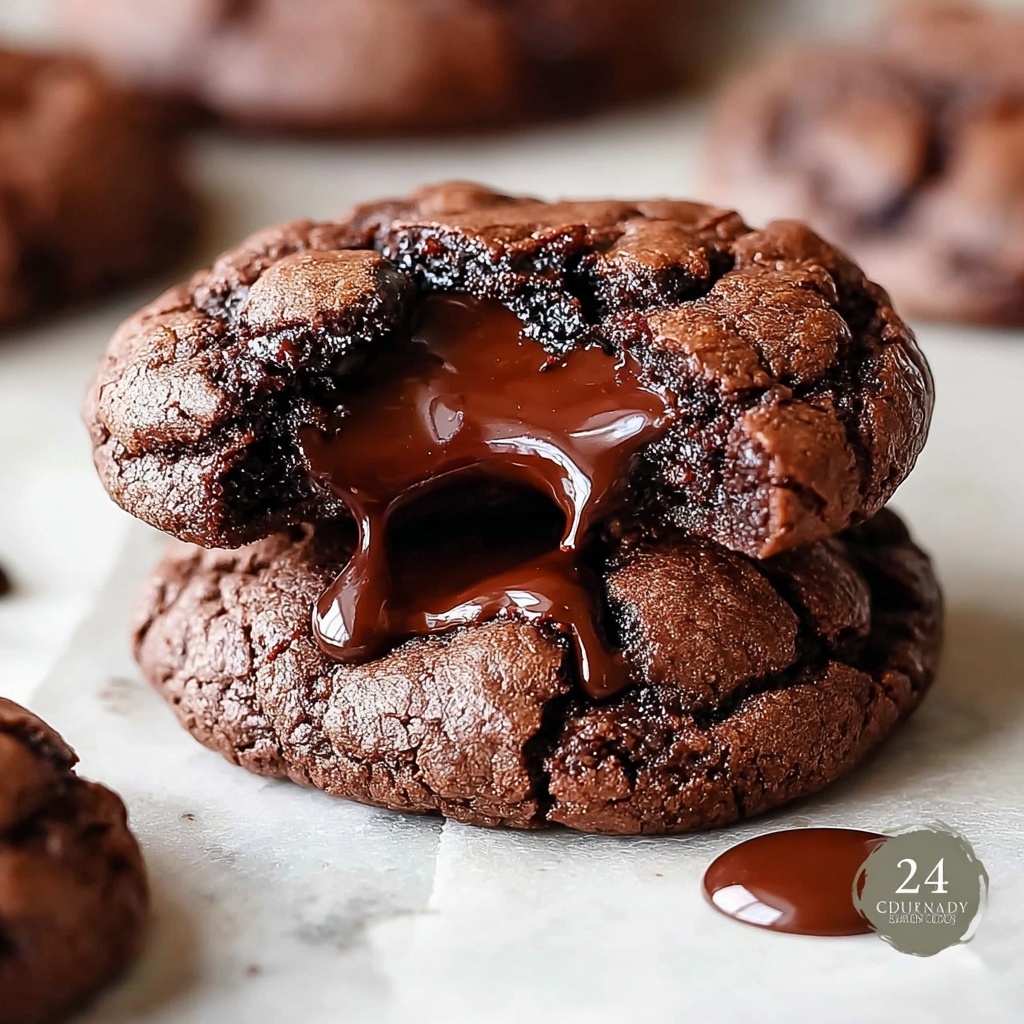
There’s something utterly magical about the moment when you bite into a cookie and find a warm, gooey center oozing out, and that’s exactly what this Chocolate Lava Cookies Recipe promises to deliver. These cookies are a perfect combination of crisp edges, tender dough, and that irresistible melted chocolate core that feels like a delightful secret waiting to be discovered. Whether you’re baking for a cozy night in or impressing friends at your next gathering, this recipe brings that wow factor with every bite.
Ingredients You’ll Need
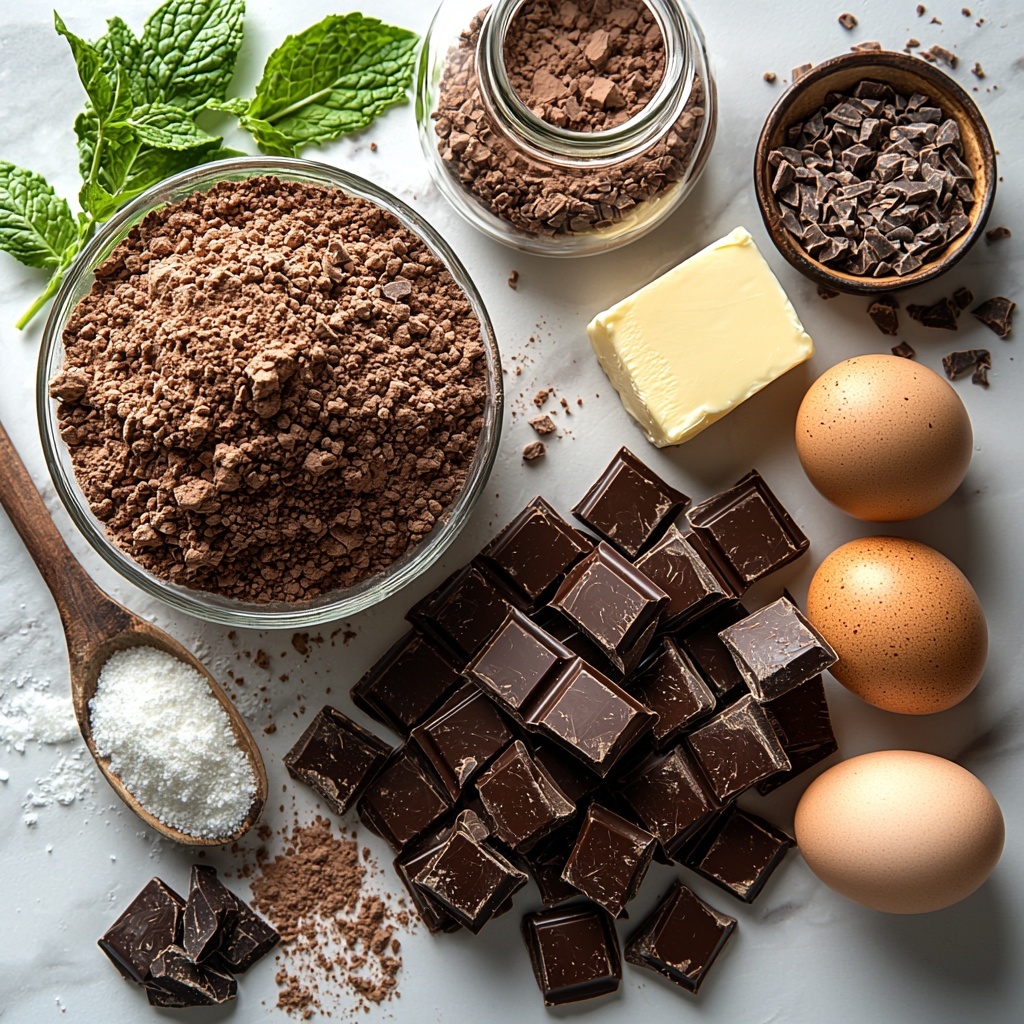
This Chocolate Lava Cookies Recipe calls for simple, pantry-friendly ingredients that each play a crucial role in crafting the perfect texture and flavor. From the rich cocoa powder that provides depth to the luscious semi-sweet chocolate that creates the molten center, every component is essential and easy to find.
- 1 cup all-purpose flour: The base of your cookie dough, giving structure and softness.
- 1/2 cup unsweetened cocoa powder: Adds rich chocolate flavor and a nice dark color.
- 1 teaspoon baking powder: Helps the cookies rise just enough for a tender bite.
- 1/2 teaspoon salt: Enhances all the chocolatey goodness and balances sweetness.
- 10 oz semi-sweet chocolate, divided: Part melts into the dough and part goes inside the cookie for the molten surprise.
- 1/2 cup unsalted butter: Provides richness and a melt-in-your-mouth texture.
- 3/4 cup granulated sugar: Sweetens the dough and helps achieve a beautiful crisp edge.
- 1/2 cup brown sugar, packed: Adds moisture and a slight caramel undertone to the cookies.
- 2 large eggs: Bind everything together and add lift.
- 1 teaspoon vanilla extract: Rounds out the flavors with a warm, aromatic touch.
How to Make Chocolate Lava Cookies Recipe
Step 1: Mix the Dry Ingredients
Start by whisking together the flour, cocoa powder, baking powder, and salt in a medium bowl. Getting these dry ingredients well combined before mixing with the wet ones ensures an even flavor and texture throughout your cookies.
Step 2: Melt Chocolate and Butter
Melt 6 ounces of the chopped chocolate with the butter in a microwave-safe bowl, gently heating until smooth. Let it cool slightly so it doesn’t cook the eggs later but remains warm enough to blend beautifully into the mixture.
Step 3: Whisk Sugars, Eggs, and Vanilla
In a large bowl, whisk together the granulated sugar, brown sugar, eggs, and vanilla extract until everything is nicely combined and slightly fluffy. This mixture forms the creamy base that balances the dense chocolate flavors.
Step 4: Combine Wet and Dry Ingredients
Slowly stir the melted chocolate and butter into the sugar-egg mixture. Next, fold in the dry ingredients just until combined. Remember, overmixing can make cookies tough — a gentle touch keeps them tender.
Step 5: Chill the Dough
Cover the dough and refrigerate for a few hours. Chilling firms the dough, preventing the cookies from spreading too much when baked, and the flavors get to marry, intensifying the chocolate goodness.
Step 6: Prepare to Bake
Preheat your oven to 350°F (175°C), and line baking sheets with parchment paper. This setup ensures your cookies bake evenly and are easy to lift off without sticking.
Step 7: Shape the Cookies
Divide the chilled dough into 12 equal portions. Flatten each portion slightly, place a chunk of the remaining chopped chocolate in the center, and seal the dough around it to encase that delicious molten heart perfectly.
Step 8: Bake to Perfection
Bake the cookies for 10-12 minutes, just until the edges are set but the centers still look slightly soft. This timing is crucial for that gooey lava effect.
Step 9: Cool and Enjoy
Let the cookies cool on the baking sheets for about 5 minutes. This brief rest lets them firm up just enough to transfer to a wire rack without losing the molten center delight.
How to Serve Chocolate Lava Cookies Recipe
Garnishes
A simple dusting of powdered sugar instantly adds elegance and extra sweetness, but don’t hesitate to get creative with a sprinkle of flaky sea salt or a scattering of chopped nuts for crunch. A scoop of vanilla ice cream on the side turns these warm treasures into an unforgettable dessert experience.
Side Dishes
Pair these cookies with a refreshing glass of cold milk or a cup of rich espresso to balance the intense chocolate flavor. Fresh berries or a drizzle of raspberry coulis can also add a bright contrast that elevates the overall plate.
Creative Ways to Present
For a special occasion, serve the cookies warm in individual ramekins topped with whipped cream and a cherry. You could also sandwich two cookies with a scoop of ice cream between for a decadent lava cookie ice cream sandwich that’s sure to impress.
Make Ahead and Storage
Storing Leftovers
Place any leftover cookies in an airtight container at room temperature, and they’ll stay fresh for about 2 to 3 days. Keep in mind that the molten center is best enjoyed soon after baking for that perfect gooey texture.
Freezing
You can freeze the cookie dough balls before baking by wrapping them tightly and placing them in a freezer-safe container. When you’re ready, bake straight from frozen, adding a couple of extra minutes to the baking time for perfect, fresh-from-the-oven results anytime.
Reheating
Reheat baked cookies in a warm oven or microwave for just a few seconds to revive their lava center’s melty magic. Be careful not to overheat, or the cookie might lose its tenderness.
FAQs
Can I use dark chocolate instead of semi-sweet?
Absolutely! Dark chocolate will deepen the flavor and add a slightly more intense bitterness, which pairs wonderfully with the sweetness of the cookie itself.
Why do I need to chill the dough?
Chilling solidifies the fats and allows the flavors to meld, resulting in less spreading during baking and a richer taste in the finished cookie.
How do I know when the cookies are done?
Look for cookies with firm edges and centers that still look a little soft or slightly underbaked—that’s the key to that molten center you’re craving.
Can I make these gluten-free?
Yes, you can substitute the all-purpose flour with a gluten-free blend, but you might need to adjust the baking time slightly and ensure the blend includes xanthan gum for proper structure.
What’s the best way to store these cookies if I want to keep the lava center?
Store them at room temperature in an airtight container for up to 2 days and reheat briefly before serving to maintain that luscious lava center.
Final Thoughts
If you’ve been searching for a cookie that elevates your chocolate cravings to the next level, this Chocolate Lava Cookies Recipe is your new best friend. With its rich, molten center and tender crumb, it’s an easy-to-make treat that feels special every time you bake it. So go ahead and dive into the joy of warm, gooey chocolate—your taste buds will thank you!
Print
Chocolate Lava Cookies Recipe
- Prep Time: 15 minutes
- Cook Time: 12 minutes
- Total Time: 3 hours 27 minutes
- Yield: 12 cookies
- Category: Dessert
- Method: Baking
- Cuisine: American
Description
Delight in these rich and gooey Chocolate Lava Cookies, featuring a fudgy center that oozes melted chocolate with every bite. Perfect for chocolate lovers craving a warm, decadent dessert that combines the texture of a classic cookie with the melt-in-your-mouth magic of a lava cake.
Ingredients
Dry Ingredients
- 1 cup all-purpose flour
- 1/2 cup unsweetened cocoa powder
- 1 teaspoon baking powder
- 1/2 teaspoon salt
Chocolate & Butter
- 10 oz semi-sweet chocolate, divided (6 oz chopped for melting, 4 oz chunks for filling)
- 1/2 cup unsalted butter
Wet Ingredients
- 3/4 cup granulated sugar
- 1/2 cup packed brown sugar
- 2 large eggs
- 1 teaspoon vanilla extract
Instructions
- Combine Dry Ingredients: In a medium bowl, whisk together the all-purpose flour, unsweetened cocoa powder, baking powder, and salt until evenly mixed.
- Melt Chocolate and Butter: In a microwave-safe bowl, melt 6 oz of chopped semi-sweet chocolate with the unsalted butter until smooth, stirring every 20-30 seconds to prevent burning. Allow it to cool slightly to avoid cooking the eggs later.
- Mix Wet Ingredients: In a large bowl, whisk together granulated sugar, brown sugar, eggs, and vanilla extract until creamy and smooth. Then stir in the melted chocolate and butter mixture until fully incorporated.
- Combine Wet and Dry: Gradually fold the dry ingredients into the wet chocolate mixture gently until just combined, being careful not to overmix to preserve the cookie’s tender texture.
- Chill the Dough: Cover the cookie dough and refrigerate for at least a few hours or overnight to firm up the dough and enhance flavor development.
- Preheat Oven and Prepare Baking Sheets: Preheat the oven to 350°F (175°C) and line baking sheets with parchment paper to prevent sticking.
- Shape Cookies: Divide the chilled dough into 12 equal portions. Flatten each portion slightly, place a chunk of the remaining 4 oz semi-sweet chocolate in the center, and seal the dough around it to form a ball.
- Bake: Bake the cookies in the preheated oven for 10-12 minutes, until the edges are set but the centers still look slightly soft to achieve the molten lava effect.
- Cool: Allow the cookies to cool on the baking sheets for about 5 minutes to set before transferring them to a wire rack to cool completely. Enjoy warm for best lava melt experience.
Notes
- For extra flavor, refrigerate dough overnight to let the cocoa and chocolate meld.
- Use high-quality semi-sweet chocolate for best tasting molten centers.
- Avoid overbaking to keep the center molten and gooey.
- Cookies can be stored in an airtight container at room temperature for up to 3 days.
- Reheat gently in microwave for 10-15 seconds to revive the lava center before serving.


