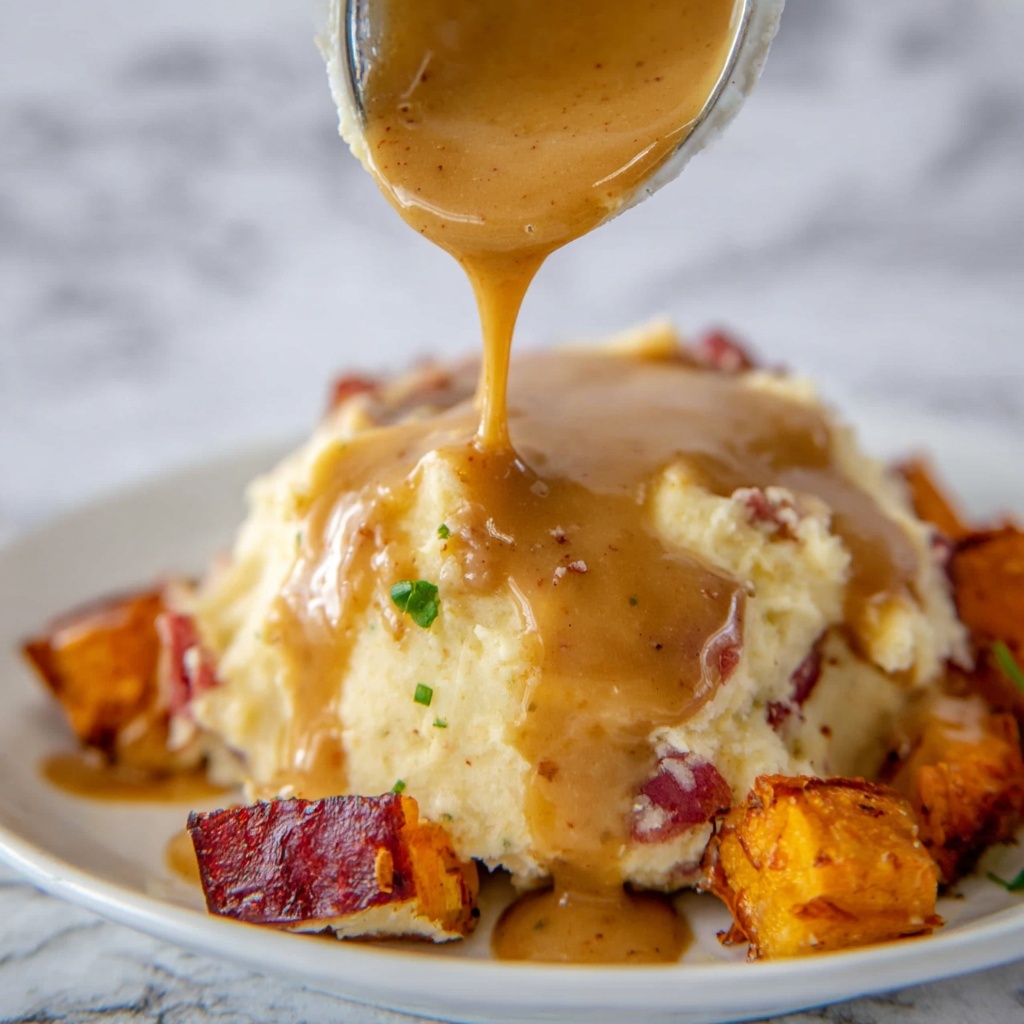
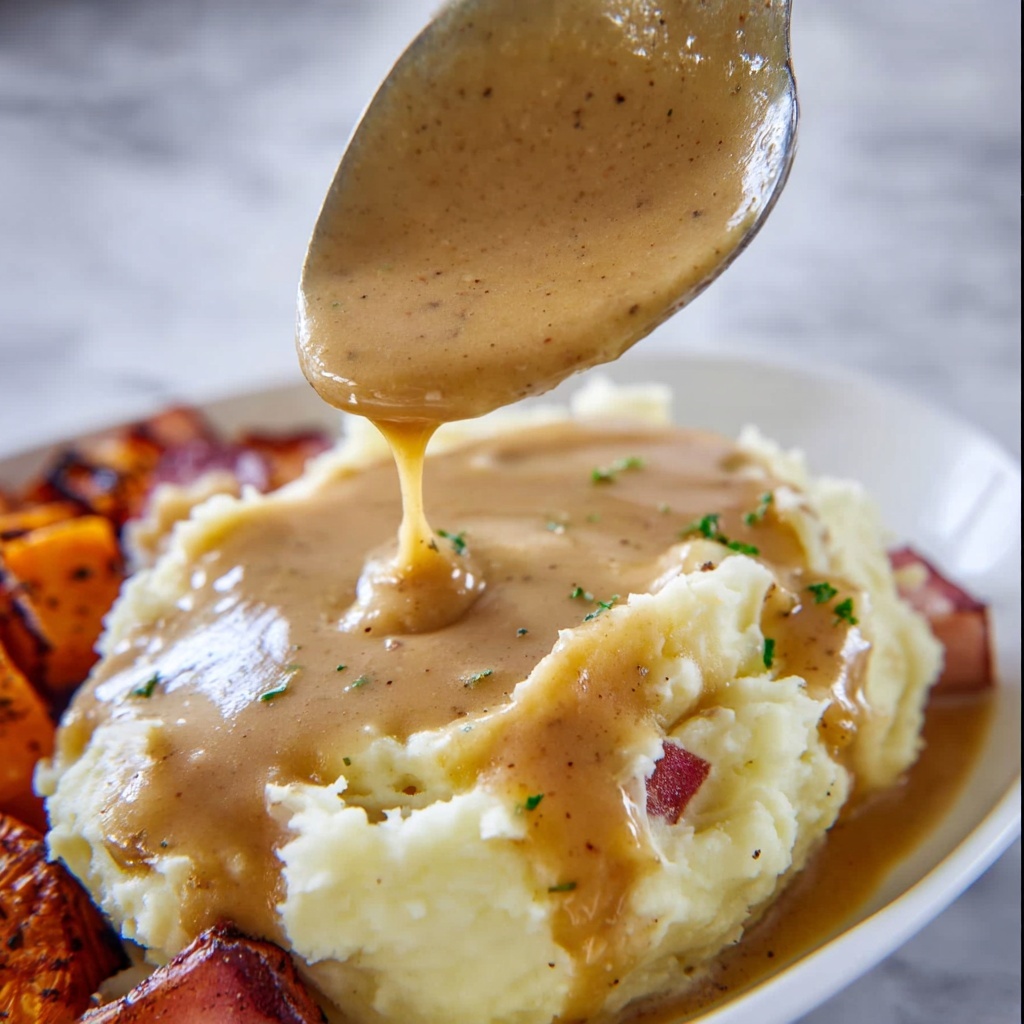
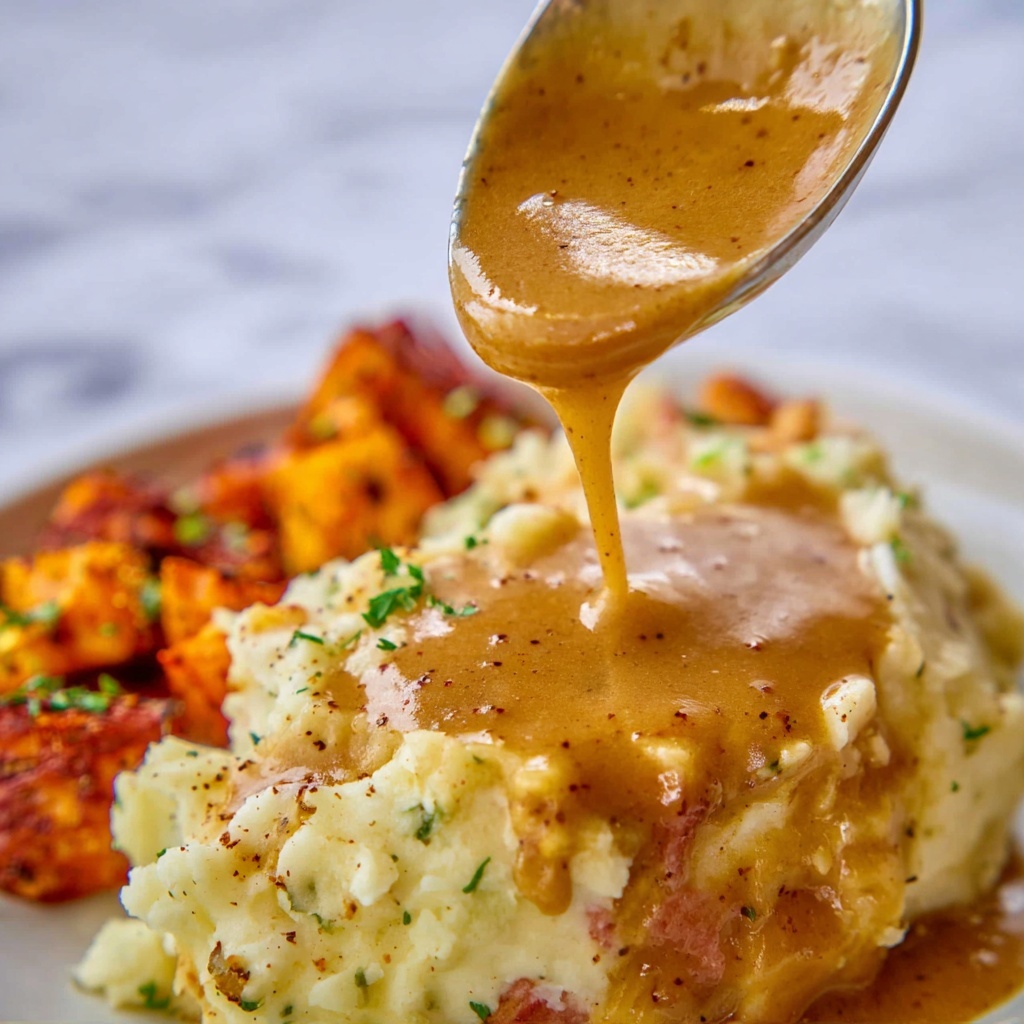
If you’re looking to elevate your holiday feast or any special turkey dinner, nothing beats the rich, savory goodness of the Best Make Ahead Gravy for Turkey Recipe. This recipe is a game-changer because it allows you to prepare your gravy well in advance while locking in all those deep, roasted flavors that come from slow-cooked turkey wings and perfectly seasoned broth. The gravy turns out silky, flavorful, and comforting — the kind of sauce that never fails to bring everyone back for seconds.
Ingredients You’ll Need
The beauty of this recipe lies in its simple, straightforward ingredients, each chosen to build that classic, mouthwatering gravy flavor and luscious texture. From fresh turkey parts to aromatic vegetables and pantry staples, everything plays a crucial role in this easy yet impressive gravy.
- 4 turkey wings or other parts (4 to 5 pounds total): These add that unbeatable turkey flavor and richness to the stock.
- 2 medium onions (roughly chopped): Onions deepen the broth with their sweetness and aroma as they roast.
- 1 cup water: Helps deglaze the roasting pan and lift all those flavorful browned bits.
- 6 cups chicken broth (*): Forms the base of the gravy; use quality broth for best results.
- 1-2 carrots (chopped): Adds subtle sweetness and body to the stock.
- ½ teaspoon thyme (dried): Provides a gentle herbal note that complements the turkey perfectly.
- 3/4 cup all-purpose flour: Essential for thickening the gravy to that perfect consistency.
- 2 cups chicken broth (*): Used in the flour slurry, it ensures the gravy remains silky without lumps.
- 2 tablespoons butter: Adds richness and a smooth finish to the gravy.
- 1/2 teaspoon ground pepper (more to taste): Delivers a subtle kick to balance the flavors.
- 1/2 to 1 teaspoon salt: Highlights all the natural flavors and seasoning.
How to Make Best Make Ahead Gravy for Turkey Recipe
Step 1: Roast the Turkey Parts and Onions
Start by preheating your oven to 400 degrees F and lightly greasing a large baking sheet. Place the turkey wings or parts along with roughly chopped onions on the sheet. Roast them for about an hour until the turkey is nicely browned on top. This roasting step is crucial as it brings a deep, caramelized flavor to your broth that really sets this gravy apart.
Step 2: Transfer and Deglaze
Once roasted, transfer the turkey parts to a large stockpot. Don’t throw away those browned bits stuck to the pan! Use a cup of water and medium heat on the stove to loosen all the flavorful bits, stirring with a wooden spoon. Pour that liquid and those bits into your stockpot — this is pure gold for your gravy base.
Step 3: Build Your Stock
Add 6 cups of chicken broth (or a combination of water and turkey base if that’s what you have), the chopped carrots, and dried thyme into the pot. Simmer uncovered for around 1.5 hours. This gentle simmer extracts every ounce of flavor from the turkey parts and veggies.
Step 4: Strain and Skim the Fat
Remove the turkey parts (you can save any meat if you like, though it may be tough). Strain the broth through a colander, discarding or snacking on the veggies. For the creamiest gravy, cool the broth in the fridge or freezer briefly to skim off any excess fat from the surface.
Step 5: Make the Roux and Thicken
Bring the skimmed broth back to a gentle boil. Mix the 3/4 cup flour with 2 cups of the broth, whisking until smooth with no lumps. Slowly whisk this mixture into the boiling broth. Let it boil for 5 minutes while stirring constantly to cook out the flour taste and thicken the gravy beautifully.
Step 6: Final Seasoning Touches
Stir in butter, salt, and pepper. Taste and adjust seasoning if needed — add more salt, pepper, thyme, or turkey base up to one teaspoon for a flavor boost. Let it cool completely before freezing or refrigerating.
How to Serve Best Make Ahead Gravy for Turkey Recipe
Garnishes
A sprinkle of freshly chopped parsley or thyme leaves adds a pop of color and a fresh herbaceous note that complements the deep, savory gravy.
Side Dishes
This gravy pairs beautifully with classic sides like fluffy mashed potatoes, savory stuffing, roasted vegetables, or buttery dinner rolls — it’s that finishing touch that ties the whole meal together.
Creative Ways to Present
For a charming presentation, serve the gravy in a beautiful gravy boat, or drizzle it over individual slices of turkey and mashed potatoes on your plate so each bite is a luscious blend of flavors. You can also offer small ramekins of gravy for guests to pour as much as they like.
Make Ahead and Storage
Storing Leftovers
Store leftover gravy in an airtight container in the refrigerator for up to four days. Be sure to cool the gravy at room temperature first to keep it fresh and safe.
Freezing
This recipe freezes wonderfully. Portion your gravy into ziplock bags or freezer-safe containers, removing as much air as possible. Freeze for up to three months, making it a lifesaver to have handy for busy holiday cooking days.
Reheating
Thaw frozen gravy overnight in the fridge, then gently reheat on the stovetop over low heat, stirring occasionally. If reheating from chilled leftovers, warming slowly ensures the gravy remains smooth and velvety. You can add a splash of broth or water if it’s too thick.
FAQs
Can I use turkey drippings instead of turkey wings for the stock?
Absolutely! If you have plenty of flavorful drippings from your roasted bird, they can add tremendous depth. However, using wings or parts helps create a richer, more complex stock for your make ahead gravy.
What if I don’t have chicken broth on hand?
You can use water plus turkey or chicken bouillon base as a substitute, but using a good quality broth always improves the taste and richness of the gravy.
Can I make this gravy completely dairy-free?
Yes! Simply omit the butter and replace it with a neutral oil or a dairy-free butter alternative when finishing the gravy. It’ll still be creamy and delicious.
How do I avoid lumps when thickening the gravy?
The key is whisking the flour with some cold broth first to create a smooth slurry before adding it to the hot broth. Slowly whisk it in while the broth is boiling to help it incorporate without clumping.
Is it okay to freeze gravy with the turkey meat inside?
It’s best to freeze the gravy and turkey meat separately since the meat can become tough after freezing and reheating. Keep the gravy smooth and silky by freezing it alone.
Final Thoughts
This Best Make Ahead Gravy for Turkey Recipe is a delightful way to take your turkey meal to the next level with minimal stress. Preparing the gravy ahead lets all those flavors develop fully, giving you silky, rich sauce with every spoonful. I can’t wait for you to try it and make it part of your own holiday traditions or cozy dinners any time of the year!
Print
Best Make Ahead Gravy for Turkey Recipe
- Prep Time: 15 minutes
- Cook Time: 3 hours
- Total Time: 3 hours 15 minutes
- Yield: 12 servings
- Category: Sauce/Gravy
- Method: Roasting and Stovetop
- Cuisine: American
Description
This Best Make Ahead Gravy for Turkey recipe delivers rich, flavorful gravy made from roasted turkey wings and aromatic vegetables. Perfect for preparing in advance, it simmers slowly to develop a deep, savory taste and smooth texture, making it an ideal accompaniment for your holiday turkey or any poultry dish.
Ingredients
Turkey and Broth Base
- 4 turkey wings or other parts (4 to 5 pounds total)
- 2 medium onions, roughly chopped
- 1 cup water
- 6 cups chicken broth (or 6 cups water with 6 teaspoons turkey base)
- 1–2 carrots, chopped
- ½ teaspoon dried thyme
Gravy Thickening and Seasoning
- ¾ cup all-purpose flour
- 2 cups chicken broth
- 2 tablespoons butter
- ½ teaspoon ground pepper (more to taste)
- ½ to 1 teaspoon salt
Instructions
- Preheat Oven: Preheat your oven to 400°F (204°C). Lightly grease a large baking sheet to prepare for roasting the turkey parts.
- Prepare Turkey and Onions: Arrange the turkey wings or parts on the baking sheet. Scatter the roughly chopped onions evenly over the pan.
- Roast Turkey: Roast the turkey parts in the oven for 1 hour to 1 hour and 15 minutes until browned on top and cooked through.
- Transfer Turkey to Stock Pot: Remove the roasted turkey parts from the oven and place them into a large stock pot.
- Deglaze the Baking Sheet: Place the baking sheet over two burners on medium heat. Add 1 cup of water and use a wooden spoon to scrape up all the browned bits from the pan. Pour this flavorful liquid into the stock pot with the turkey parts.
- Add Broth and Vegetables: Add 6 cups of chicken broth (or 6 cups water with turkey base), the chopped carrots, and dried thyme into the pot.
- Simmer the Stock: Simmer the mixture uncovered for approximately 1 hour and 30 minutes to develop flavor.
- Remove Turkey Parts: Take out the turkey parts from the pot and set them aside. The meat can be saved for other recipes but may be tough.
- Strain the Stock: Pour the broth and vegetables through a colander into a bowl. Discard or enjoy the softened vegetables as desired.
- Chill the Broth: Place the bowl in the freezer for about 20 minutes to allow the fat to solidify on top, making it easy to skim off.
- Return Broth to Pot and Boil: Pour the defatted broth back into the pot and bring it to a gentle boil.
- Prepare Flour Slurry: In a separate bowl, whisk together the ¾ cup flour with 2 cups of chicken broth, removing all lumps.
- Thicken Gravy: Slowly whisk the flour mixture into the boiling broth. Continue to boil for 5 minutes while stirring constantly to avoid lumps and cook out the flour taste.
- Finish Seasoning: Stir in the butter, ground pepper, and salt. Taste and adjust seasoning, adding more salt, pepper, thyme, or up to 1 teaspoon turkey base if desired.
- Cool and Store: Let the gravy cool before transferring it to ziplock bags for freezing.
- Reheat and Use: Thaw the gravy overnight in the refrigerator or reheat directly in the microwave on the day of serving.
- Optional Pan Dripp Addition: If making turkey on the same day, add the fat-skimmed pan drippings from the roasted turkey to the gravy for extra richness.
Notes
- This gravy can be made several days ahead and freezes well.
- Skimming the fat after chilling improves the flavor and texture.
- Using turkey base is optional but enhances the savory taste.
- For a gluten-free version, substitute the all-purpose flour with a gluten-free flour blend or cornstarch slurry.
- The turkey wings and parts provide excellent gelatin for a rich-bodied gravy.


