Description
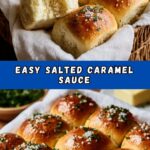
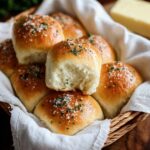
These Best Garlic Bread Rolls are soft, fluffy, and bursting with rich garlic butter flavor, perfect as a side or snack. Made with simple ingredients and an easy homemade dough, they have a golden crust thanks to an egg wash and a fragrant burst of fresh parsley. Ideal for garlic lovers seeking a delightful, homemade bread experience.
Ingredients
Scale
Garlic Butter
- 4 tablespoons unsalted butter
- 3 fresh garlic cloves, minced finely
- 2 tablespoons fresh parsley, chopped
Dough
- 3 ½ cups all-purpose flour
- 2 teaspoons granulated sugar
- 2 ¼ teaspoons instant yeast (or 2 teaspoons active dry yeast activated in warm milk)
- 1 ½ teaspoons sea salt
- 1 cup whole milk, warmed (about 110°F / 43°C)
- 1 large egg
For the Egg Wash
- 1 large egg, beaten with 1 tablespoon water
Optional Ingredients
- Shredded parmesan or mozzarella cheese (for stuffing or topping)
- Fresh herbs swap: oregano, rosemary, or thyme
- Honey or maple syrup (can replace sugar for subtle sweetness)
Instructions
- Prepare the Garlic Butter: In a small saucepan over medium heat, melt the unsalted butter and stir in the finely minced fresh garlic. Cook until the garlic sizzles and releases a fragrant aroma, about 1-2 minutes. Remove from heat and let the butter cool to room temperature.
- Mix the Dry Ingredients: In a large bowl or the bowl of a stand mixer, combine all-purpose flour, granulated sugar, sea salt, instant yeast, and chopped fresh parsley. Whisk together briefly to evenly distribute all the ingredients.
- Add the Wet Ingredients and Knead: Pour warm whole milk, cooled garlic butter, and one large egg into the dry ingredients. Using a dough hook attachment, knead the mixture on low speed until the dough starts to pull away from the sides of the bowl and feels soft but slightly tacky, approximately 10 minutes.
- Divide and Shape the Dough: Transfer the dough to a lightly floured surface. Using a kitchen scale for accuracy, divide it into 12 equal portions. Shape each piece into a smooth ball by tucking the edges underneath and rolling gently under your palm on the counter.
- First Rise: Place the shaped dough balls on a baking sheet lined with parchment paper or a lightly greased pan, spacing them evenly. Cover the dough with a clean kitchen towel or plastic wrap. Let the dough rise in a warm, draft-free area until doubled in size, about 1 to 1.5 hours.
- Preheat and Egg Wash: Preheat the oven to 375°F (190°C). Just before baking, brush the tops of the risen rolls gently with the beaten egg wash to achieve a shiny, golden crust.
- Bake the Rolls: Bake the garlic bread rolls in the preheated oven for 18 to 20 minutes or until the tops are golden brown and the rolls sound hollow when tapped.
- Cool and Serve: Remove the rolls from the oven and transfer to a wire rack. Let them cool slightly before serving warm. For extra indulgence, sprinkle with additional fresh herbs or grated cheese while still warm.
Notes
- Use high-quality unsalted butter for the best flavor in the garlic butter.
- If substituting active dry yeast, dissolve and activate it first in warm milk with a pinch of sugar before mixing with dry ingredients.
- You can add shredded cheese inside the rolls before baking or sprinkle on top after the egg wash for a cheesy variation.
- Herbs like oregano, rosemary, or thyme can be swapped for parsley to customize flavor.
- Honey or maple syrup can replace sugar for a subtle natural sweetness.
- Use a kitchen scale for consistent roll sizes and even baking.
- Ensure the milk is warm but not hot to avoid killing the yeast.