If you’re searching for a delightful treat that brings a touch of whimsy to your baking adventures, this Bear Paw Cookies Recipe has got you covered. These charming cookies are not only a feast for the eyes but also a delicious combination of soft, buttery dough and rich chocolate accents. Perfect for sharing with friends, family, or even indulging in solo, these cookies bring warmth and fun to any occasion while delivering a texture and flavor you’ll fall in love with instantly.
Ingredients You’ll Need
Just a handful of simple, everyday ingredients come together beautifully to create the perfect Bear Paw Cookies Recipe. Each element plays a crucial role, from the creamy butter that ensures softness to the rich chocolate that adds character and charm.
- 1 cup unsalted butter (softened): Brings a rich, creamy base that makes the cookies wonderfully tender.
- 1 cup sugar: Adds just the right amount of sweetness and helps create a lovely golden color.
- 1 egg: Acts as the glue to bind everything perfectly while contributing to the cookie’s softness.
- 1 tsp vanilla extract: Enhances the flavor with a warm, inviting aroma.
- 2 cups flour: The foundation of the dough, providing structure and balance.
- 1 tsp baking powder: Helps the cookies rise gently and stay light.
- 1/2 tsp baking soda: Works with baking powder to make the texture tender and chewy.
- 1/4 tsp salt: Elevates all the other flavors and balances the sweetness.
- 1 bag of Ghirardelli dark chocolate melting wafers (24 wafers): Used for the cookie’s signature paw pad, melting perfectly for a glossy finish.
- 1 bag of semi-sweet chocolate chips: Just three chips per cookie create the bear’s claws with a delightful chocolate pop.
How to Make Bear Paw Cookies Recipe
Step 1: Get Your Oven Ready
Preheat your oven to 350 degrees to ensure it’s at the perfect temperature for even baking. This step is crucial because a stable heat helps cookies bake through without drying out.
Step 2: Prepare Your Baking Surface
Line your cookie sheet with a cookie mat or parchment paper. This simple preparation will prevent the cookies from sticking and makes cleanup a breeze afterward.
Step 3: Cream the Butter and Sugar
Using a stand mixer, beat together the softened butter and sugar until light and fluffy. This step builds the cookie’s tender texture and adds that subtle sweetness we all crave.
Step 4: Add the Egg and Vanilla
Mix in one egg and a teaspoon of vanilla extract, combining these ingredients fully. The egg brings moisture and cohesion, while vanilla adds a hint of cozy warmth that complements the chocolate beautifully.
Step 5: Combine Dry Ingredients and Form the Dough
Add the baking soda, baking powder, salt, and flour into the wet mixture. Beat gently until a soft dough comes together — it should be smooth and easy to handle without sticking to your hands excessively.
Step 6: Shape Your Cookies
Scoop out dough using a small ice cream scoop, then roll each portion between your palms to form balls. For an extra touch, roll the balls in granulated sugar to add a subtle crunch and sparkle once baked.
Step 7: Arrange and Bake
Place each cookie ball on the lined baking sheet, spacing them about two inches apart to give room for spreading. Bake for 9 to 12 minutes, watching for a light golden edge—this means they’re perfectly baked.
Step 8: Add the Bear Paw Details
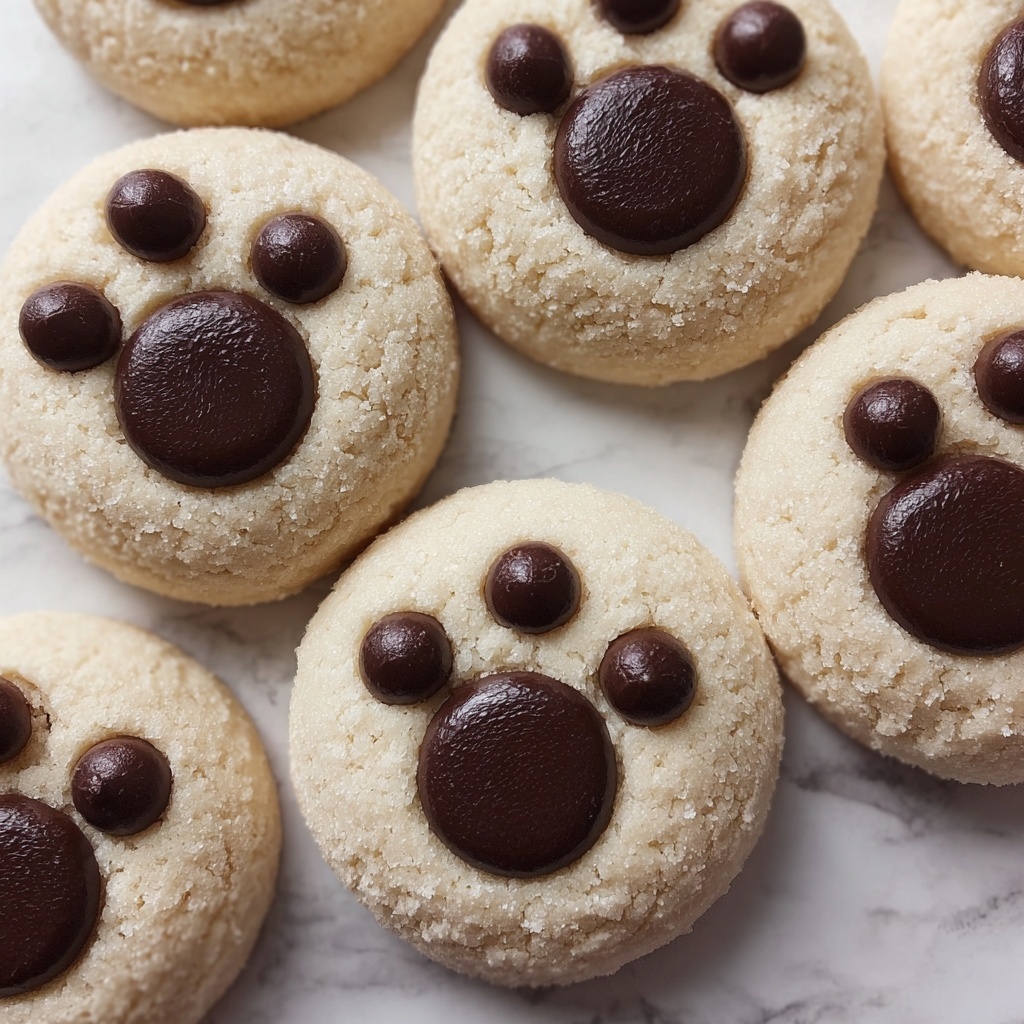
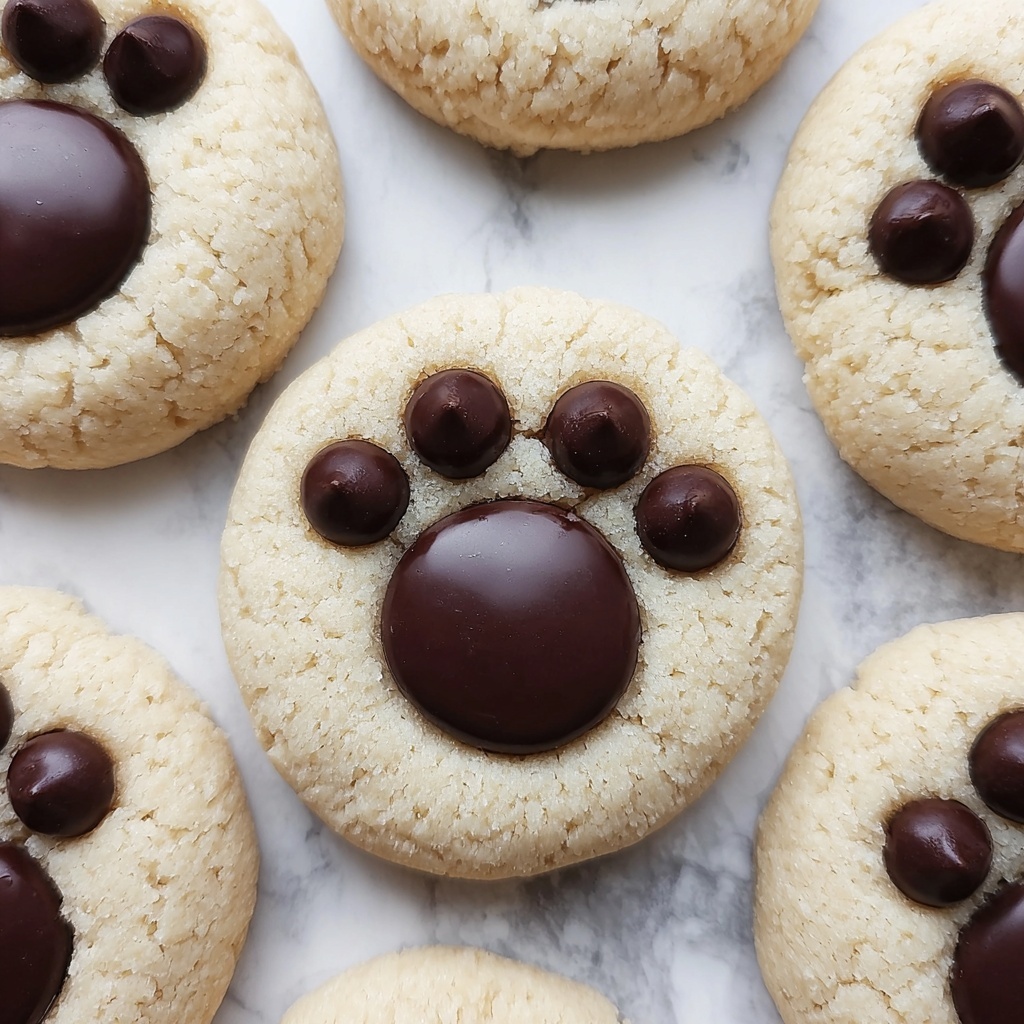
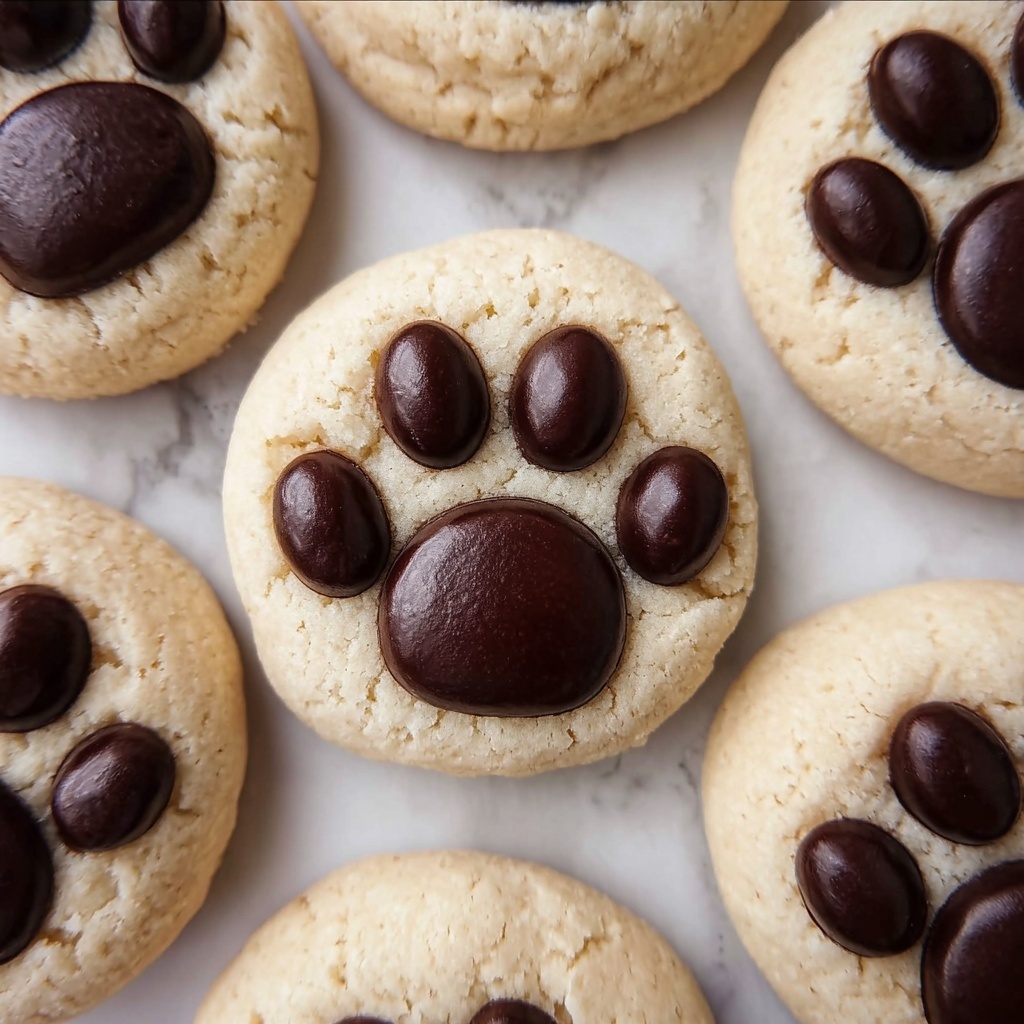
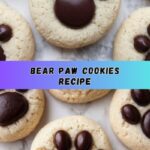
As soon as the cookies come out of the oven, gently press one dark chocolate melting wafer in the center to create the main pad of the paw. Then place three semi-sweet chocolate chips in an arc above the pad to form the bear’s claws. This step turns ordinary cookies into delightful bear paws with a playful character.
Step 9: Cooling Time
Allow the cookies to cool on the baking sheet for about 30 minutes. This waiting period lets the chocolate set properly and the cookies firm up just enough to enjoy without losing that tender texture.
Step 10: Repeat and Enjoy
Repeat all the above steps with the remaining dough until you have a full batch of adorable Bear Paw Cookies Recipe ready to delight your taste buds.
How to Serve Bear Paw Cookies Recipe
Garnishes
For an extra pop of elegance, sprinkle a dusting of powdered sugar over the cooled cookies or drizzle a little melted white chocolate for contrast. Fresh berries make a colorful and fresh garnish on the side, pairing nicely with the deep chocolate tones.
Side Dishes
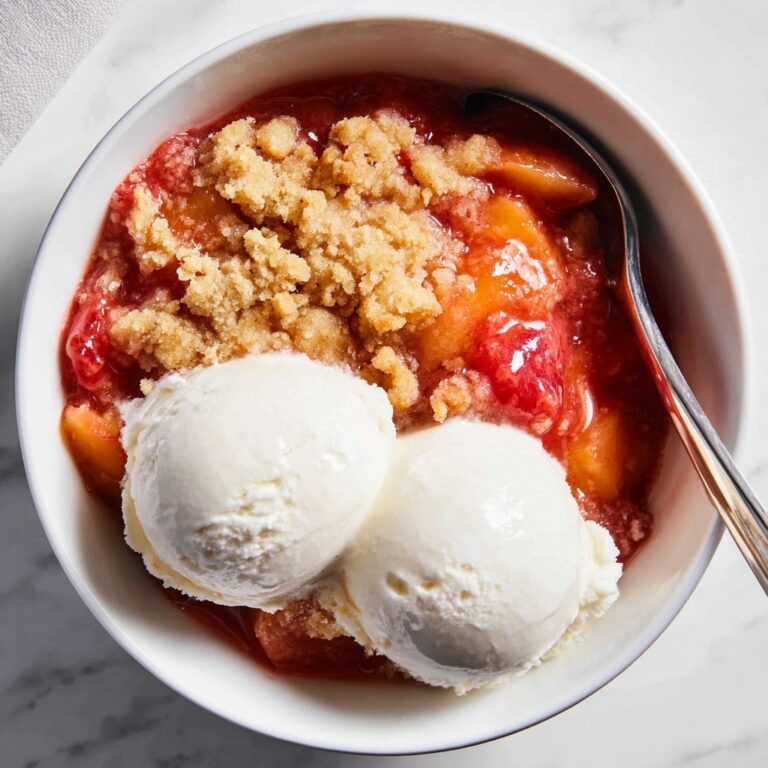
Bear Paw Cookies go wonderfully with a scoop of vanilla ice cream or a dollop of whipped cream for dessert. They’re also a fun companion to a warm cup of coffee, tea, or even a cold glass of milk for a classic treat that never fails.
Creative Ways to Present
Turn these cookies into a delightful gift by arranging them on a wooden platter lined with parchment and tied with rustic twine. Or create a themed party spread with other woodland-inspired treats to match the Bear Paw Cookies Recipe’s charming style.
Make Ahead and Storage
Storing Leftovers
Once cooled completely, store your Bear Paw Cookies in an airtight container at room temperature. They’ll stay fresh and delicious for up to a week, retaining their soft texture and chocolate charm.
Freezing
If you want to save some for later or prepare for a special occasion, freeze the unbaked dough balls on a tray until firm, then transfer them to a freezer-safe bag. Bake straight from frozen, adding a minute or two to the baking time for perfectly fresh cookies anytime.
Reheating
To bring back that fresh-baked feeling, warm your cookies briefly in the oven at 300 degrees for about 5 minutes. This will make the chocolate slightly melty again and revive the cookie’s soft texture without drying it out.
FAQs
Can I substitute the butter with margarine or oil?
For best results, stick to unsalted butter because it provides the right texture and flavor. Margarine or oil may alter the cookie’s consistency and taste, making them less tender and rich.
What if I don’t have chocolate melting wafers? Can I use regular chocolate?
While chocolate melting wafers are ideal for their smooth melting properties, you can use any good-quality chocolate pieces. Just make sure they soften nicely; otherwise, the paw pad might not have the same glossy look.
How do I make sure my cookies don’t spread too much during baking?
Chilling the dough before baking helps control spreading. Also, use parchment paper or a silicone mat, and ensure the dough balls are well chilled if you make them ahead or freeze.
Can I make these cookies gluten-free?
Yes, you can substitute the all-purpose flour with a gluten-free blend designed for baking. Keep in mind the texture may vary slightly, but the Bear Paw Cookies Recipe will still be delicious.
What is the best way to serve Bear Paw Cookies to kids?
Kids love fun shapes and themes, so serving these cookies with a glass of milk and maybe a little story about bears can make snack time extra special and memorable.
Final Thoughts
Getting into the kitchen to bake this Bear Paw Cookies Recipe is such a joyful experience, not only for the delicious outcome but for the fun in bringing these playful treats to life. Whether it’s a family gathering, a quirky dessert idea, or just a sweet pick-me-up, these cookies are sure to warm hearts and fill bellies. Give this recipe a try, and watch it become one of your all-time favorite baking adventures.
Print
Bear Paw Cookies Recipe
- Prep Time: 10 minutes
- Cook Time: 9-12 minutes
- Total Time: 40-45 minutes
- Yield: 24 cookies
- Category: Dessert, Cookie
- Method: Baking
- Cuisine: American
Description
Delightful Bear Paw Cookies featuring soft, buttery dough topped with rich Ghirardelli dark chocolate melting wafers and semi-sweet chocolate chips shaped like a bear’s paw and claws. Perfectly baked with a crisp edge and chewy center, these cookies are a fun and tasty treat for any occasion.
Ingredients
Dough
- 1 cup unsalted butter, softened
- 1 cup sugar
- 1 egg
- 1 tsp vanilla extract
- 2 cups all-purpose flour
- 1 tsp baking powder
- 1/2 tsp baking soda
- 1/4 tsp salt
Toppings
- 24 Ghirardelli dark chocolate melting wafers (1 per cookie)
- 72 semi-sweet chocolate chips (3 per cookie for the claws)
Instructions
- Preheat Oven: Preheat your oven to 350 degrees Fahrenheit to prepare for baking the cookies evenly.
- Prepare Baking Sheet: Line a cookie sheet with a silicone baking mat or parchment paper to prevent sticking and ensure easy cleanup.
- Cream Butter and Sugar: Using a stand mixer, cream together the softened butter and sugar until the mixture is light and fluffy, about 2-3 minutes.
- Add Wet Ingredients: Beat in the egg and vanilla extract until fully combined and smooth.
- Incorporate Dry Ingredients: Add baking soda, baking powder, salt, and flour to the wet mixture. Beat until a soft dough forms, ensuring even distribution of ingredients.
- Form Dough Balls: Using a small ice cream scoop, scoop dough portions and roll each into a ball with your hands. Optionally, roll the dough balls in extra sugar for a sweet crust.
- Arrange and Bake: Place cookie dough balls on the prepared cookie sheet about 2 inches apart to allow for spreading. Bake for 9-12 minutes until edges are lightly golden but centers are still soft.
- Add Chocolate Pads: Immediately after baking, press one Ghirardelli dark chocolate melting wafer into the center of each warm cookie to create the bear’s paw pad.
- Add Chocolate Claws: Place three semi-sweet chocolate chips above the paw pad on each cookie to form the claws.
- Repeat: Continue shaping, baking, and decorating the remaining dough until all cookies are done.
- Cool: Allow the cookies to cool on the baking sheet for about 30 minutes so the chocolate sets properly and flavors develop before enjoying.
Notes
- Use a silicone baking mat or parchment paper to avoid sticking and make cleanup easier.
- Rolling the dough balls in extra sugar before baking can add a slight crunch and sweetness on the exterior.
- Make sure to press the chocolate wafers into the cookies while they are still warm so they slightly melt and adhere well.
- Cooling the cookies on the baking sheet helps the chocolate set and prevents the cookies from breaking.
- Store cookies in an airtight container for up to 5 days to maintain freshness.
