
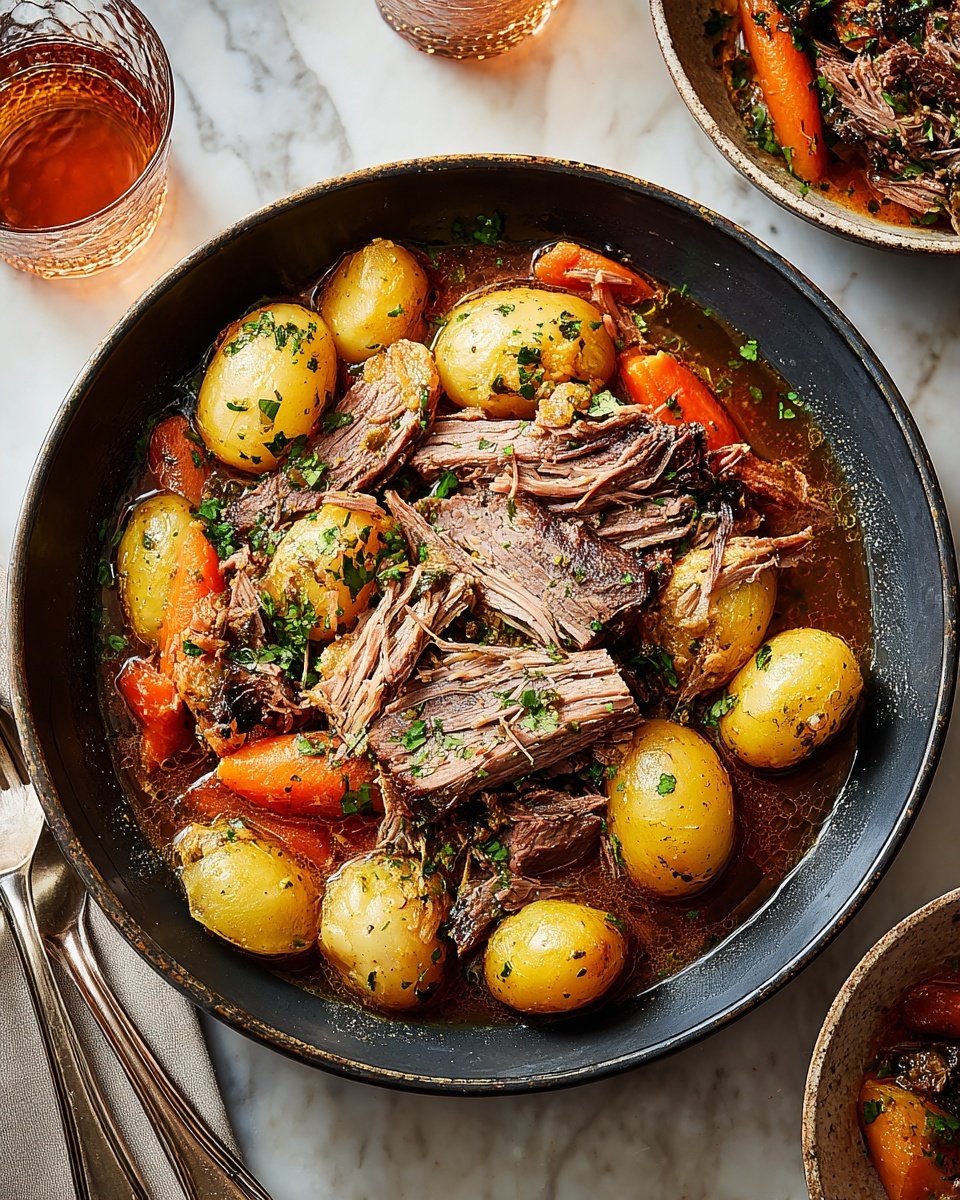
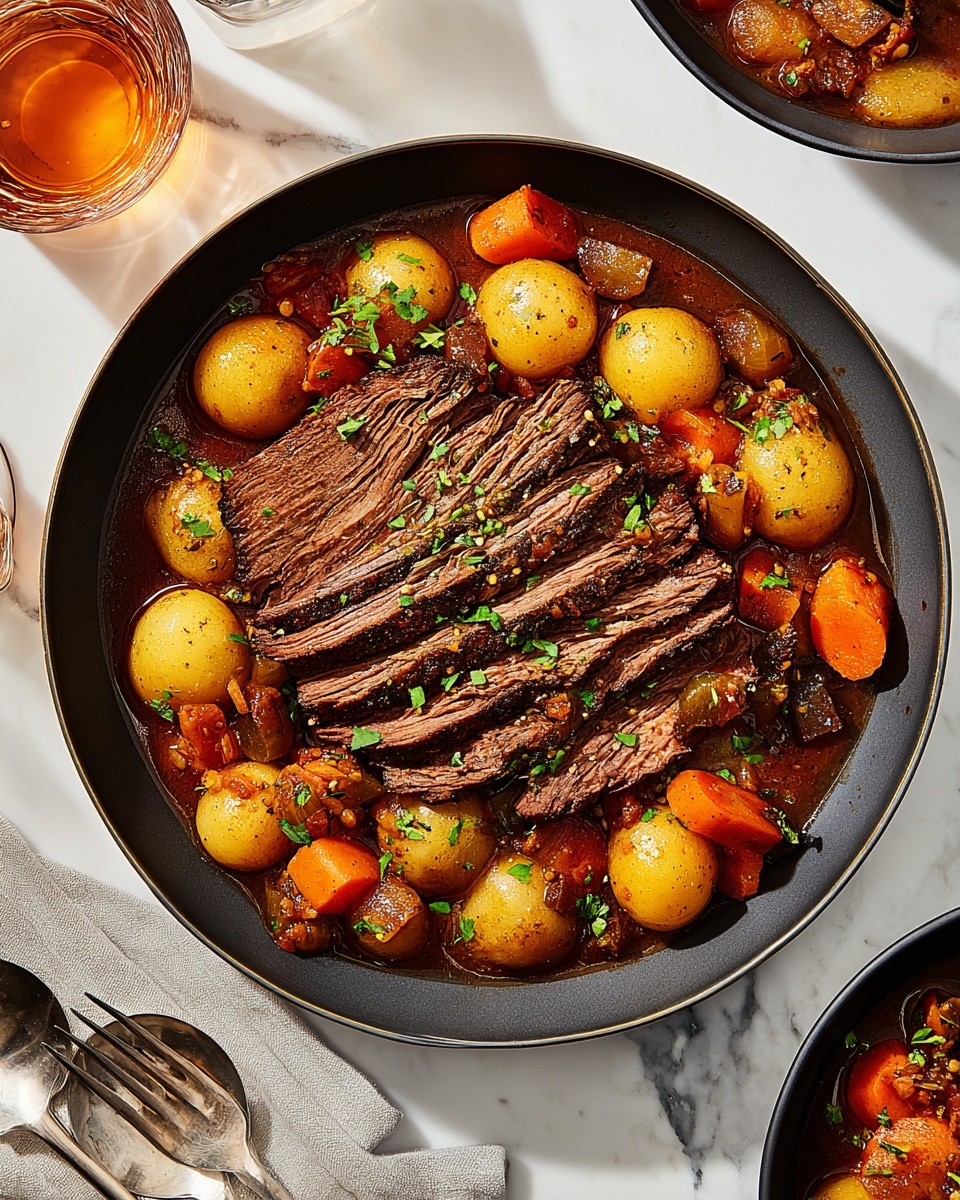
If you are craving a meal that feels like a warm hug on a plate, this Classic Pot Roast Recipe is exactly what you need. It’s a timeless comfort dish that brings together tender, slow-cooked chuck roast with hearty vegetables, all infused with rich, savory flavors from a simple combination of herbs, garlic, and beef broth. Whether you’re feeding a family or want to impress guests with minimal effort, this recipe turns humble ingredients into an unforgettable feast that’s perfect any day of the week.
Ingredients You’ll Need
The beauty of this Classic Pot Roast Recipe lies in its straightforward ingredients. Each one plays a critical role, whether it’s adding depth, sweetness, or a velvety texture to the dish. These essentials come together to create a dish that’s rustic yet refined.
- 3 lbs chuck roast: The ideal cut for pot roast due to its marbling and flavor that becomes melt-in-your-mouth tender.
- 4 medium carrots, chopped: They add natural sweetness and vibrant color to the stew.
- 2 large Yukon gold potatoes, diced: Creamy and buttery, these potatoes soak up the broth beautifully.
- 1 large yellow onion, chopped: Provides a richly aromatic base that layers flavor in every bite.
- 2 cups low-sodium beef broth: Keeps the roast moist and infuses the dish with deep umami character.
- 4 cloves garlic, minced: Adds a subtle punch of flavor that complements the herbs perfectly.
- 2 tsp fresh thyme leaves: Brings a fragrant, slightly earthy note to the pot roast.
- 1 tsp whole peppercorns: For a gentle, fresh spice that brightens the meat’s richness.
- 2 bay leaves: These impart a warm, herbal complexity during slow cooking.
- Salt and pepper to taste: Essential seasoning that enhances every ingredient.
- 2 tbsp olive oil: Used for searing to develop a flavorful crust on the meat.
How to Make Classic Pot Roast Recipe
Step 1: Prepare Your Vegetables
Start by chopping your carrots, potatoes, and onions into bite-sized pieces. This ensures they cook evenly and soak up all the wonderful flavors while the roast simmers gently. Having your ingredients prepped saves time later and keeps the process smooth.
Step 2: Sear the Roast
Heat olive oil in a skillet over medium-high heat, then season the chuck roast generously with salt and pepper. Sear the meat for about 4 to 5 minutes on each side until it develops a beautifully browned crust. This step is crucial because it locks in juices and adds layers of flavor right from the start.
Step 3: Add Aromatics and Broth
Transfer the seared roast to your slow cooker or Dutch oven. In the same skillet, sauté chopped onions and minced garlic until fragrant—about 1 to 2 minutes. This quick step wakes up their flavors and prevents waste. Pour the beef broth into the skillet to deglaze, scraping up those tasty browned bits, then pour it all over the meat. These fond bits are pure gold for your pot roast sauce.
Step 4: Layer Your Vegetables
Arrange the chopped carrots and potatoes around the roast. Sprinkle fresh thyme leaves evenly, and tuck in the bay leaves along with whole peppercorns. These ingredients will slowly release their flavors, enhancing both the aroma and taste of the dish as it cooks.
Step 5: Cook Low and Slow
Cover the pot and cook the roast on low heat for 8 hours, or on high for about 4 hours if you’re short on time. This slow cooking method breaks down the tough fibers of the chuck roast, turning it buttery tender, while allowing the flavors to meld beautifully. You’ll know it’s done when the meat is fork-tender and the vegetables have softened perfectly.
Step 6: Serve and Enjoy
Before serving, remove the bay leaves. Slice or shred the pot roast and plate it alongside the tender vegetables. The broth will be rich and comforting—a perfect sauce to spoon over your serving. This dish is best enjoyed hot and fresh for that ultimate cozy dinner experience.
How to Serve Classic Pot Roast Recipe
Garnishes
For a final touch, sprinkle freshly chopped parsley or a few extra thyme leaves on top. This adds a pop of color and a fresh herbal brightness that contrasts beautifully with the deep, savory flavors of the pot roast.
Side Dishes
While the pot roast comes with potatoes and carrots, you can round out the meal with a crisp green salad or some buttered green beans. Creamy mashed cauliflower or roasted Brussels sprouts also pair nicely, adding variety and fresh textures to your comforting plate.
Creative Ways to Present
Try serving the pot roast in rustic bread bowls for a fun twist that doubles as edible serving dishes. You can also layer slices of the roast with mashed potatoes and gravy in individual ramekins, then broil briefly for a golden crust—perfect for a dinner party that will wow your guests.
Make Ahead and Storage
Storing Leftovers
Leftover pot roast is a treasure. Store it in an airtight container in the refrigerator for up to 3 days. The flavors deepen even more overnight, making your next meal arguably better than the first!
Freezing
If you want to keep your pot roast longer, freezing is a great option. Place the cooled leftovers in a freezer-safe container or heavy-duty zip-top bag. It will keep well for up to 3 months. Be sure to label and date it so you can enjoy your delicious meal later without any guesswork.
Reheating
Reheat gently on the stove over low heat, adding a splash of beef broth if the sauce has thickened too much. This method preserves the meat’s tenderness and prevents the vegetables from drying out. You can also reheat in the microwave, but do it in short bursts to keep everything moist and flavorful.
FAQs
Can I use a different cut of meat for this Classic Pot Roast Recipe?
Absolutely! While chuck roast is preferred for its marbling and tenderness after slow cooking, you can use brisket or round roast. Just be mindful that cooking times might vary slightly depending on the cut’s toughness.
Is it necessary to sear the meat before slow cooking?
While you could skip searing, browning the meat first adds tremendous flavor and a rich color to the final dish. It enhances the depth of the broth, making your pot roast truly stand out.
Can this recipe be made in a pressure cooker?
Yes, a pressure cooker will significantly reduce cooking time. Cook on high pressure for about 60 minutes, then let it naturally release. Just keep an eye on the veggies so they don’t overcook.
What can I substitute if I don’t have fresh thyme?
Dried thyme works well in a pinch; use about one-third of the amount called for when substituting fresh herbs. Alternatively, rosemary can provide a lovely earthy note that complements the beef.
How do I know when the pot roast is done?
The best sign is when the meat is fork-tender and pulls apart easily. The vegetables should also be soft but not mushy, soaking up the flavors of the broth nicely.
Final Thoughts
This Classic Pot Roast Recipe is a true crowd-pleaser that fills your kitchen with mouthwatering aromas and leaves everyone happily full. It’s an effortless way to create a hearty, soulful meal that feels special while using simple ingredients. Give it a try—you might just find you’ve discovered your new go-to comfort dish!
Print
Classic Pot Roast Recipe
- Prep Time: 15 minutes
- Cook Time: 8 hours
- Total Time: 8 hours 15 minutes
- Yield: 6 servings
- Category: Main Course
- Method: Slow Cooking
- Cuisine: American
Description
This Classic Pot Roast recipe delivers a tender, flavorful beef chuck roast cooked slowly with fresh vegetables and aromatic herbs. Perfectly seared before slow cooking to lock in juices, this comforting dish features carrots, Yukon gold potatoes, and onions simmered in a savory low-sodium beef broth, creating a rich, hearty meal ideal for family dinners.
Ingredients
Meat
- 3 lbs chuck roast
Vegetables
- 4 medium carrots, chopped
- 2 large Yukon gold potatoes, diced
- 1 large yellow onion, chopped
- 4 cloves garlic, minced
Liquids and Seasonings
- 2 cups low-sodium beef broth
- 2 tsp fresh thyme leaves
- 1 tsp whole peppercorns
- 2 bay leaves
- Salt and pepper to taste
- 2 tbsp olive oil
Instructions
- Prepare ingredients: Chop carrots, potatoes, and onions into bite-sized pieces to ensure even cooking and easy serving.
- Sear the roast: Heat olive oil in a skillet over medium-high heat. Season the chuck roast generously with salt and pepper, then sear each side for 4 to 5 minutes until a deep golden-brown crust forms. This step locks in flavors and improves texture.
- Add aromatics and broth: Transfer the seared roast to a slow cooker or Dutch oven. In the same skillet, sauté chopped onions and minced garlic for 1 to 2 minutes until fragrant and translucent. Pour in beef broth to deglaze the skillet, scraping up browned bits. Pour this mixture over the roast.
- Layer vegetables: Arrange chopped carrots and diced potatoes around the roast in the cooking vessel. Sprinkle fresh thyme leaves on top. Add bay leaves and whole peppercorns for enhanced aroma.
- Cook low and slow: Cover the slow cooker or Dutch oven and cook on low heat for 8 hours (or on high heat for 4 hours) until the roast is fork-tender and vegetables are cooked through.
- Serve: Remove bay leaves before serving. Slice or shred the pot roast and serve hot alongside the cooked vegetables for a hearty meal.
Notes
- For best results, allow the roast to rest for 10 minutes after cooking before slicing to retain juices.
- Use a slow cooker for hands-off convenience or a Dutch oven on the stovetop/oven for more control over cooking.
- Adjust salt and pepper according to your taste preferences, especially if using regular sodium broth.
- To add complexity, consider adding a splash of red wine to the broth when deglazing.
- Leftovers keep well refrigerated for up to 3 days or freeze for up to 3 months.


