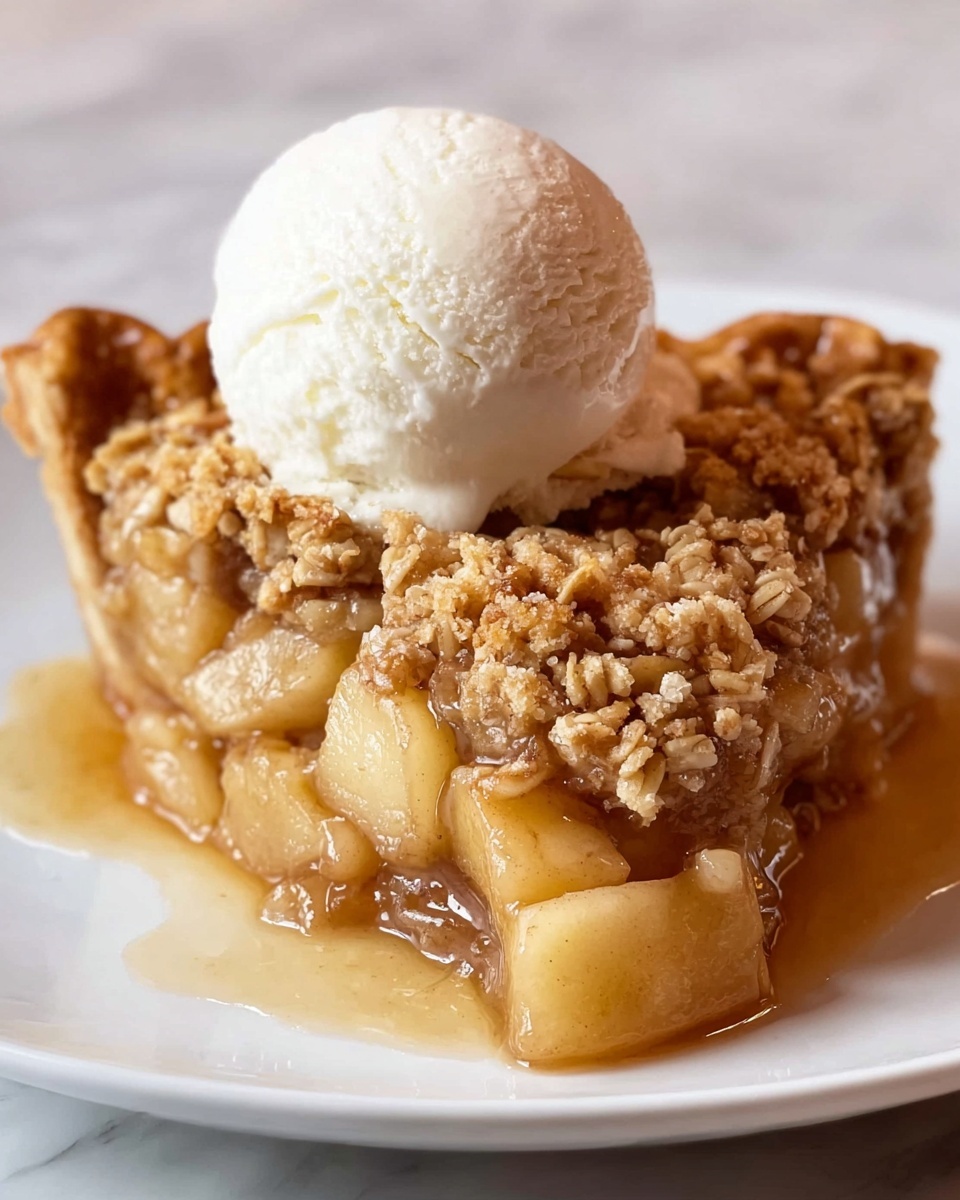
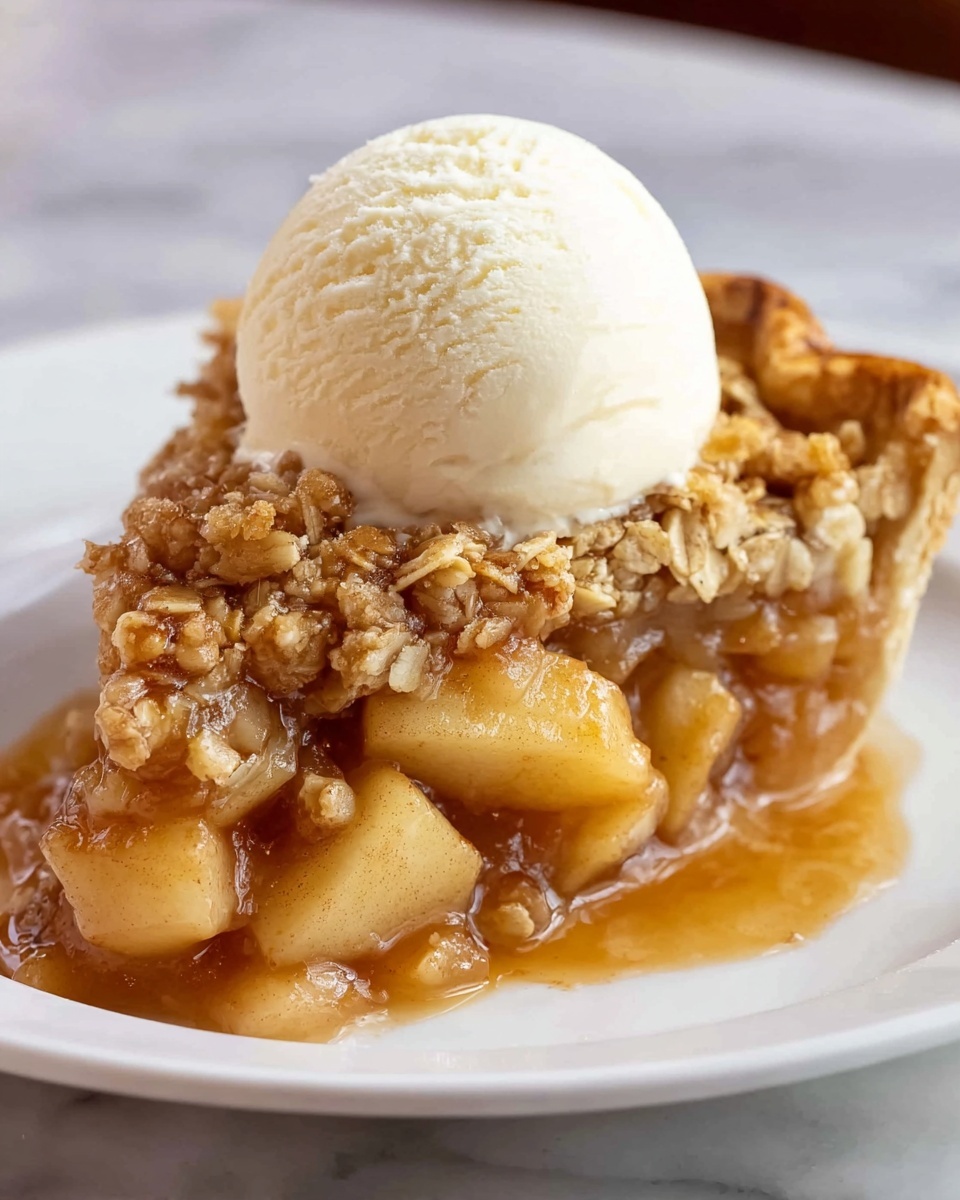
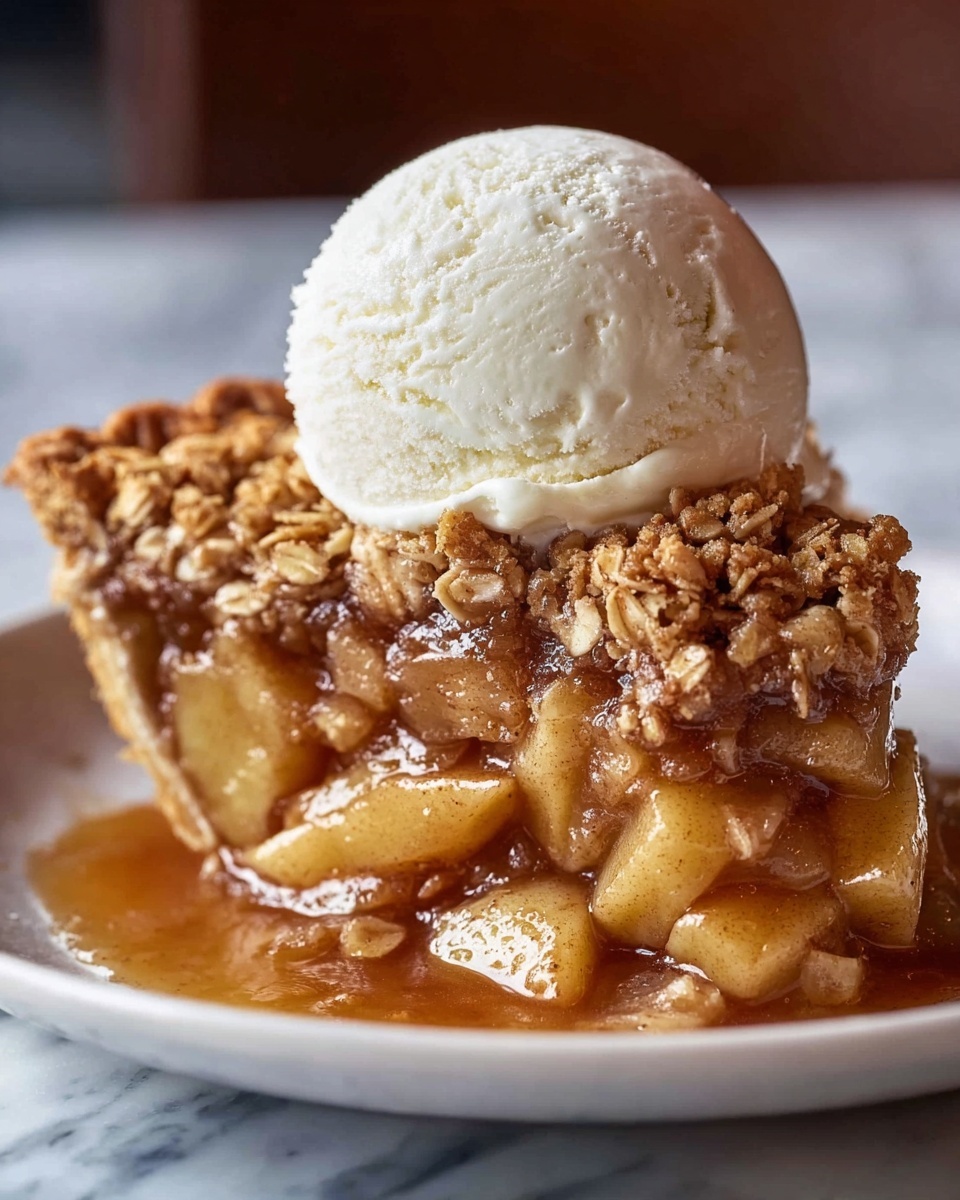
There’s something truly heartwarming about a Classic Apple Crisp Recipe that feels like a warm hug on a chilly day. This dessert brings together tender, cinnamon-scented apples with a crispy, buttery oat topping that’s the perfect balance of sweet and tart. Whether you’re making it for a holiday gathering or just because you crave something cozy, this recipe never fails to satisfy and delight. It’s easy enough for a weeknight treat but impressive enough to serve to guests, making this Classic Apple Crisp Recipe a real crowd-pleaser any time of year.
Ingredients You’ll Need
The beauty of this Classic Apple Crisp Recipe lies in its simplicity. Every ingredient plays an important role in creating the perfect harmony of flavors and textures—from the crisp tartness of the apples to the sweet, crumbly topping that bakes to golden perfection.
- Granny Smith apples: Their tartness holds up well during baking and balances the sweet topping.
- Light brown sugar: Adds rich molasses flavor and moisture to both the filling and the crisp topping.
- All-purpose flour: Acts as a binder in the filling and base of the topping for structure.
- Ground cinnamon: The quintessential spice that infuses warmth and depth throughout the dish.
- Quick oats: Provide a chewy, rustic texture to the crisp topping.
- Cold unsalted butter: Creates tender, flaky pockets in the crumble as it melts during baking.
How to Make Classic Apple Crisp Recipe
Step 1: Prepare Your Oven and Baking Dish
Start by preheating your oven to 375 degrees Fahrenheit (190 degrees Celsius), then grease a 9×13 inch baking dish with butter or nonstick spray. This ensures your apple crisp won’t stick and makes cleanup much easier, setting you up for a stress-free baking experience.
Step 2: Mix the Apple Filling
In a large bowl, combine your peeled, cored, and sliced Granny Smith apples with light brown sugar, flour, and cinnamon. Gently toss everything together so each apple slice is beautifully coated, releasing those wonderful flavors while maintaining their shape. This step is where the magic starts—giving you that sweet, warmly spiced filling everyone will love.
Step 3: Make the Crisp Topping
Next, in another bowl, mix oats, flour, brown sugar, and cinnamon before cutting in cold, cubed butter. Using your hands or a fork, blend the butter into the dry ingredients until the mixture resembles pea-sized crumbs. This crumbly texture is key to achieving that golden, buttery crisp layer that makes this Classic Apple Crisp Recipe so irresistible.
Step 4: Layer the Dish
Take three cups of your crisp mixture and press it firmly into the bottom of your greased baking dish. This base adds a wonderful crunch and structure underneath the tender apples. Pour the apple mixture over this crisp base and spread evenly, pressing gently with a spatula. Finally, sprinkle the remaining crisp topping over the apples for that signature crunchy finish.
Step 5: Bake Until Perfect
Bake your masterpiece uncovered for 35 to 45 minutes, allowing the apple filling to bubble and the topping to turn a beautiful golden brown. The smell alone is worth the wait, filling your kitchen with cozy cinnamon and buttery goodness that perfectly announces a delicious dessert is near.
Step 6: Cool and Enjoy
Once baked, let your apple crisp cool slightly. This resting time helps the filling set, making it easier to serve while keeping it warm and inviting. Don’t forget the classic finishing touch of a scoop of vanilla ice cream or whipped cream that melts perfectly over the crisp top, elevating this simple dessert to extraordinary.
How to Serve Classic Apple Crisp Recipe
Garnishes
While a scoop of vanilla ice cream is a timeless partner, don’t hesitate to get creative—try a dollop of freshly whipped cream sprinkled with a pinch of cinnamon or even a drizzle of caramel sauce. These simple garnishes bring an extra layer of indulgence and make every bite feel special.
Side Dishes
Classic Apple Crisp Recipe pairs beautifully with comforting sides like a hot cup of spiced apple cider or a glass of cold milk. For a more festive occasion, consider serving alongside a warm custard or even a scoop of frozen yogurt for a lighter touch.
Creative Ways to Present
Elevate your presentation by serving individual portions in cute ramekins or mason jars. You can even sprinkle chopped nuts like pecans or walnuts on top before baking for added texture and a nutty flavor boost. These simple tweaks make your apple crisp visually stunning and perfect for sharing.
Make Ahead and Storage
Storing Leftovers
If you have leftovers, store them in an airtight container in the refrigerator for up to 4 days. The flavors only deepen with time, and you’ll love reheating a portion for an easy, cozy dessert or snack at any time.
Freezing
Classic Apple Crisp Recipe also freezes beautifully. Wrap it tightly with plastic wrap and aluminum foil, or store in a freezer-safe container for up to 3 months. When you’re ready, thaw overnight in the fridge before reheating to enjoy that freshly baked taste all over again.
Reheating
Rewarm individual servings in the microwave or heat the whole crisp in the oven at 350 degrees Fahrenheit (175 degrees Celsius) until warmed through and the topping regains its crispness, usually about 15-20 minutes. Top with a scoop of ice cream for the perfect revival.
FAQs
Can I use apples other than Granny Smith for this Classic Apple Crisp Recipe?
Absolutely! While Granny Smith apples hold their tartness and texture well, you can mix in sweeter varieties like Fuji or Honeycrisp for a more complex flavor profile. Just be aware that sweeter apples might reduce the amount of sugar you need.
Is it necessary to peel the apples?
Peeling apples is a personal preference. Peeling ensures a smoother texture in the filling, but leaving the skins on adds a bit more fiber and a slightly rustic look. Just be sure to wash them well if you decide to keep the peels.
Can I make this Classic Apple Crisp Recipe gluten-free?
Yes! Substitute all-purpose flour with a gluten-free flour blend, and opt for gluten-free oats if needed. The texture might be slightly different, but it will still be deliciously satisfying.
Why is cold butter used in the topping?
Cold butter helps create that crumbly, flaky texture by mixing into small pieces that melt slowly during baking. This results in the crisp, golden topping that everyone loves in a classic apple crisp.
Can this dessert be made ahead of time?
Definitely! You can prepare the apple filling and topping separately, then assemble it just before baking. This way, you can have fresh-baked apple crisp whenever you want without the last-minute rush.
Final Thoughts
There’s a special kind of joy in serving a homemade Classic Apple Crisp Recipe that’s bursting with warm spices, tender apples, and that perfect crunchy topping. Whether you’re sharing it with loved ones or savoring a quiet moment, this dish brings comfort and delight with every bite. I can’t wait for you to try this recipe and make it your own delicious tradition.
Print
Classic Apple Crisp Recipe
- Prep Time: 20 minutes
- Cook Time: 45 minutes
- Total Time: 1 hour 5 minutes
- Yield: 12 servings
- Category: Dessert
- Method: Baking
- Cuisine: American
Description
This classic Apple Crisp recipe features tender, cinnamon-spiced Granny Smith apples baked under a buttery oat and brown sugar crumble topping. Perfectly balanced in sweetness and texture, it’s a comforting dessert ideal for family gatherings or cozy evenings. Serve warm with vanilla ice cream for an irresistible treat.
Ingredients
Apple Mixture
- 10 medium Granny Smith apples, peeled, cored, and sliced (about 10 cups)
- 1 cup packed light brown sugar
- 1 tablespoon all-purpose flour
- 1 teaspoon ground cinnamon
Crisp Topping & Base
- 2 cups quick oats
- 2 cups all-purpose flour
- 2 cups packed light brown sugar
- 2 teaspoons ground cinnamon
- 1 cup (2 sticks / 227g) cold unsalted butter, cubed
Instructions
- Preheat and Prepare Baking Dish: Preheat your oven to 375°F (190°C). Grease a 9×13 inch baking dish thoroughly using nonstick cooking spray or butter to prevent sticking.
- Mix Apple Filling: In a large bowl, toss together the sliced apples, 1 cup brown sugar, 1 tablespoon flour, and 1 teaspoon cinnamon until the apples are evenly coated with the mixture. Set aside to allow the flavors to meld.
- Prepare Crisp Mixture: In a separate medium bowl, combine 2 cups quick oats, 2 cups flour, 2 cups brown sugar, and 2 teaspoons cinnamon. Add the cold cubed butter and work it into the dry ingredients using your hands or a fork until the mixture resembles pea-sized crumbs.
- Assemble the Crisp: Spread 3 cups of the crisp mixture evenly across the bottom of the prepared baking dish, pressing it down firmly to form the base layer. Spoon the apple filling over this base and gently press down with a spatula. Finally, sprinkle the remaining crisp mixture evenly over the top.
- Bake: Place the baking dish in the oven and bake uncovered for 35 to 45 minutes, or until the apple filling is bubbly and the topping turns a golden brown color.
- Cool and Serve: Remove the apple crisp from the oven and allow it to cool slightly before serving. For a classic experience, serve warm with a scoop of vanilla ice cream.
Notes
- For best texture, use cold butter to create a crumbly topping.
- Granny Smith apples provide a tart flavor that balances the sweetness; other tart apples like Honeycrisp or Braeburn can also work well.
- Cover the crisp loosely with foil if the topping browns too quickly while baking.
- Leftovers can be refrigerated for up to 3 days and reheated in the oven for a crisp finish.
- Optional: Add chopped nuts like pecans or walnuts to the crisp mixture for added crunch.

