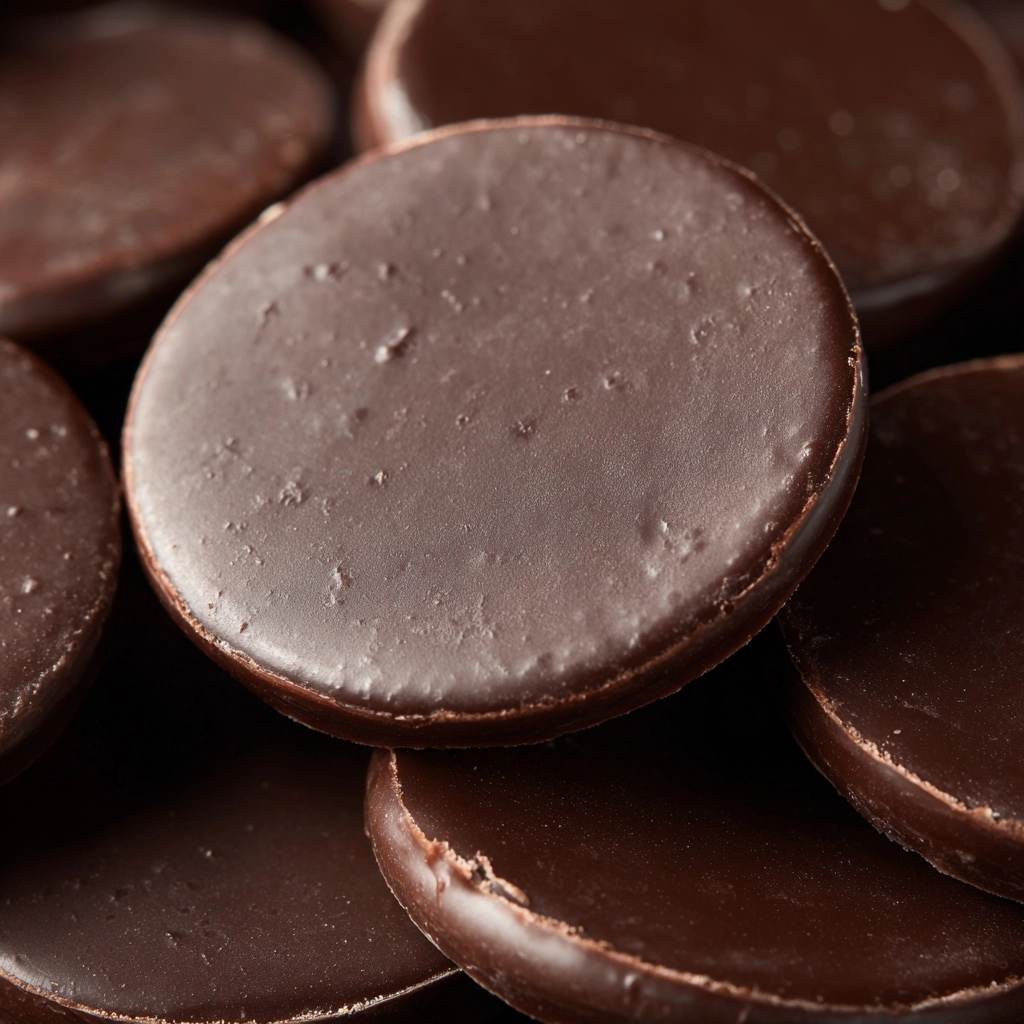
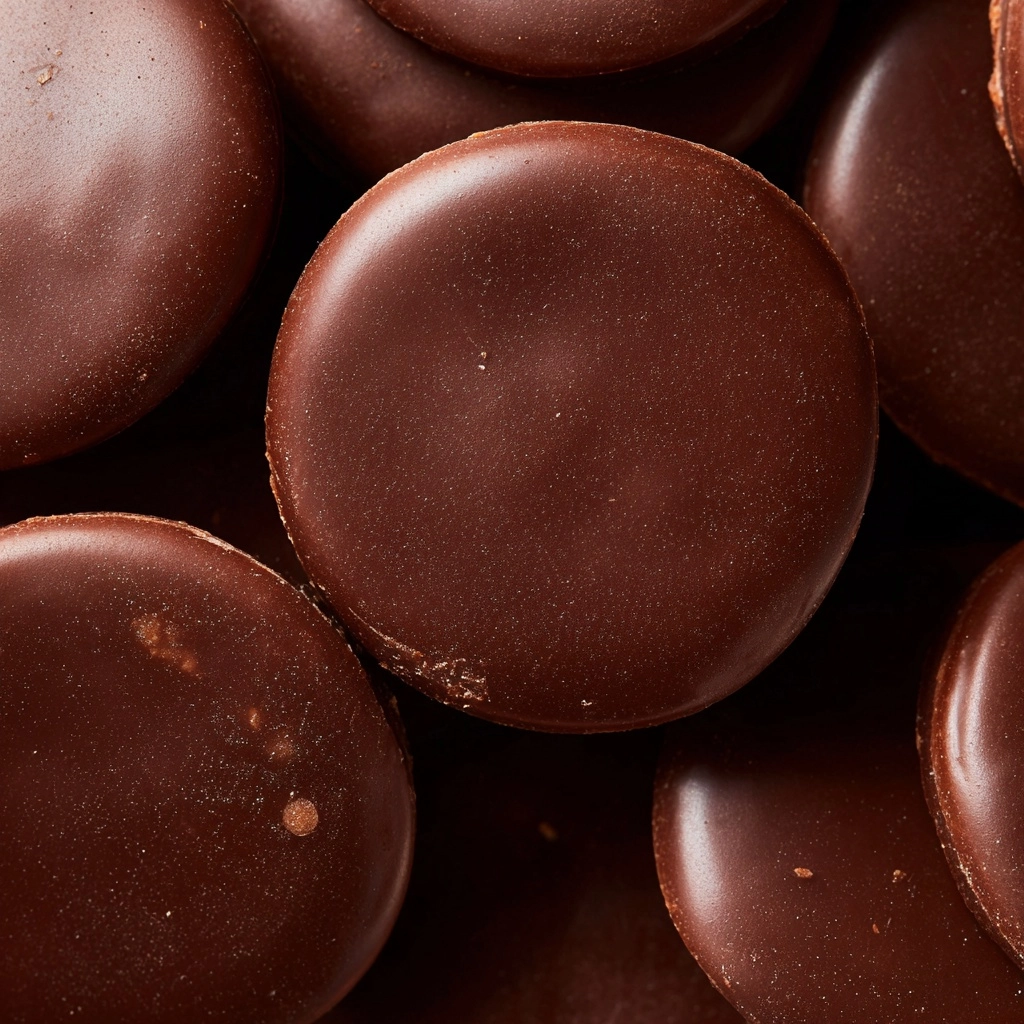
There’s something wonderfully nostalgic and indulgent about biting into a crisp, chocolatey, mint-infused cookie—and with this recipe for Perfect Homemade Thin Mint Cookies, you can bring that iconic treat straight from your own oven! These cookies offer all the refreshing flavor and delicate crunch of the beloved originals, with the irresistible bonus of being made completely from scratch. Rich dark chocolate, cool peppermint, and a buttery cookie base come together in each heavenly bite, making them perfect for sharing (or not!).
Ingredients You’ll Need
The beauty of these Perfect Homemade Thin Mint Cookies lies in how just a handful of simple ingredients transform into something magical. Each plays an essential role in flavor, texture, or appearance—so let’s give them the spotlight they deserve.
- Unsalted butter, softened: This forms the rich, tender base of your cookie dough and ensures a crisp, melt-in-your-mouth texture.
- Powdered sugar: It sweetens the dough gently, while keeping the texture ultra-smooth and delicate.
- Large egg: Adds structure and a bit of richness so your cookies bake up just right.
- Pure vanilla extract: A touch of vanilla rounds out the chocolate and mint, creating a well-balanced flavor.
- Peppermint extract: This is the star ingredient—use it in both the dough and the coating for that signature cool, refreshing lift.
- Salt: Don’t skip it! Salt makes the chocolate and mint sing by enhancing their flavors.
- Unsweetened cocoa powder: Deep, dark cocoa creates the lush chocolate flavor and stunning color of the cookies.
- All-purpose flour: Provides just the right structure for a crisp, snappy cookie bite.
- Semi-sweet or dark chocolate chips: These get melted for the final coating—choose your favorite for the perfect finish.
- Peppermint extract (for coating): Folding a little extra into the melted chocolate intensifies the mint sensation.
How to Make Perfect Homemade Thin Mint Cookies
Step 1: Cream the Butter and Sugar
Start by beating together the softened unsalted butter and powdered sugar until light, fluffy, and creamy. This important step helps set the stage for a tender cookie, ensuring the base is perfectly aerated and sweetened before you add more flavors.
Step 2: Add Wet Ingredients
Crack in your egg and pour in both the vanilla and peppermint extracts. Now mix until totally combined—the aroma of mint is already irresistible! The egg adds structure and moisture, creating the ideal dough consistency for shaping later on.
Step 3: Combine Dry Ingredients
In a separate bowl, whisk together the salt, unsweetened cocoa powder, and all-purpose flour. Blending these first guarantees even distribution and prevents streaks of cocoa. This is what gives Perfect Homemade Thin Mint Cookies their bold cocoa bite!
Step 4: Form the Dough and Chill
Gradually add the dry ingredients to your wet mixture, mixing just until a uniform dough forms. Don’t over-mix! Divide the dough in half, flatten into discs, and wrap tightly in plastic wrap. Chill them for at least one hour; this helps the dough firm up and makes rolling (and cutting) a breeze.
Step 5: Roll and Cut the Cookies
Once chilled, roll each dough disc on a floured surface to about 1/8-inch thickness. Using a cookie cutter, stamp out 1.5 to 2-inch rounds. The thinness is key for that iconic, ultra-crisp Thin Mint snap!
Step 6: Bake to Perfection
Arrange your cutouts on parchment-lined baking sheets, then pop them into a preheated 350°F oven. Bake for 10–12 minutes, just until set. The aroma is heavenly! Let the cookies cool completely on wire racks to achieve maximum crunch.
Step 7: Dip in Mint Chocolate
Melt your chocolate chips in 30-second bursts in the microwave, stirring in between until smooth and glossy. Stir the extra peppermint extract directly into the melted chocolate for extra zip. Dip each cooled cookie to coat completely, letting excess drip off before placing them on parchment to set. Don’t rush—allow the chocolate to set at room temp or pop in the fridge for a quick fix.
How to Serve Perfect Homemade Thin Mint Cookies

Garnishes
If you want to dress up your Perfect Homemade Thin Mint Cookies, a little sprinkle of crushed peppermint candy or even a light dusting of powdered sugar before the chocolate sets is both lovely and delicious. Or, drizzle a bit of white chocolate over the top for a bakery-style finish!
Side Dishes
The classic way to enjoy Perfect Homemade Thin Mint Cookies is with a cold glass of milk, but they’re also dreamy alongside hot coffee or rich hot chocolate. For an elegant twist, serve a few cookies with a scoop of vanilla or mint ice cream for an after-dinner treat that delights both kids and adults.
Creative Ways to Present
Thin Mints aren’t just for eating out of hand! Try sandwiching a little ice cream between two cookies for the ultimate homemade ice cream sandwich, or crumble a few over a chocolate mousse or no-bake cheesecake for a show-stopping dessert topping. Beautifully wrapped stacks also make fantastic gifts for any cookie lover in your life.
Make Ahead and Storage
Storing Leftovers
Once your Perfect Homemade Thin Mint Cookies have cooled and the chocolate has set, store them in an airtight container. They stay crisp for days at room temperature, or keep them in the fridge for an extra chilly crunch and prolonged freshness—just like the originals!
Freezing
One of the best things about these cookies is how beautifully they freeze. You can layer fully finished cookies (with parchment between them) in a container or freezer bag; they’re just as good straight from the freezer, and their cool, minty flavor is even more refreshing when cold.
Reheating
No need to reheat these cookies, as they’re meant to be crisp and chilled. However, if you love a slightly melty chocolate coating, a few seconds in a warm room (or a minute on the counter after coming out of the freezer) softens the chocolate slightly for a fudgier experience.
FAQs
Can I use dutch-process cocoa instead of regular?
Absolutely! Dutch-process cocoa will give your Perfect Homemade Thin Mint Cookies an even richer color and a smoother chocolate flavor. Either type Dessert.
What’s the best substitute for powdered sugar?
If you’re out of powdered sugar, you can blitz regular granulated sugar in a blender or food processor until super fine. The texture won’t be exactly the same, but it works in a pinch for this recipe.
Do I have to chill the dough?
Yes, chilling is crucial! Skipping this step makes the dough difficult to roll and can lead to cookies that spread too much in the oven. Chilling helps the cookies hold their shape and gives that signature crunch.
How can I make these gluten-free?
Easy! Substitute the all-purpose flour with a good quality 1:1 gluten-free baking flour. The results are still perfectly crisp and chocolatey, so everyone can join in the fun of Perfect Homemade Thin Mint Cookies.
Can I freeze the dough instead of the baked cookies?
Definitely. After forming and wrapping the dough discs, freeze them for up to three months. Let the dough thaw in the fridge overnight before rolling and baking as directed—cookies on demand!
Final Thoughts
There’s nothing quite like sharing a fresh batch of Perfect Homemade Thin Mint Cookies with friends or family, or tucking a few away just for yourself. This recipe truly brings bakery-quality cookies into your home kitchen, filled with chocolatey, minty joy in each crisp bite. Go ahead—give these a try, and let the scent of fresh mint and chocolate fill your kitchen!
Print
Perfect Homemade Thin Mint Cookies Recipe
- Prep Time: 20 minutes
- Cook Time: 12 minutes
- Total Time: 1 hour 45 minutes (includes chilling and setting time)
- Yield: About 36 cookies
- Category: Dessert
- Method: Baking
- Cuisine: American
- Diet: Vegetarian
Description
These Perfect Homemade Thin Mint Cookies are a delightful treat that captures the essence of the classic Girl Scout Thin Mints. With a rich chocolate base and a refreshing hint of mint, these cookies are sure to be a hit at any gathering or as a special homemade treat.
Ingredients
Cookies:
- 1 cup unsalted butter, softened
- 1 cup powdered sugar
- 1 large egg
- 1 teaspoon pure vanilla extract
- 1/2 teaspoon peppermint extract
- 1/2 teaspoon salt
- 1/2 cup unsweetened cocoa powder
- 1 1/2 cups all-purpose flour
Chocolate Coating:
- 12 ounces semi-sweet or dark chocolate chips
- 1/2 teaspoon peppermint extract (for coating)
Instructions
- In a large bowl, cream together the butter and powdered sugar until light and fluffy.
- In a separate bowl, whisk together the salt, cocoa powder, and flour.
- Divide the dough in half, flatten into discs, wrap in plastic wrap, and chill for at least 1 hour.
- Preheat the oven to 350°F (175°C) and line baking sheets with parchment paper.
- Roll out the dough on a floured surface to about 1/8-inch thickness and cut into 1.5 to 2-inch rounds.
- Place on baking sheets and bake for 10–12 minutes.
- Let cookies cool completely on wire racks.
- Melt chocolate chips in a microwave-safe bowl in 30-second intervals, stirring in between, until smooth.
- Dip each cooled cookie into the melted chocolate, coating completely, and place on parchment paper to set.
- Let chocolate set fully at room temperature or refrigerate for faster results.
Mix in the egg, vanilla extract, and peppermint extract.
Gradually add the dry ingredients to the wet mixture and mix until a dough forms.
Stir in the 1/2 teaspoon peppermint extract.
Notes
- For a gluten-free version, substitute all-purpose flour with a 1:1 gluten-free baking flour.
- Store cookies in an airtight container in the fridge or freezer for that signature crisp Thin Mint texture.
Nutrition
- Serving Size: 1 cookie
- Calories: 120
- Sugar: 8g
- Sodium: 35mg
- Fat: 7g
- Saturated Fat: 4g
- Unsaturated Fat: 2g
- Trans Fat: 0g
- Carbohydrates: 13g
- Fiber: 1g
- Protein: 1g
- Cholesterol: 10mg


