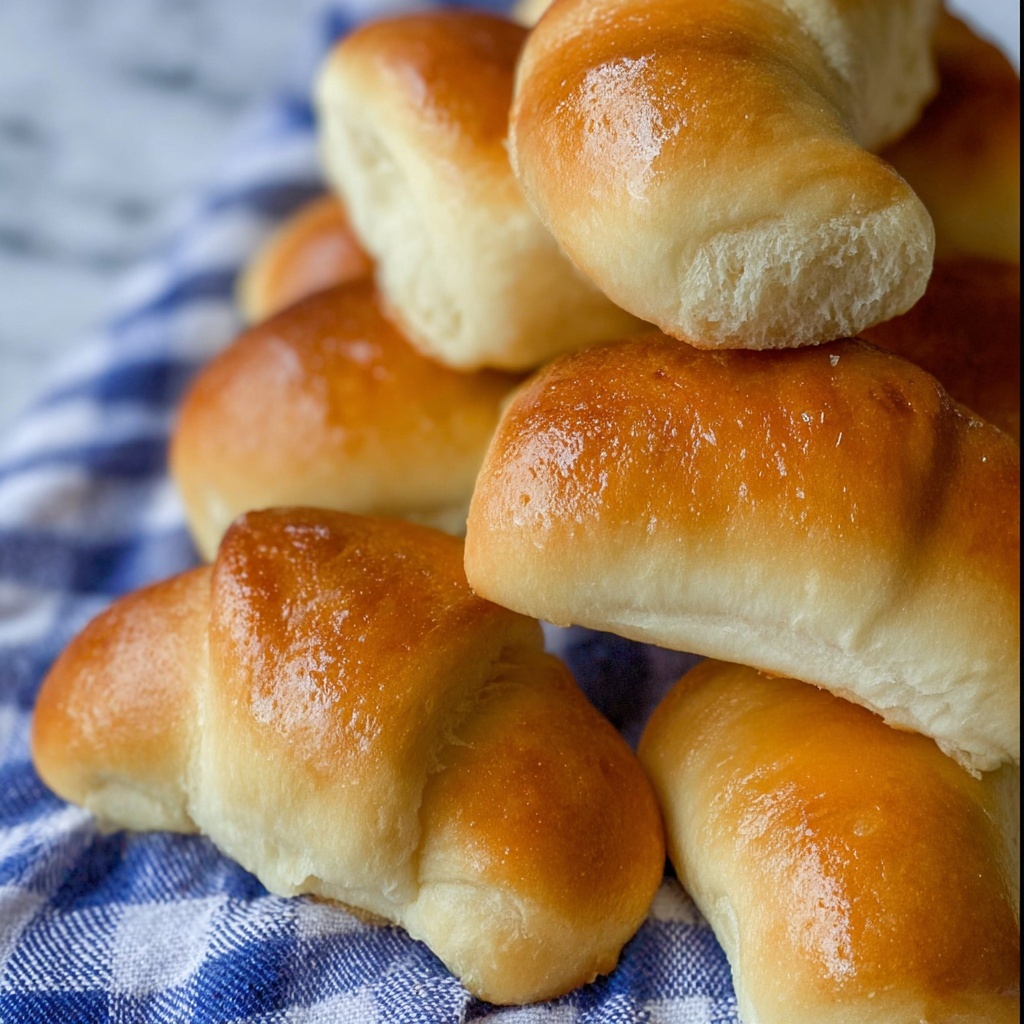
If you’re searching for a warm, buttery, and utterly irresistible treat to brighten your day, this Big Fat Crescent Rolls Recipe is an absolute game changer. These rolls are fluffy, generously sized, and packed with a tender crumb that just melts in your mouth. Whether you’re baking for a big family breakfast, a festive gathering, or simply because you deserve a little homemade indulgence, these crescent rolls deliver on taste, texture, and that cozy homemade charm in every bite.
Ingredients You’ll Need
This recipe uses simple but essential ingredients that come together to create the perfect balance of softness, flavor, and golden color. Each component plays a crucial role, from the yeast awakening the dough to that signature buttery touch at the end.
- Active dry yeast: The magic agent that makes the dough rise, giving you those fluffy layers.
- Warm water: Helps activate the yeast, but remember it’s got to be just right—lukewarm, not hot!
- Milk: Adds richness and tenderness to the dough while keeping it moist.
- Butter: Used twice—once melted into the dough and then brushed on top for that irresistible golden shine and flavor.
- Sugar: Gives just the right hint of sweetness to balance the buttery goodness.
- Salt: Enhances all the flavors without overpowering.
- Eggs: Adds structure and richness that make these crescent rolls super soft yet sturdy.
- All-purpose flour: The foundation that creates the perfect dough, sticky but workable.
How to Make Big Fat Crescent Rolls Recipe
Step 1: Activate the yeast
Begin by combining the active dry yeast with warm water in a large bowl or your stand mixer. The water should feel like a lukewarm bath, around 105 degrees Fahrenheit. Let it sit for about 5 minutes until it becomes bubbly and frothy. If it doesn’t bubble, your yeast might be dead, so start fresh!
Step 2: Warm the milk and butter
In a separate container, warm the milk and butter together carefully—this helps make the dough tender and flavorful. The butter won’t completely melt but will soften enough to mix in seamlessly with the milk and the rest of your ingredients.
Step 3: Combine wet ingredients and sugar
Add the warmed milk and butter mixture into your yeast mixture. Then stir in the sugar and salt for that perfect balance of sweet and savory.
Step 4: Incorporate eggs
Mix in the eggs thoroughly. They add a creamy richness and help bind the dough’s structure, giving these rolls their signature fluffiness.
Step 5: Add flour gradually
Add the flour one cup at a time, mixing after each addition. The dough will remain loose and sticky—that’s absolutely normal. This softness ensures the rolls stay tender and big. Mix on medium speed for a couple of minutes to get everything well blended.
Step 6: First rise
Cover the bowl tightly with greased plastic wrap and let the dough rise in a warm spot for about an hour. It should puff up nicely but keep a close eye to avoid overflow, since the dough is quite active.
Step 7: Prepare your baking sheets
Line four large baking sheets with silicone mats, parchment paper, or apply a good spray of nonstick cooking spray to prevent sticking.
Step 8: Punch down and knead
Use your mixer or hands to gently punch down the risen dough. Turn it onto a very well-floured surface — don’t be shy here, you’ll need plenty of flour to manage the sticky dough. Knead it a few times to make it workable and divide the dough into four equal parts.
Step 9: Roll, butter, and cut
Roll one quarter into a rough 12-inch circle. Brush generously with melted butter, then cut into eight triangles using a pizza cutter. Butter on the surface helps layers separate and adds that wonderful golden finish.
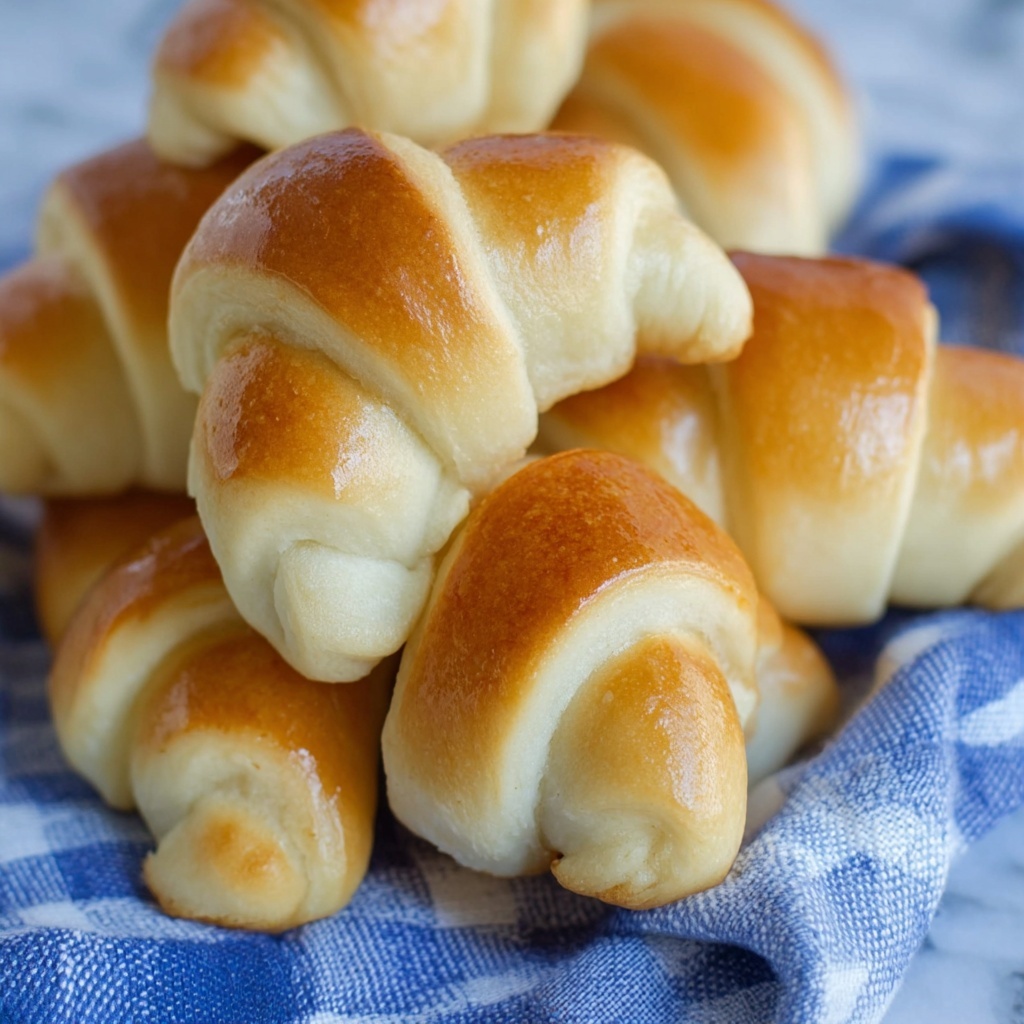
Step 10: Shape your rolls
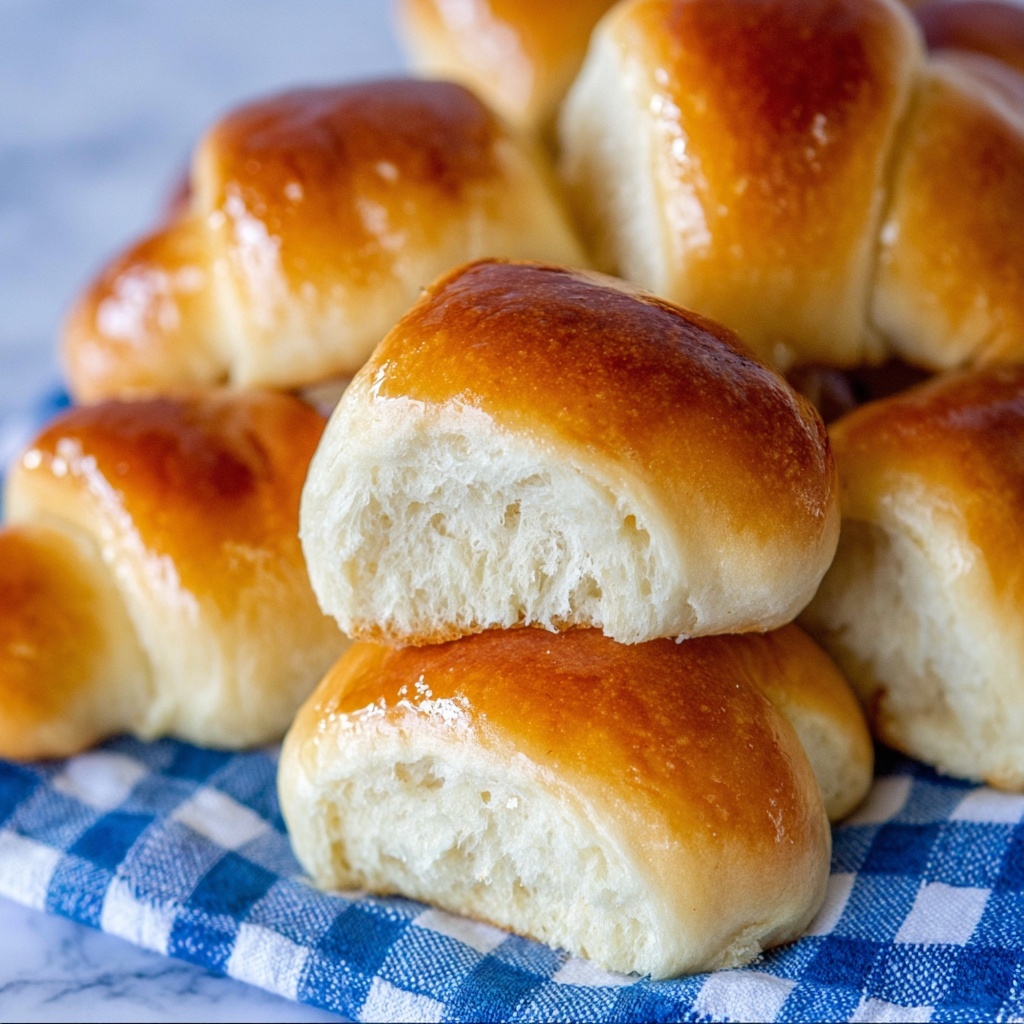
Starting from the wide end of each triangle, gently stretch the skinny end with your fingers and roll up toward the point. For a fatter roll instead of a long one, you can snip the wide end and fold it over before rolling.
Step 11: Second rise
Place your formed rolls on the baking sheets, spacing them about two inches apart. Cover with a tea towel and let them rise for at least another half hour. This gentle second rise ensures the rolls will be big, soft, and airy.
Step 12: Bake and finish
Preheat your oven to 375 degrees Fahrenheit. Bake each sheet for 12 to 15 minutes until golden brown on top and bottom. If baking multiple sheets, rotate them after about 6-7 minutes for even cooking. When out of the oven, brush the rolls with more melted butter for that signature luster and rich flavor.
How to Serve Big Fat Crescent Rolls Recipe
Garnishes
While these rolls are dazzling on their own, a sprinkle of flaky sea salt or a brush of garlic herb butter can elevate them to irresistible. You can also dust with a little powdered sugar for a sweet twist perfect for breakfast or brunch.
Side Dishes
Pair these baby beauties with hearty soups, stews, or even a fresh salad for a comforting meal. Their pillowy texture works wonderfully alongside something with bold flavors, like chili or roasted chicken.
Creative Ways to Present
For a festive occasion, arrange the crescent rolls in a circular wreath shape on the baking sheet and brush with garlic butter before baking. They look stunning as a centerpiece and taste even better when you pull them apart one by one with friends and family.
Make Ahead and Storage
Storing Leftovers
Keep any leftover Big Fat Crescent Rolls Recipe in an airtight container at room temperature for up to two days. To maintain softness, you can wrap them individually in foil before placing in a container.
Freezing
If you want to prepare these rolls ahead, freeze them in ziplock bags for up to three weeks. When you’re ready, thaw them in the bag on your counter to keep moisture locked in, then reheat gently.
Reheating
To warm the rolls, set your oven to 170 degrees Fahrenheit (warm setting), place the rolls on a baking sheet, and heat for 5 to 10 minutes. They’ll come out soft and fresh-tasting, perfect for that out-of-the-oven experience all over again.
FAQs
Can I use instant yeast instead of active dry yeast?
Absolutely! If using instant yeast, you can skip the proofing step with warm water and add it directly to the dry ingredients, but keep in mind the rising times might be slightly shorter.
Why is the dough so sticky? Should I add more flour?
The dough is meant to be quite loose and sticky for these big, fluffy rolls. Adding too much flour can make them dense. Just flour your hands and work surface generously for handling, and add only as much flour as needed to manage the dough.
Can I make smaller rolls with this recipe?
Yes! Simply cut the dough into smaller triangles and adjust baking time accordingly. However, the distinction of this recipe is those big fat rolls, so the size really adds to the charm and texture.
What if my rolls don’t brown evenly?
Try rotating your baking sheets halfway through baking for even browning. Make sure your oven is fully preheated and avoid opening the door too often, which can interfere with consistent heat.
Is it okay to brush the rolls with butter before baking?
For this recipe, it’s best to butter the raw dough only after shaping and just before rolling the triangles. Then the rolls get a second butter brush right after baking. Brushing before baking helps layering but brushing later preserves the luscious sheen.
Final Thoughts
There’s something truly special about pulling warm, soft, and golden crescent rolls straight from your oven. This Big Fat Crescent Rolls Recipe brings that joy home in a big way with its tender crumb, buttery richness, and gorgeous size. I promise once you try this recipe, it will become a beloved classic to share at every meal. So grab your apron, start mixing, and prepare to be wowed!
Print
Big Fat Crescent Rolls Recipe
- Prep Time: 30 minutes
- Cook Time: 15 minutes
- Total Time: 45 minutes plus rising time (approximately 1.5 to 2 hours including rises)
- Yield: 32 rolls
- Category: Bread/Rolls
- Method: Baking
- Cuisine: American
Description
These Big Fat Crescent Rolls are soft, buttery, and delightfully fluffy homemade rolls perfect for any meal or occasion. Made with warm milk, butter, yeast, and plenty of flour, these crescent rolls feature a rich texture and golden brown crust, achieved through careful rising and baking. Brushed generously with melted butter before and after baking, they are irresistible warm and fresh, with a tender crumb and flaky layers. Ideal for family dinners, holiday spreads, or as a comforting snack, these rolls are a crowd-pleaser that fills your kitchen with a heavenly aroma.
Ingredients
Yeast Mixture
- 2 tablespoons active dry yeast
- 1/2 cup warm water (about 105°F)
Dough
- 2 cups warm milk (about 105°F)
- 1/2 cup butter (1 stick), softened
- 1/4 cup sugar
- 2 teaspoons salt
- 2 large eggs
- 7 cups all-purpose flour (plus extra for kneading and surface)
For Brushing
- 1/2 cup butter (1 stick), melted
Instructions
- Activate Yeast: In a large bowl or stand mixer bowl, combine the active dry yeast with warm water (about 105°F). Let it sit for 5 minutes until it becomes bubbly and foamy, indicating the yeast is alive.
- Warm Milk and Butter: In a glass measuring cup, warm 2 cups of milk with 1 stick of butter in 30-second intervals until butter softens and the milk is warm but not hot (around 105°F).
- Combine Liquids: Pour the warmed milk and butter mixture into the yeast mixture bowl.
- Add Sugar and Salt: Stir in the sugar and salt using the paddle attachment if using a stand mixer.
- Add Eggs: Beat in the two large eggs thoroughly to incorporate.
- Add Flour: Gradually add 7 cups of all-purpose flour, one cup at a time, mixing after each addition. The dough will be loose and sticky. Continue mixing for 2 minutes on medium speed.
- First Rise: Remove the paddle attachment, cover the bowl with greased plastic wrap, and let the dough rise in a warm place for 1 hour, until it has expanded but not overflowed the bowl.
- Prepare Baking Sheets: Line four large baking sheets with silicone baking mats or parchment paper, or grease them well with nonstick spray.
- Punch Down Dough: Use the mixer paddle or your hands to gently punch down the dough to release air bubbles.
- Knead Dough: Transfer dough to a heavily floured surface (about 1/2 cup flour). Flour your hands and knead the dough a few times until manageable, adding up to an additional 1/2 cup flour if needed to reduce stickiness without making the dough dry.
- Divide Dough: Using a floured serrated knife, divide the dough into 4 equal pieces. Place 3 pieces on a floured surface and cover with a tea towel to prevent drying out.
- Roll Out Dough: Roll out the 4th piece into a 12-inch circle on a floured surface, being careful not to make it too large to avoid overly long rolls.
- Butter the Dough: Melt 1/2 cup butter in a small bowl and brush it generously over the rolled dough circle.
- Cut Triangles: Using a pizza cutter, cut the dough circle into 8 equal triangular wedges, like slicing a pizza.
- Shape Rolls: Starting from the wide end of each triangle, roll it up towards the point, stretching the skinny end gently as you roll to create layers. If the wide end is too long, make a small snip in the middle and fold it to create a fatter roll instead of a long one.
- Arrange Rolls: Place the shaped rolls on the prepared baking sheets about 2 inches apart, with the tip of each triangle tucked underneath.
- Second Rise: Cover rolls with a tea towel and let them rise for at least 30 minutes or longer if your kitchen is cooler.
- Preheat Oven: Preheat your oven to 375°F while the rolls rise.
- Continue Shaping: Repeat rolling, buttering, cutting, and shaping steps with the remaining dough pieces, keeping track of pans to manage rising time evenly.
- Bake Rolls: Bake the rolls in the preheated oven for 12-15 minutes until golden brown on top and bottom. Bake two pans at a time if needed and rotate pans halfway through baking (after 6-7 minutes) for even cooking.
- Brush with Butter: Immediately after baking, brush the hot rolls with melted butter to add shine and flavor.
- Serve and Store: Enjoy the rolls fresh and warm, or if serving later, brush with melted butter just before serving to avoid wrinkling the crust.
- Reheat Instructions: To reheat, warm the rolls on a baking sheet at 170°F for 5-10 minutes.
- Freezing Instructions: Freeze rolls up to 3 weeks in ziplock bags. Thaw at room temperature in the sealed bag and reheat as instructed. For best results, brush melted butter only before serving after freezing.
Notes
- Ensure the water and milk are warm, not hot, to avoid killing the yeast.
- The dough will be sticky; don’t add too much flour or the rolls will be dense.
- Letting the dough rise in a warm place is critical for proper texture and fluffiness.
- Use a serrated knife dusted with flour to cut the dough cleanly.
- Stretching the skinny end of the triangle before rolling gives more layers and a prettier roll.
- Butter brushing before and after baking adds flavor and a golden crust.
- If freezing, do not brush butter before freezing to avoid wrinkling.
- Rotate pans during baking to ensure even heat distribution.


