“`html
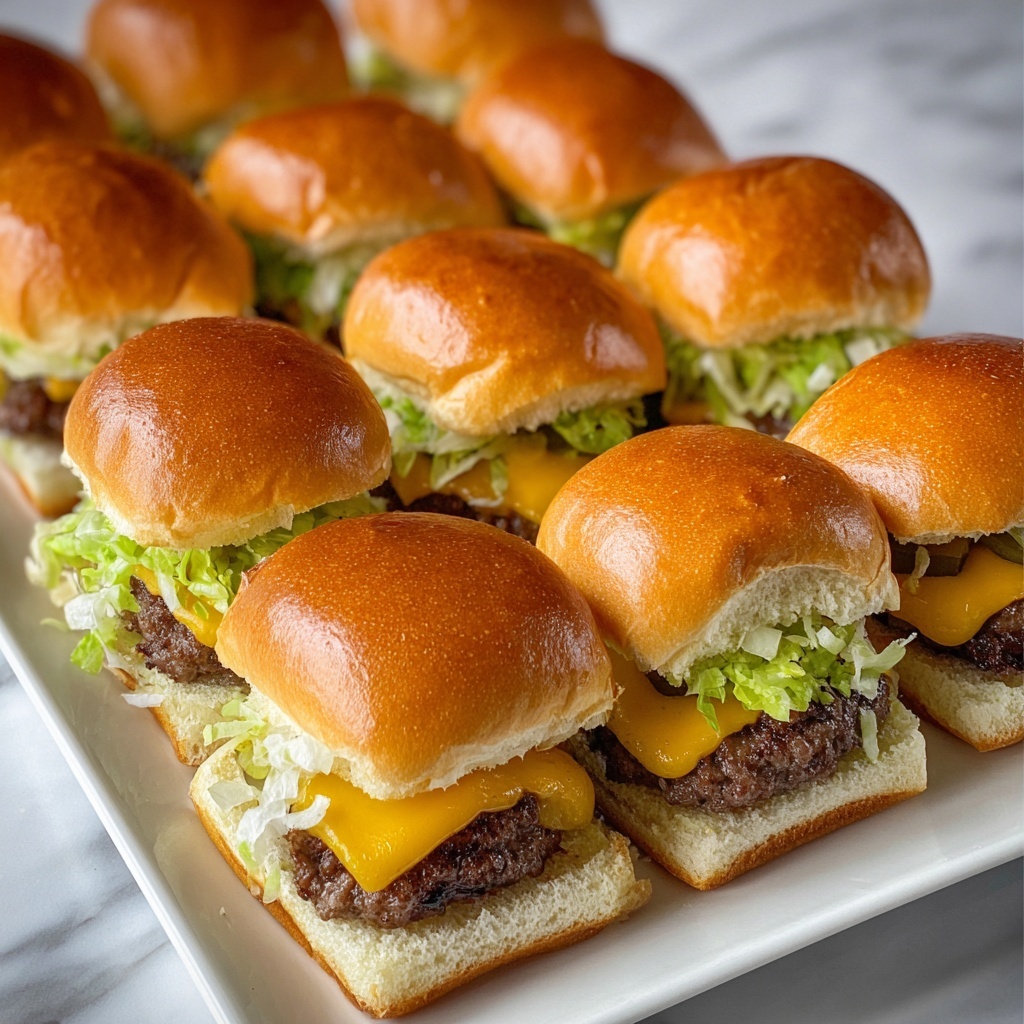
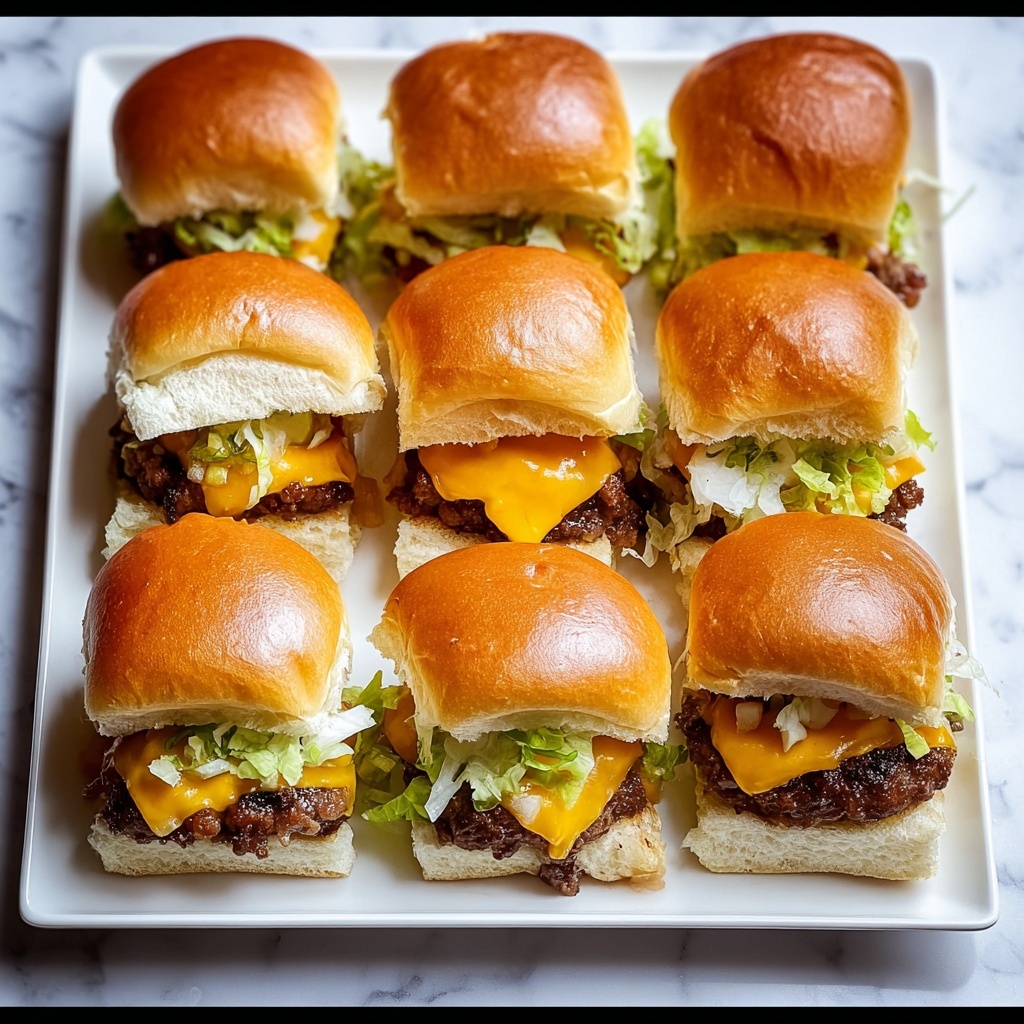
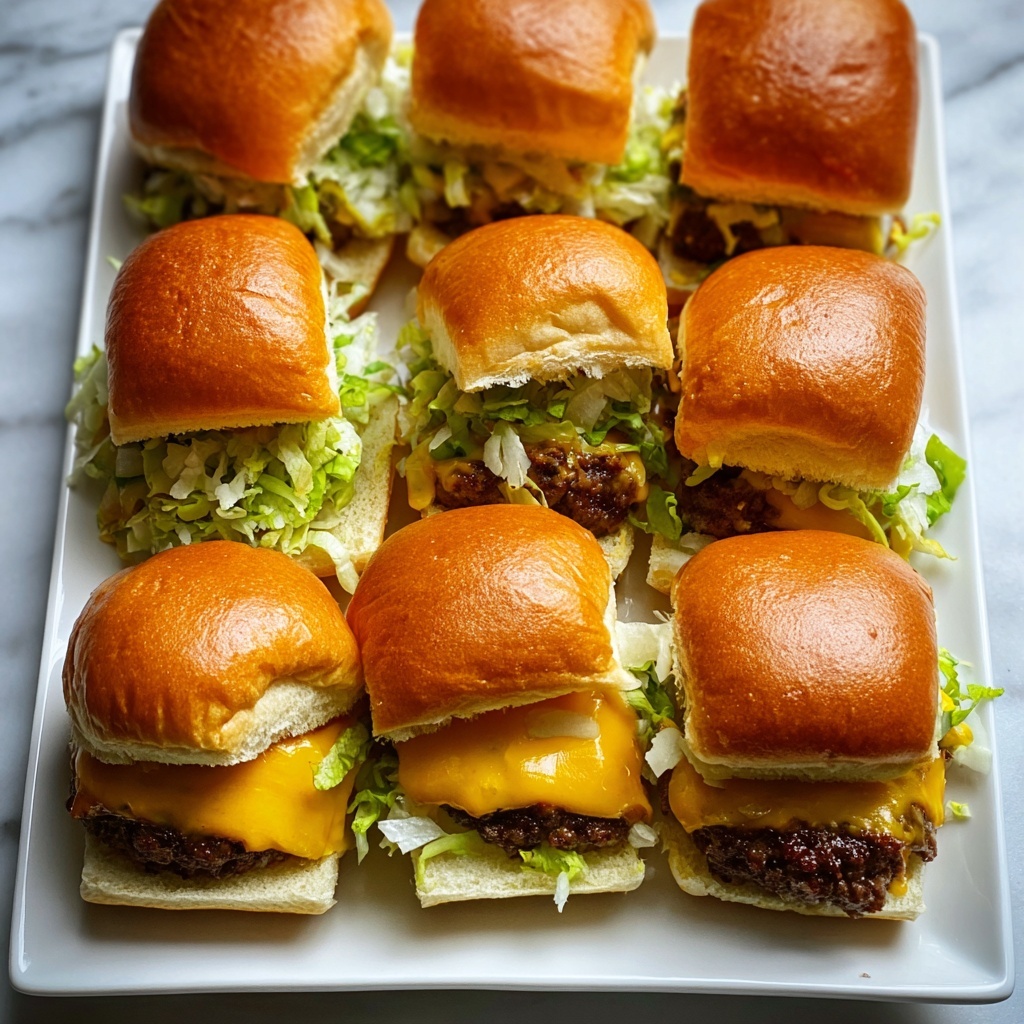
There is nothing quite like a hands-on, crowd-pleasing meal that comes together effortlessly yet delivers incredible flavor, and that’s exactly what this Sheetpan Burger Sliders Recipe brings to the table. By baking an entire batch of juicy, cheesy sliders on one sheetpan, you’re cutting down on cleanup and cooking time while still savoring every bit of juicy goodness, perfect for family dinners, casual parties, or game day snacks.
Ingredients You’ll Need
The beauty of this Sheetpan Burger Sliders Recipe is in its simplicity. Each ingredient plays a crucial role—whether it’s grounding the dish with savory beef, adding a punch of fresh veggies, or creating that creamy, tangy sauce that ties everything together.
- 2 lbs ground beef: The hearty base that keeps each slider juicy and flavorful.
- 1 small onion, finely chopped: Adds natural sweetness and a tender crunch.
- 1 clove garlic, minced: Boosts the savory depth with aromatic warmth.
- 1 tablespoon Worcestershire sauce: Glazes the beef with a rich, umami punch.
- Salt and pepper, to taste: Simple seasonings that bring out all the best flavors.
- 12 slider buns: Perfectly sized to cradle the juicy patties and toppings.
- 12 slices of cheddar cheese: Melts beautifully to create that irresistible gooey layer.
- 1 cup mayonnaise: Creates the creamy base of the homemade slider sauce.
- 1/4 cup ketchup: Adds sweetness and tang, completing the sauce.
- Shredded lettuce: For a refreshing crunch and vibrant color.
- Sliced tomatoes: Juicy slices that add freshness and balance.
- Sliced pickles: Brings in a zesty, tangy contrast.
- Vegetable oil spray: Keeps the patties from sticking and helps create a nice crust.
How to Make Sheetpan Burger Sliders Recipe
Step 1: Prepare Your Oven and Sheetpan
Start by preheating your oven to 400°F (200°C). Line a sheetpan with aluminum foil, then lightly spray it with vegetable oil to ensure your beef mixture won’t stick and to help it cook evenly with a slight crisp on the edges.
Step 2: Mix the Burger Ingredients
In a large bowl, combine the ground beef, finely chopped onion, minced garlic, Worcestershire sauce, salt, and pepper. Mix these just until combined—overmixing will make the sliders tough rather than tender and juicy, and we definitely want that tender bite here.
Step 3: Shape and Spread the Beef
Spread the seasoned beef mixture evenly across the prepared sheetpan. Press it down gently to create one smooth, even layer. This ensures all sliders cook uniformly, giving everyone the same juicy goodness.
Step 4: Bake the Beef Layer
Place your sheetpan in the oven and bake for about 15 to 20 minutes, or until the beef reaches an internal temperature of 160°F (70°C). The smell filling your kitchen at this stage will have you absolutely drooling!
Step 5: Whip Up the Slider Sauce
While the beef cooks, combine mayonnaise and ketchup in a small bowl to create your very own creamy, tangy slider sauce. This easy sauce will add an essential layer of flavor and moisture when the sliders are assembled.
Step 6: Drain and Cheese
Once the beef layer is cooked, carefully remove the sheetpan from the oven. Drain off any excess grease for a cleaner bite. Then, evenly place the cheddar cheese slices over the beef and return the pan to the oven for another 2 to 3 minutes until the cheese melts to gooey perfection.
Step 7: Rest and Slice
Take the sheetpan out once the cheese is melted, and allow it to cool slightly. This lets the flavors settle and makes slicing easier. Cut the beef and cheese into 12 even squares to fit your slider buns perfectly.
Step 8: Assemble and Enjoy!
Place each cheesy beef square onto a slider bun, then top with a generous dollop of your homemade slider sauce. Finish by layering shredded lettuce, sliced tomatoes, and pickles for the perfect balance of texture and flavor. Serve immediately while warm for maximum satisfaction.
How to Serve Sheetpan Burger Sliders Recipe
Garnishes
Fresh garnishes elevate your sliders to the next level. Crisp shredded lettuce adds crunch, juicy tomato slices bring moisture, and tangy pickles cut through the richness of the beef and cheese. Feel free to add thinly sliced red onions or a dash of hot sauce if you like a bit of zest!
Side Dishes
These sliders pair beautifully with crispy fries, sweet potato chips, or a simple coleslaw to keep things crunchy and refreshing. For a more indulgent side, try baked macaroni and cheese or roasted veggies to add a comforting touch.
Creative Ways to Present
For a party vibe, arrange sliders on a large platter layered with fresh herbs or lettuce leaves. Add small flags or toothpicks to keep them neat and easy to grab. You can also offer condiment stations with extra sauce, pickles, and toppings, making it a customizable slider feast everyone will love.
Make Ahead and Storage
Storing Leftovers
If you’re lucky enough to have leftovers, store assembled sliders in an airtight container in the refrigerator for up to 3 days. For best results, keep the toppings separate to preserve freshness and assemble sliders just before eating.
Freezing
You can freeze the cooked but unassembled beef and cheese layer by wrapping it tightly in plastic wrap and foil before placing it in the freezer. It should keep well for up to 2 months. When ready to eat, thaw overnight in the fridge and reheat gently.
Reheating
Reheat leftovers in a preheated oven at 350°F (175°C) for 10-15 minutes until warmed through and the cheese is melty again. If you freeze the meat layer, let it thaw first to ensure even heating. Avoid microwaving assembled sliders to keep buns from getting soggy.
FAQs
Can I use ground turkey or chicken instead of beef?
Yes! Ground turkey or chicken can be a lighter alternative. Just be mindful they cook faster and can dry out, so keep an eye on the timing and consider adding a bit of moisture like grated onion or a splash of broth.
How do I make this recipe gluten-free?
Simply swap the slider buns for gluten-free versions available in many stores. Make sure to check that the Worcestershire sauce and other condiments are also gluten-free to keep everything safe.
Can I add other seasonings to the beef mixture?
Absolutely! Experiment with smoked paprika, garlic powder, or even a touch of chili powder to add your own twist. Just be sure not to overpower the classic burger flavors that make this recipe shine.
What’s the best way to keep the sliders from getting soggy?
To avoid sogginess, assemble sliders right before serving. Keep wet toppings like tomatoes and pickles separate and add them at the very end. Toasting the buns lightly can also help create a moisture barrier.
Can I make the slider sauce ahead of time?
Yes, the sauce can be made a day ahead and stored in the refrigerator in a covered container. This actually helps the flavors meld together and makes assembling your sliders even quicker.
Final Thoughts
If you’re searching for a fun, flavorful, and fuss-free way to serve burgers to a crowd or just want an easy weeknight meal with all the classic fixings, this Sheetpan Burger Sliders Recipe will become your go-to. It’s quick to prepare, packed with nostalgia and deliciousness, and guaranteed to bring smiles all around the table. Give it a try—you’ll love how effortlessly fantastic it turns out!
“`
Print
Sheetpan Burger Sliders Recipe
- Prep Time: 0h 15m
- Cook Time: 0h 20m
- Total Time: 0h 35m
- Yield: 12 sliders
- Category: Main Course
- Method: Baking
- Cuisine: American
Description
These Sheetpan Burger Sliders are an easy and delicious way to make multiple classic cheeseburgers at once. Ground beef mixed with onion, garlic, and Worcestershire sauce is baked in a single layer on a sheetpan, then topped with melted cheddar cheese. Served on slider buns with a tangy mayonnaise-ketchup sauce, shredded lettuce, tomatoes, and pickles, these sliders come together quickly and are perfect for casual gatherings or family meals.
Ingredients
Beef Mixture
- 2 lbs ground beef
- 1 small onion, finely chopped
- 1 clove garlic, minced
- 1 tablespoon Worcestershire sauce
- Salt and pepper, to taste
Slider Assembly
- 12 slider buns
- 12 slices of cheddar cheese
- 1 cup mayonnaise
- 1/4 cup ketchup
- Shredded lettuce
- Sliced tomatoes
- Sliced pickles
- Vegetable oil spray
Instructions
- Preheat Oven and Prepare Sheetpan: Preheat your oven to 400°F (200°C). Line a sheetpan with aluminum foil and lightly spray it with vegetable oil to prevent sticking.
- Mix Beef Mixture: In a large bowl, combine the ground beef, finely chopped onion, minced garlic, Worcestershire sauce, salt, and pepper. Mix thoroughly but avoid overmixing to keep the burgers tender.
- Spread Beef on Sheetpan: Evenly spread the beef mixture onto the prepared sheetpan, pressing it into a flat, even layer to ensure uniform cooking.
- Bake the Beef: Place the sheetpan in the preheated oven and bake for 15 to 20 minutes, or until the internal temperature reaches 160°F (70°C), indicating the beef is fully cooked.
- Prepare Slider Sauce: While the beef bakes, mix the mayonnaise and ketchup in a small bowl to create the flavorful slider sauce.
- Drain Excess Grease: Once the beef is cooked, carefully remove the sheetpan from the oven and drain off any excess grease to keep the sliders from being oily.
- Add Cheese and Melt: Arrange cheddar cheese slices evenly over the cooked beef, then return the sheetpan to the oven for 2 to 3 minutes until the cheese melts and is bubbly.
- Rest and Portion: Remove the sheetpan from the oven and let the beef and cheese rest for a few minutes. Then, cut the mixture into 12 equal pieces, sized to match the slider buns.
- Assemble Sliders: Place each beef and cheese piece onto a slider bun. Top with a dollop of the prepared slider sauce, shredded lettuce, sliced tomatoes, and pickles to complete each slider.
- Serve: Serve the sliders immediately while warm and enjoy a delicious, hassle-free burger experience.
Notes
- Do not overmix the beef mixture to keep sliders tender and juicy.
- Use a meat thermometer to ensure the beef reaches 160°F (70°C) for safe consumption.
- If you prefer, swap cheddar cheese for your favorite type of cheese.
- These sliders can be customized with additional toppings like onions or bacon.
- For crispier edges, broil the sliders for the last minute of cooking instead of just melting the cheese.
- Leftover sliders can be refrigerated and reheated gently in an oven or microwave.


